We think that anyone who’s done at-home PCB fabrication will appreciate the tidiness that [Fran] maintains throughout her etching process. She recently posted a three-part video tutorial which showcases her techniques. As you can see in the screenshot above, her habits reek of top-notch laboratory skills.
Regular readers can probably guess what circuit she’s etching. It’s the test boards for her LVDC reverse engineering. She is using the toner transfer method, but in a bit different way than most home-etchers do. She uses the blue transfer paper made for the job, but before transferring it to the copper clad she uses a light box (kind of like the X-ray film viewer at the doctor’s office) to inspect for any gaps where toner did not adhere. From there she uses a heat press to apply the resist. This is a heck of a lot easier than using a clothes iron, but of course you’ve got to have one of these things on hand to do it this way.
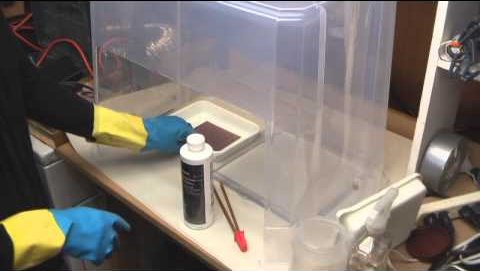
The second part of the tutorial is embedded after the break. We chose this segment because it shows off how [Fran] built her own chemical hood. It’s a clear plastic storage container lying upside down. A work window has been cut out of the front side, and a 4-inch exhaust hose added to the top. [Fran’s] lab has a high volume low velocity fan to which it connects to whisk the fumes outside.


nice fume hood, I should set up someting like that….
Bubbler tanks rule.
Yeah, I still have my attempt at a bubbler here, made from bits of old all-in-one HP printers.
The tricky part is having them not leak, using glass sheets cut to fit the edge then using silicone between those is a good start.
I can see why you’d want to make your own boards for a quick prototype, but I can’t understand why somebody would ever want to do any kind of volume production this way. For runs over 100 boards, you’ll end up working for less than minimum wage for lousy results compared to professionally made boards.
Yep – especially when there are plenty “batch” services around that will do small numbers (even one) of PCBs with no setup fee. DIY pcbs are great for prototypes, but remember all the additional stuff you get with a proper board – plated through holes, soldermask and silkscreen (on both sides!).
I watched the first video, as I was interested in her technique for toner transfer. Good information. Wonder how she deals with double sided boards….
Oh, and before you ask, NO, a sandwich press won’t work…don’t ask how I found that out (and got my butt chewed out by the wife asking where the sandwich press went)
Just use a laminator. Both sides get transferred in one pass. Easy-peasy.
Her toner transfer paper is different than mine. I ditched mine and started using vinyl. I think I’ll go back to FeCl etchant. With CuCl in a tray like that, but the time the middle of the board gets etched, it’s starting to dissolve away the edges of the board.
For transfering, I use a laminator. Almost as easy as her press.
Go with surface mount, forget drilling all those silly holes. I was hoping to see how she does 2 sided boards, but it looks like she doesn’t.
Wonder if she’d be interested in an unemployed brat in his mid 50’s :D
“but the time”? No, “by the time”.
How safe is it to use an inline fan to exhaust enchant fumes away? I would have thought the fumes would attack the motor because it is in the air flow.
I have to say, I think the fume hood is overkill. There should be no fumes given off the etchant solution – even if it was hot and steaming, that’s only water vapour. The ferric chloride isn’t going anywhere. So, if you want to use an inline fan, by all means – it should be fine since there isn’t actually any fumes there to damage it ;-)