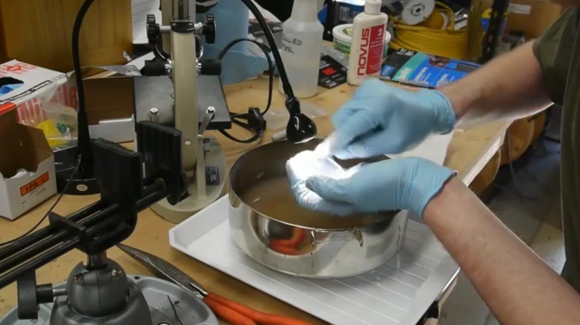
[Ben Krasnow] milled some lenses out of cast acrylic and needed a way to get an optical finish on the tool-marked surface. He tested several acrylic finishing methods to achieve a crystal clear finish. The tests were done using flat chunks. A regiment of sandpaper, from coarse to fine, was used as the first stage of the operation. From there [Ben] sought out the best finishing step, starting with hand polishing tests, flame polishing, and methylene chloride vapor polishing (which is something along the lines of acetone vapor polishing for 3D printed ABS parts).
Flame polishing and vapor polishing are not really exact sciences… at least in the tests he performed. It was difficult to know exactly how long to expose the acrylic. Too short or too long resulted in poor clarity. Watch his video to get a look at all results. We’d say the the easiest way to make milled acrylic clear without achieving an optical finish is to flame polish it as it doesn’t really require that you sand it ahead of time. But [Ben’s] tests prove that you can’t beat hand polishing with 600 then 2000 grit sandpaper before finishing up with a liquid plastic polish.


I’ve done acrylic prisms with sandpaper, then after my highest grit wet sanding, I polish with toothpaste and a soft rag. Works great for optical clarity. Also I’ve tried jewlers rouge on a buffing wheel, works well depending on the curvature of the surface.
This reminds me of those boring times when I’ve been waiting on the CNC router and wondered about using it to polish surfaces.
It has far more patience than I do, and it can spend exactly the same amount of time and pressure on each area.
So… can this be used to polish the cosmetic scratches on my phone?
Ive used Formax buffing compounds and MAAS polish to repair key scratches on the LCD screens on old blackberries. This was before the top cover on black berries protected the screen. It worked, but left the worked area with a gloss finish, when the rest of the screen was matte. Also it took off so much material that you could feel/see the dip in the screen. Other than that it made a unreadable screen usable.
I did something similar once, but I used a platoon of wire wool, and an entire battalion of polish. Sadly the bit of plastic was caught behind enemy lines and killed, for which he earned a Purple Art..
+1
Do know that acetone contact will eventually cause acrylic to form fine surface micro-fracturing over time.. Once you get past 220-280. you might try an un-sewn muslin buff running at low rpm, with a stick of “Plastic” polish priming the wheel. Low rpm an moderate pressure keep you from melting the surface. Practice on scrap first to get the feel. I’ve also used fine aluminum oxide (>1000) in a wet slurry with a wood mounted hard felt bull (a standard jewelry maker item). The water helps to keep the heat down. I machined a custom radiation detector of scintillator plastic for long travel in deep space, and NASA would not allow a single DROP of acetone to be anywhere in my work room.
After the 2000 grit, use 2500 grit paper then a 3000 grit polishing pad, then the plastic polishing compound.
The flame polishing intrigues me. I wonder if I could run a torch with a flame spreader over my cloudy headlight lenses to un-fog them. They don’t need to be optical quality…just clear.
I have found a metal polish like “Brasso” and a cloth work quite well after a bit of sanding. Cheap, readily available at most supermarkets, easy and fast.
I polished out light but very noticeable scratches from a motorbike helmet visor using the finest car polish and softest buffing pad on a rotory polishing tool (after giving it a 600, 1000 and 2000 grit sanding).
It wasn’t good enough. Looked totally clear in the daytime but at nighttime every point of light became a spiky star.
So I tried hand polishing with various fabrics and the same car polish. I found that those lint-free cloths you get with sunglasses are ideal and could get the visor clear enough for nighttime use, although still not perfect.
Polish the plastic part in the dark, with a point source of light behind it to get them very clear.
Using these lint-free cloths makes sense as they are designed for cleaning an optical plastic piece without scratching it. Other fabrics were still creating small scratches.
I didn’t try with toothpaste.