 There may be nothing new under the sun when it comes to etching PCBs with UV light, but [Heliosoph] has brought finer control to a used face tanner he bought that now exposes his boards in ~50 seconds.
The original system allowed for exposure times from 1-99 minutes to be programmed in 1-minute increments. [Heliosoph] though it would be perfect as-is, but the lamp is so powerful that even one minute of exposure was too much. He hoped to find TTL when he opened the thing and was pleasantly surprised to discover a COP410L microcontroller and an MM5484 display driver. Unfortunately, the COP410L’s clock range is too small and he didn’t want to overclock it.
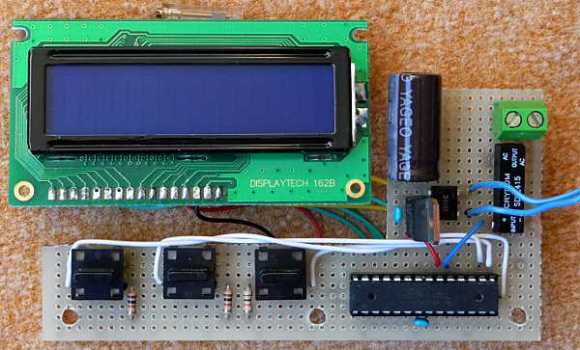
[Heliosoph] built a new board based on the ATMega328P with a salvaged 16×2 LCD, which he was able to easily integrate using the library that ships with the Arduino IDE. He then replaced the BT136 triac lamp switch with a solid state relay, conveniently isolating the electronics from mains power. He re-purposed the unit’s push buttons using the M2tklib, which supports a plethora of common menu functions.
If you need some help with the whole UV PCB etching process, you can’t go wrong with this tutorial from [CNLohr].


At first I couldn’t figure out why the comment about the COP410’s clock range was there, but then I realized the comment there meant we was hoping for a quick fix of just increasing its input clock speed to speed up the timer.
I was also briefly hoping that the COP410 would have been reprogrammable. There’s something bizarrely satisfying about the idea of cramming new functionality it something as minimalist as it is.
Today I learned that face tanning is a thing.
i’m with you
WOW a 4Bit mcu
That comment makes me feel really old… ;-)
My first job out of school was diagnostic programming to test 4 bit controllers in-circuit… you would be surprised what you can do with a 512 bits of ram, a few dozen asm instructions… NCR was using a dozen 4-bit cpu on a interface controller for a “hard drive” (that was the size of a washing machine). Now, you could replace that entire setup with a 75 cent Cortex-M0 core hard wired to $1 USB flash drive…
Odd that he used perfboard for his circuit. If he’s going to the effort of modifying it I’d hope that he has successfully managed to use it for PCBs by manually switching it on and off to find a suitable target time.
Staying with the beauty theme, UV nail dryers are a much easier starting point and very cheap on eBay. They’re also the right frequency of UV. I *think* that UV used for tanning may be slightly off.
The nail dryer works fine for me, the timing circuit is based on a 555 and it has solder points for adding in a pot to make the timing adjustable.
The one thing that did kind of suck though was that i had to cut the bulb sockets out and then glue them back in arranged in a flat plane.
I just removed the outer two bulbs from mine. Also added black tape around the sides (inside) to minimize reflected light getting under the transparency. Probably not necessary to be honest. If I got to the point of moving bulbs I’d just make another enclosure and probably add a nice timer like [Heliosoph] did.
A great tip for UV exposure – ZipLock vacuum food bags. A really cheap and easy way to get your transparency pressed down firmly and evenly against the PCB. Remove the writing on them with a little alcohol first.
^—THIS
“…nothing new under the sun when it comes to etching PCBs with UV light, ”
??Etching??