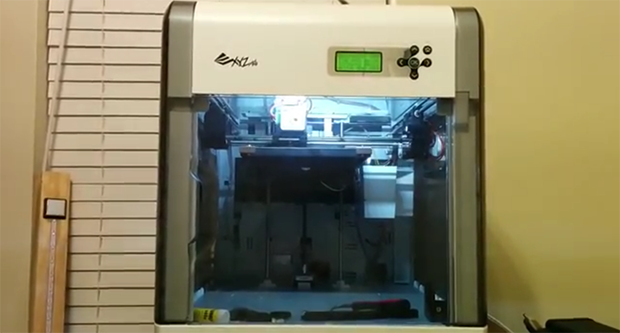
The Da Vinci printer from XYZprinting is turning out to be one of the best buys in the world of cheap, consumer printers. Sure, it uses chipped filament, but that’s an easy fix for anyone who knows what a .hex file is. And yes, the Da Vinci host software is a mess of proprietary garbage with limited functionality, but [Mark] has figured out a way around that.
When [Mark] received his Da Vinci, he immediately started snooping around inside the printer’s guts, like any good tinkerer should. He found an SD card holding all the sample prints that ship with the printer, all in a convenient Gcode format. Inside these sample .STL files were all the calls you would expect – setting the temperature, changing the layer height, and all the other good stuff you’d find in any other RepRap.
With a little bit of modification to .STL files generated by any slicing program, [Mark] isn’t limited any more by the terrible host software that ships with the Da Vinci. Combine this with the ability to reset the chip inside the filament cartridge, and [Mark] has a printer at least as functional as any open hardware model.


nicely done Mark
I think you mean “gcode” not “.STL” in most places in the summary?
G code on the SD
Why not “just” gut the existing controller out of it and swapping in something a little more “open”?
Although that’ll just further point out the lack of a quality IKEA-like hardware kit where you “just” assemble it and then add your own controller board(s).
Looking at the video I noticed that the controller shown actually has stepsticks mounted on it, so if you swap it out with a ramps or sanguinololu or similar you wouldn’t even need to buy those.
What’s more interesting however is that the sd card contains a file ‘FW_upgrade.dat’, so unless there’s some funky encryption going on, the easiest things seems to be to just port a standard firmware over to this controller.
Mark, if you’re reading this, perhaps you can post that file somewhere?
Also, this guy found that the ‘proprietary’ .3w file format is just obfuscated gcode, and wrote a converter for it (unfortunately online only):
http://3dprintingindustry.com/2014/02/05/unboxing-printing-da-vinci-1-0-3d-printer/
In other words, lots of options for ‘jailbreaking’ this machine, it seems.
So the FW_upgrade.dat’ is encrypted too. I tired decrypting it with Notepad++ with no luck. Also the converter does not work for the version I have. I sent the .3w and the same .gcode file to a very geeky friend and he could not crack the encrypted file and get the key. I will post the all of the files later today.
Bonus points for whoever can crack the code first!
Mark F
2robotguy
Did you ever crack it? I have da vinci jr 1.0
I’ve seen this printer mentioned twice now on this site as being something great. What makes it so special?
from what i can tell, the biggest thing it has going for it is that its ‘cheap’
Dual-extruder, USB connectivity goes for $649, and dual-extruder WIFI/LAN/USB is $999. I’d be curious to see if it has the same vulnerabilities
No no no. For all future readers of this comment, do not waste your time this is a terrible machine as are all of their printers.
Buy a Prusa or Ender or if you must, an Elgoo but don’t by anything from this company, hacking them is a necessity not a choice. Print quality is low and you are restricted to PLA on most machines and no heated bed options. How they actually work (when they work) is a miracle.
Heavy locked down with bad DRM, bad software and they keep forcing updates that don’t add functionality or features or even improved printing, but instead adding hacks to their blacklists, and sometimes making it evenore unstable. One of the updates caused it to freeze mid-print randomly leaving the hot end smoking near to ignition point.
On that note, if you have one of these machines – DON’T LEAVE UNATTENDED, ITS NOT WORTH THE RISK IF A FIRE.
the offline gcode file may be the printer’s spool file that is transferred from the computer to the printer for printing offline. It might be worth looking to see if it changes from offline print to offline print.
When I export a file to the machine to print it does change the offline gcode. Now if there was a way to push the file from the computer and press print we can bypass the XZYsoftware.
Replace SD card with WIFI SD card, link to folder on PC, print?
So, I’m a biased party here, but if you want a hackable printer, why not just buy a libre hardware one, and support the companies that are willing to respect your rights to tinker? *cough*lulzbot et all*cough*
I’m thinking because the DaVinci is cheap ($500) with pretty good specs and what appears to be solid build quality. Their plan, I assume, was to take a hit on the printer, and make up the cost with their proprietary filament.
you realize what you’re saying …. you are attempting to convince people who regularly seek to modify and improve locked down devices with effectively a subsidized device price, and encourage them to pay more money for a product that already does what they want out of the box. typically that type of talk/’solution’ is discouraged here.
yo dawg heard you like hacking so we bought you all this stuff so you wont have to use hacks to hack as you hack for hackings sake
amen, i am looking a the lulzbot at $2,000 on amazon right now, i like the TPE, but i’m also looking at the $500 davinci thinking hax.
Mostly i’m wrestling with the idea that i’ll end up with a poopbot that requires a tonne of fiddling about with and not that great prints, thats what stops me buying one.
This is the boat I find myself in, I want to support the open standards, but starting off with my first venture into 3D printers at $500 (and a bit of hacking) is a lot easier to swallow as entry level to figure out what I really want when I go to spend thousands.
I spent $700ish at makerfarm for a Prusa i3 kit. Super Happy with it. Took a few hours to put together, but that was part of the fun.
My colleague at work bought a pre-built 3D printer – don’t remember the exact brand, but he paid around $2K and had to tinker with it (tightening belts and bolts and stuff that loosened/misaligned during shipping) for about the same amount of time as it took me to build from the kit.
Working on building another from scratch with my own 3d printed parts now.
I second Makerfarm I3’s $550 for the V2 and $650 for the V3 versions.
If XYZprinting just drop all the limits on the Da Vinci printer then they would probably be a great alternative.
Thanks Jerry and dale, this is the other one I’ve been looking at, just a bit worried about all the assembly required. I’ll need to watch all the assembly videos and google around to see about a case.
>tonne of fiddling about
you just described EVERY SINGLE extrusion printer there is on the market. There are no printers that just work out of the box and dont require spending hours fixing shit up.
this one doesn’t require fiddling, just finished about 9 hours worth of flawless printing out of the box!
Give it time.
Give it time. I know one person that got a several decent weeks out of a Replicator 2 before things went haywire. I think there’s something about the process that evades good usability, but cheap FFF is still in its infancy.
And, going by reviews on Amazon, Da Vinci experiences vary quite a lot, some people can it the ground running, others, not so much.
Beg to differ, out of box and printing like a pro
Bought a Da Vinci 1.0a and got it delivered a couple days ago.
The longest part of the printing process was just taking all the tape and packing off, but out of the box it was printing perfectly. The filament doesn’t seem that expensive – $40 from Kogan including delivery, and you get 240m. the starter spool is 120m, I’ve used about 4m according to the machine stats. I use about 1m average per print (some prints are bigger, some are smaller). The only problem I’ve had with it is when I didn’t glue the plate adequately, I cleaned it up, and then it was back to printing fine again.
Whoops, I hit report comment without reading it, thinking it was the reply button. Sorry.
Anyway, some parts I’ve done easily took half a spool as I got comfortable with scaling up. 240 meters is pretty close to 1kg. I’ve bought plenty of good material at $25/kg.
I haven’t seen the machine in person, but I would suspect that there’s a lot of corners cut that make it a false economy. It might be a subsidized unit, but it could be a lot of substandard parts too. If you still have to do a bunch of jiggering and upgrades to get it working well, you may as well build a proper open source open hardware machine.
Drop in azteeg electronics or arduino + ramps and you’re done!
Sure, but also some of us recoil at the idea of giving money to snakes who put encryption chips into their cartridges. For that reason alone, I bought a Makerbot 2X rather than a UPrint – the Uprint was all around better, but I felt right about buying the Makerbot… and then three months later Stratasys bought them out anyway, go figure!
That’s sort of how we got into this mess in the first place. Vote with your wallet, and vote for companies that aren’t going to try and screw you over.
At least when that’s practical.
You could probably build a reprap wallace for cheaper.
Because I bought it. It’s mine and I can do what I dxxn well please. I purchased turnkey and now I’m ready to fiddle.
here is the http version of the video
http://www.youtube.com/watch?v=V1UhqT5iOXk
HAD really, really, really needs a link to each story under the summary.
As it is, a link “Read More” only appears when the description is long. We have to scroll back up and find the comments link to get to the comments if the description is short.
The code should be changed to show the same link in either case, but say “comments” if the description is not long enough for “Read More” to appear.
PS – congrats on the fine grammar and spelling these days. It’s wonderful!
Thanks for the tips on design. We have been talking about a ground-up template redo just to fix all the broken stuff. Not sure when we’ll get around to that. But I’ll keep this in mind as plans shape up.
I also appreciate the compliment regarding our language skills. (You don’t know how hard it was not to misspell in that sentence on purpose just to mess with you)
Any bets on there not being an SD card or other SW lockdown in future builds? Get `em while you can…
I’d also like to know what’s in the Machine_Life.dat file.
If I had to guess, I’d say it’s a track of number of hours in operation, feet extruded, serial number, maybe cartridge serial numbers, and probably an error log, etc for warranty and debugging purposes
I really think it makes more sense to support open source by buying open source rather than bend an existing product and get it shut down in an update.
I’d recommend Fabtotum.
sense but not cents. a good, proper hack would address this possibility/likelyhood. when someone hacks an 1,000$ scope to perform functions of a competing, more capable $3,000 model, ‘buy the more expensive existing product to ensure success’ is a tough sell. tough sell here too.
I recommend $thing that costs twice as much and isn’t available yet.
Don’t get me wrong, fabtotum sounds kinda slick, but you’re kinda comparing apples and samsungs here.
On the surface, it’s impressive for the money.
ABS only?
It smells and it’s fickle. Local sales show PLA is selling about 5 to 1 PLA to ABS. That is/was a serious blunder on their part. More and more are moving away from ABS..
A big problem with the race to the bottom on 3d printers is that we have pretty much bottomed out the electronics, and all profit is coming out of the mechanical side. Which wears out. Give it a couple hundred hours of print time, and see how worn it is. That may not sound bad until you consider 200 hours of print time, isn’t much when a single print can take 4 hours or more. Good linear systems are quite expensive.
If memory serves ABS has a higher melting temp than PLA. So if the hot end can handle ABS I would think it shouldn’t have an issue with PLA. So it seems to me that it would just be an issue of setting the temp in the Gcode.
If I am wrong then I am mistaken.
Unfortunately it’s not that simple. There’s a bunch of other variables. For example, the magma hotend can print ABS (225C) and polycarbonate (265C) but has all sorts of clogging problems printing PLA. The explanation I’ve heard is the heat transfers itself up the filament (creeps), eventually causing it to deform higher up in the hotend where it clogs things up. Whether that is the actual mechanism of clogging, I can’t be sure, but google magma and pla and you’ll find lots of info.
I pretty much print everything with ABS, in spite of having options. PLA doesn’t work well in Phoenix…ABS stands a better chance of not melting if a part ends up outside for any length of time.
I print PLA perfectly on my DUO.
You are right about the heat creeping up the filament, I think it is mostly attributed to it creeping up the neck of the hotend and it radiating/ advecting to the filament and melting it prematurely.
I resolved the issue by drilling a hole in a small heatsink so the neck of my hot end can poke through it (you can see another member on the volvito forum has done the same thing) and I put some heatsink compound on hot end where it contacts the alumunum block that it mounts too.
I’ve given up printing large parts in abs, the warping is terrible, especially for solid objects with squarish corners. Closed chamber, heated print surface and abs slurry on the print surface help, but at some at some point your print is going to curl at the corners and split across layers because it is too big.
For strong or large parts I print in pla which in my experience does not warp, sand and touch up. Then silicone mold and cast. The bonus is that I can save the mold and recast. Takes 20 minutes to cure instead of 3+ hours of print time. Downside is that youre going to spend an extra 100 $ on materials that spoil pretty quick once opened.
The software has a preconfigured PLA setting.
It may have been based on original product specs or something, but the sales info I saw, said ABS only.
The biggest thing about ABS that is hard for a beginner to deal with is the higher temperatures, lengthening the turnaround time. So I suggest people start with PLA, since the machine gets up to temp as much as twice as quickly, so they can fail often, fail early so they learn quickly.
ABS does smell, but an enclosure helps that a *lot*. ABS parts can be stronger, have a much higher impact resistance and they are also not going to melt if you leave the part in your car during the day.
I’ve not had to deal with a warped part in a good long time. A level bed and an enclosure helps for that too, prevent drafts, and warmer ambient temps during prevent warping.
Suddenly I may start looking at Ez3D’s phoenix
Hello, I just wanted to mention that all the fiddling with the sd card is not needed at all. Simply slice the model of choice in whatever slicer you see fit and export the gcode. open a good editor and edit the header information to conform to the xyz file header. base64 encode the whole file and save with a .3w extension. Import that file into xyzware and hit print.
All that still seems a bit much. I guess it’s good to know for someone that can make a pass-through script, but it shouldn’t be necessary in the first place. This mirrors Makerbot’s silly antics, which also requires either using their software, or passing the gcode through a post processor so the machine will run.
“edit the header information to conform to the xyz file header. base64 encode the whole file and save with a .3w extension.”
could you tell use how? or do you have any link/tuto to see how it should be done
many thanks
Has anyone found a more detailed tutorial for this process?
Hmm. . . this makes me regret the money spent on a printrbot simple and the stupid upgrades :(
Use it to build another, better printer.
You have the experience, and you have the electronics, two big hurdles for building a printer. Your first is always the toughest and most expensive. Print one, buy a few parts and scavenge what you can from your PrintRbot.
I posted this a few places already like a day after I got my printer. If you change the offlineprinting.gcode to SAMPLE01.gcode and access it from the menu>utilities>Samples>Demo you can print the files all day long without it reducing the filament count on the eeprom chip. No soldering or wasting time resetting the chip. So essentially you can print what you want and not worry about the chipped cartridges. I’ve printed PLA, NYLON, NINJAFLEX, whatever. This works on my printer, anyone else want to confirm it?
I will take this printer any day of the week over errhem**lulzbot**cough**. Lulzbot is overpriced, you need a separate extruder head for flexible filaments, etc. The Da Vinci is everything all printer companies have not been able to do straight out of the box: work.
Crabbycakes,
You got me at “Hello” ! I just placed order on Amazon for one Da Vinci !!!!
Great Hack !!!!
You mean that if we rename the print with sample01, we could print with any other filaments?
How to setup the temperature?
Yes, the EEPROM in the cartridge does hold the initial extruder and bed temps (210C and 90C, respectively). However, once those temps are reached the G Code settings take over and the printer then pauses again until the final temps are reached.
i d love to use cura to generate g code
i’ve red that some guys managed to control printing with slic3r
what do you use? i can’t find the translator gcode to 3W
is there a link to any reliable startcode?
thanks!
slice with cura
download notepad++
open your gcode
paste this to the top
; filename = Pickup.3w
; machine = daVinciF10
; material = abs
; layer_height = 0.3
; total_layers = 173
; total_filament = 3245.86
; extruder = 1
go to plugins> mime tools >base64 encode
save with extension .3w
or you can load it directly to the sd card just save the gcode as SAMPLE03.gcode and go to print sample and select the last one
i could but my lcd screen is dead, so i can’t
Hi crabbycakes, thanks a lot for your advice, it was a lot useful for me.
I would like to ask 1 more question: how to print in PLA with the DaVinci? Everybody have bad issues with that having the extruder immediately clogging, how did you solve that? have you tried also Laywoo or Laybrick filaments?
What are the settings you used for NinjaFLEX? I tried, and it just jammed in the print head.
did you have to do any modification to print ninja flex?
ok the eprom flash worked for me but i’ve had some cartidge error
i had to reboot the printer 2 times and it was good!
is their a simple way of setting up the extruder temp?
by editing these lines i suppose:
Serial.println(“Updating EEPROM…”);
status(unio.simple_write((const byte *)x,8,4));
status(unio.simple_write((const byte *)x,12,4));
status(unio.simple_write((const byte *)et,16,2)); // extruder temp
status(unio.simple_write((const byte *)bt,18,2)); // bed temp
status(unio.simple_write((const byte *)x,52,4));
// same block from offset 0 is offset 64 bytes
status(unio.simple_write((const byte *)x,64 + 8,4));
status(unio.simple_write((const byte *)x,64 + 12,4));
status(unio.simple_write((const byte *)et,64 + 16,2)); // extruder temp
status(unio.simple_write((const byte *)bt,64 + 18,2)); // bed temp
status(unio.simple_write((const byte *)x,64 + 52,4));
i d like to have these values
210° 215 220 230 240
anybody knows how please?
thanks!
The XYZ software is running on Slic3r source code.
so how to use the real slic3r instead?
thanks javy1389
i tried your method:
“go to plugins> mime tools >base64 encode
save with extension .3w”
but xyzware can’t open it
drag and drop
i found this on voltivo blog
“The experts in this and other forums are still figuring out what the chip on the cartridge does, but at this point it is clear that the printer checks the cartridge for the following information:
– Is a valid chip present (cartridge is out – won’t print)
– What is the cartridge original (FULL) capacity?
– How much is still left in the cartridge (It’s not counting the use of filament, when I file is sent to the
printer it includes the amount of filament it will use, and this is decremented from the current capacity)
– Other print parameters
– Color of the plastic in the cartridge
– Type of plastic in the cartridge (ABS or PLA)
– Temperature values for the extruder and bed (based minimally on whether the cartridge contains
ABS or PLA (to be implemented later in 2014 when PLA cartridges are made available)
– Other parameters that are currently unknown (possibly altering the printer behavior based on level of
filament that’s been used)
I only add the last one because after flashing the EEPROM (to 120M) the print worked fine, but gradually degraded until it was just extruding slices that were misaligned and not attached. XYZ must be changing other parameters on the chip as you progress through the cartridge, but not sure what/why.”
i’m experiencing the same problem
with weak parts and delaminating layers
any idea?
Try downgrading / reloading firmware version G:
http://stashbox.org/1466582/3DP01_20140310_FW_V1.1.G_RELEASE.bin
1. disconnect from internet
2. try to upgrade firmware from within XYZware.
3. after a while, it times out and opens a dialog box to select a firmware file.
thanks , i’ve just downgrade
i’m printing now ,
i’ll let you know
thank you
I’m curious if the better solution right now is to jettison the existing firmware with something more open. Has anyone examined the controller board to see if Marlin could be put on it? That said, maybe it is some franken-Marlin.
The main MCU is an ATSAM3X8E, with A4988 stepper drivers on their own PCBs.
https://imgur.com/m5NMMYi
it works well for me but i’ve got a speed problem,
it’s a bit fast for small parts
some say speed is determined by g code and some other , in heading details
what am i supposed to do?
http://www.soliforum.com/post/55132/#p55132
Thanks for all of the info everyone is putting in. I think I want to take the leap and get one if I can find one. Amazon stopped selling them and Studica is out of stock. Have not found any other places selling it. I will be watching this post for more info, I also found this post about the chip in the cartridge: http://wctek.com/xyz/
I think Studica just got stock on these again!
Amazon got them back in stock and I snagged one on prime. Should be here in a couple of days. Cant wait!
Mine came today, already printed the XYZ keychain
Mine came Friday but work is getting in the way still boxed. Did you use the latest firmware from the site that came out about a week or two ago? Any problems?
Mine also came in today. I’ve printed out the “DEMO”- not sure what it is supposed to be, but it maybe is something to put a hot paper coffee cup into so one can drink from it as if from a regular cup. It used about 15% of the 300 gram filament cartridge- i’d skip this one if you just got your printer. I notice I have firmware 1.1.A, and the website has 1.1.I… I’m wondering if I should upgrade the firmware. I saw some mention that people wanted to revert back from ‘G’ – anyone know why?
I also printed out the key chain. I am not impressed with the print quality so far. I have a UP3D Mini that puts out much better parts. I was hoping the da Vinci would print better parts… BTW, I am using 0.2 and average speed, so I would expect better prints.
Something else I have noticed- I have an STL that prints out on the Up3D Mini in proper scale, but the da Vinci is printing it in micro size for some reason… Not very impressive results so far.
Sometimes STLs are saved in inch size and that can show as very small parts in slicers. The STL file format is unitless, so the slicing software can’t know. Most slicers read them as millimeters. Some slicers check the part size. If a part dimensions are very tiny, it will ask if the part is in inches, and if you want to scale it to mm equivalent. I wonder if your Up3D’s software just automatically scales the file without prompting.
JRDM,
Thank you for your comment- I believe you have hit the nail squarely on the head! I am using ViaCad Pro9 to develop my print files, and I am using English (inch) base measurements. I will check to see if I can get the XYZ thing to recognize inch measurements. If not, I will just scale it up by 25.4 and see if that does the trick.
Regards,
Shane
I juar ordered one myself from Amazon- should have it by Saturday, if FedEx will deliver it then.
I noticed on YouTube a guy has come up with firmware version 1.1.Q, which is his name for it. Sounds like he might have extracted the code (Arduino style?) and has modified it to use a WiFi SD card.
I’d like to see an open source firmware become available for this printer, myself.
Cheers,
Shane
I think if we can get programs like Kisslicer or Cura to recognize this printer and to be able to slice straight to it . Xyz has to recognize their software really needs work and fix theirs or allow import from 3rd parties. As more of these printers get out there someone will find a solution.
i tried with cura using base 64 protocol
i managed to setup the Z offset in cura start code (0.36mm for my machine) and start a print
….but after 3 or 4 layers z stopped rising and all layers continued to be printed at the same height so i stopped the print
so i’m sure it can work but i’m not expert enough in programing g-code to know why it doesn’t
if you’ve got an idea……
I work with a lot of gcode with my cnc plasma cutter but this a little different and I have not had time to get into it too deep yet. I have been watching this forum and think this could have some potential.
http://voltivo.com/forum/davinci/16-toshiba-flashair-firmware-1-1-i-mod-how-to#90
Totally brand new to the 3D world. I am a math teacher trying to get STEM/Programming going for students in my middle school. I actually got one of these as a donation. Can I not have kids make their own sketches? I have tried importing .stl files to their xyzware and nothing loads. Cutting the SD card out is really the only way?
Not sure why your having problems, I print with mine day in and day out it runs constantly and it prints stuff I make and stuff I find on Thingiverse. All .stl files. No problems with importing. Are you following the directions for the software? Should be as simply as select import and pick the file and hit ok.
Josh, I tend to have the same problem. I have a work around that you should try. I actually import the stl and then get a blank image. I then print anyways and send it to the device. Once xyzware slices the image it then is view able within xyzware (although by now printing.)
Bad grammar, punctuation and spelling aside on this mini rant, I believe this is due to opengl driver issues. For I’m running a mid 06 macbook with win7.
Brian Benchoff/relevant party…
How did jailbreaking the Da Vinci 1.0 affect its printing quality and anything else related to its maintenance, quality, etc.?
Before I jailbreak mine, I would like to know about how it would affect the printer…
Thank you very much. :-)
Just yesterday I saw an SD card extension cable on Amazon for cheap. It seems like this might be a good thing to install on the DaVincI so you don’t have to crack open the case to make file/fitmware changes.
I appreciate all of the great info here. I think that i’m going to go ahead and buy this printer now that I know it can be enslaved to do my bidding.
I want to print a prosthetic hand for a disabled veteran that got busted up in Iraq. My hope is that this machine is a good place to start for cheap.
If things work out I will post whatever I discover in the process of putting this thing to work.
Maybe a page on Google+ would be a good thing for aggregating resources on this topic.
My Da Vinci cant seem to recognize when a cartridge is installed. Any magic trick recommended?
I’m having the same problems. Stock cartridges yet it says it’s not there support has been worthless they just tell me to pull it out and try again.. Eventually I get it to recognize but what a pain.
Check that the chip on the bottom of the cart is fitting correctly. I had a few come loose in shipping. Then wiggle the cart a bit once it’s installed before you snap it down. I’ve had the cart not register a few times but it’s never taken more than a few extra smacks to get it to work.
One time I forgot to remove the white plug, sliding it in, it popped out, and was under the cartridge preventing it from reaching the chip reader.
Hmm I was reading something recently about how they were remotely killing any printers that detect a hacked cartridge turning it into a zombie until its factory reset BAB. I’m building my own Vector 3 slowly. Might take a while but will let you know how I get on or if I need any hacks for it. Cheers.
I bought a XYZ printer for $160 + shipping and decided to write new firmware that works with Repetier using the original controller. I have firmware that is completely compatible with Repetier. Still to finish is software SPI to the SD card and better Extruder temp accuracy. It is nice to load .stl files, slice with Cura or Slic3r and print. With access to the SD card and using Repetier I can load, slice and store and print from the SD.
Where did you get a Davinci for $160 or do you mean a generic 3D ?
Where did you get a XYZ for $160 ?
New XYZ 1.0 AiO encode base64 gives incorrect file format. No SD card in the back either.
Swear at me if you’d like. Hardware wise XYZ Printing makes fantastic professional looking ready to go equipment way to go awesome job XYZ Printing.
Many of the connectors hot end especially require replacement with automotive style barrel connectors. Some of the zip tires in the back need to be removed to lengthen the wiring harness’ otherwise no other mods or repairs have been required.
Where they dropped the ball is with there garbage software. If you want a decent printer scrap the firmware re-flash with 0.92+ repetier host as per forums follow some settings videos on you tube and enjoy this well put together little machine. Hacks and mods are always fun and the community has collectively taken what I once considered a crappy waste of $500 and made me smile as I now rival my friends $2000 machine.
Anyone know how to modify the g code for the da vinci mini? I’d love to be able to print on it using Simplify3d…
thanks for site, very usefull. Has anyone found a more detailed tutorial for this process?