Before the second world war Radio was a revolution in mass-communication much like the internet today. Fortunes were made and lost, empires built, epic patent battles ensued, all of which resulted in the world being more connected than ever before, which makes for a really great story (and a great Ken Burns documentary).
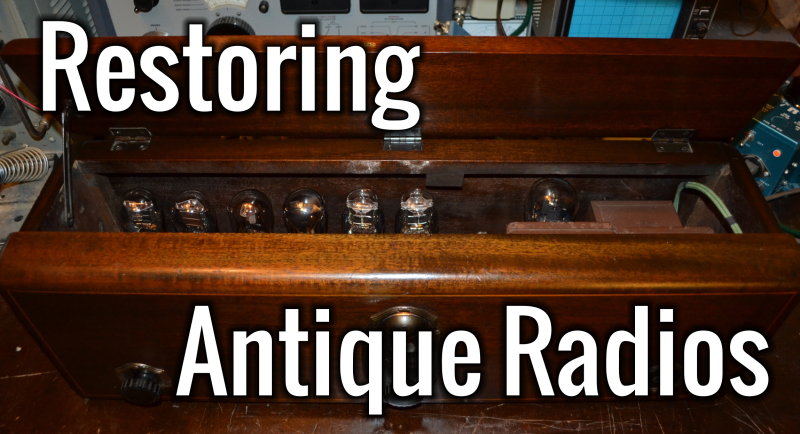
Last month we showed you how to modify a vintage radio to play your own audio source through it while re-using the existing electronics and maintaining its functionality. In this post we will show you how to restore any vacuum tube radio. You will learn basic repair/restoration procedures from a different era when it was actually worth repairing consumer electronics. Plug into history and get your hands on the most influential technology of the first-half of the 20th century!
In the early days radios were very expensive consumer devices costing as much or more than an automobile or a house in some cases. For this reason many listeners resorted to building their own. Edwin Armstrong developed the heterodyne receiver that used frequency multiplication to shift the desired signal down to an intermediate frequency where it was filtered and detected resulting in reduced costs and increased access to radio technology. Heterodyne receivers cost significantly less than the previous architecture known as tuned radio frequency (TRF), where the radio was simply a very large tunable bandpass filter (3 or 4 sections typically) with amplifiers between each section that had to tune across the entire AM broadcast band. TRF architectures are expensive because to maintain a narrow 10 KHz band pass filter across one full octave is challenging and requires more precision than using only one fixed filter that can be mass-produced and is at a lower frequency.


Danger, Danger, High Voltage!
Be very careful when working with old radio equipment. Yes, these radios have very high voltage potentials inside. Many even tie the hot end of the line directly to their metal chassis (known as Hot Chassis radios), notably most of the post-war table top radios.
How-to
Antique radios can be functional statement pieces, showing both your appreciation for the old styles and your ability to repair just about anything. This hobby is well within the reach of anyone with basic electronics skills. Follow these general steps to restore your radio:
- Do not power on your radio. You could cause damage if you power it on before replacing the capacitors. There are several flavors of capacitors but the ones that typically decay with age are the electrolytics (usually found in power supply and on audio output circuit) and the wax-paper coupling capacitors.
- Find a service manual. Most are available online.
- Replace all electrolytic and paper capacitors with new ones of similar value and same or better voltage rating.
- Examine closely and replace anything that looks damaged, such as burned up resistors.
- Test the radio using a dim bulb tester, which is a 60 to 100 watt lightbulb wired in series with your radio’s line voltage. If the bulb glows dim after a while then there are likely no shorts across the B+ lines within your radio. You might even hear a crackle or some signals coming through.
- If it passed the dim bulb tests then try to power it up directly off the line. Most antique radios will work once the capacitors have been replaced.
- If it does not work then signal trace through the circuit by injecting a signal at the IF or RF, replacing resistors or occasionally a tube where needed. Old resistors have a tendency to increase in value with age. Often a bad stage in a tube radio is due to a resistor that has increased in value to the point of biasing the tube into cut-off. Tubes are usually not what caused the radio to be put out of service. The quickest way to find bad resistors is to probe the tube pin voltages. There will be a tube pin voltage chart in your radio’s service manual given a specific volt meter impedance. Wherever you find a voltage out of tolerance (greater than 10%), then check the resistors connected to that pin or to other circuits connected to that pin.
- If the stations are too weak then perform an alignment following the procedure in the service manual.
- Turn on the radio. It should work!
These basics are well covered in the video series that starts with this video:
RCA Radiola 18
Here is a fine example of a late 1920’s TRF receiver restoration. The power supply capacitor was replaced as well as a small number of paper coupling capacitors. Dust and grime were cleaned off. The wood enclosure was cleaned and waxed. For many TRF receivers like this one, an alignment is not needed. Performance was surprisingly good for a very sensitive receiver.


Silvertone Model 4686
Here is an example of the iconic American Console Radio. This radio, manufactured in 1937, was witness to much history: the Great Depression, the Second World War, and probably the Korean war War as well before it was put out of service. This generation of radio was the first to leverage heterodyne receiver architecture. For this reason, these radios tuned across a massive frequency range. Not only could they tune the standard AM broadcast band, they also covered shortwave frequencies from 2-18 MHz. Restoring these radios is not difficult. Millions were made. They are inexpensive to buy at flea markets and radio shows. If you can not find the right part buy another one and salvage it.


Zenith K725
By the 1950’s radios were everywhere. FM broadcasting started to gain popularity with its high fidelity. Table top radios such as this one provided both AM and FM broadcast bands in a compact package with 1950’s styling much like automobiles, jet aircraft, rockets, tail fins and chrome, and other exciting technologies of the day. This radio in particular uses negative feedback in its audio output providing booming high fidelity audio. Unfortunately, it is a Hot Chassis radio, where the line cord is tied directly to the metal chassis inside so an isolation transformer must be used in-line with the power cord while servicing.


Learn About History By Repairing It
Time to hit the flea market and pickup a few old radios to work on! Teach yourself the skills to repair vintage electronics and get in touch with the past. Learn unique troubleshooting skills that will enhance your daily career. Tubes or transistors, a seasoned engineer is capable of working with technologies from today and yesterday.
References
- Join the Antique Wireless Association, read the bi-montly fascinating journal on the history of wireless technology.
- Get help from the forums: www.antiquradios.com
- bandersontv’s youtube channel.
Acknowledgment
My cousin, Juliet Hurley, MBA, MSF, MAC for type editing this post.
Author Bio:
Gregory L. Charvat is author of Small and Short-Range Radar Systems, visiting research scientist at Camera Culture Group Massachusetts Institute of Technology Media Lab, co-founder of Hyperfine Research Inc., Butterfly Network Inc. , editor of the Gregory L. Charvat Series on Practical Approaches to Electrical Engineering, and guest commentator on CNN, CBS, Sky News, and others. He was a technical staff member at MIT Lincoln Laboratory, where his work on through-wall radar won best paper at the 2010 MSS Tri-Services Radar Symposium and is an MIT Office of the Provost 2011 research highlight. He has taught short radar courses at MIT, where his Build a Small Radar course was the top-ranked MIT professional education course in 2011 and has become widely adopted by other universities, laboratories, and private organizations. Starting at an Early Age, Greg developed numerous radar systems, rail SAR imaging sensors, phased array radar systems; holds several patents; and has developed many other sensors and radio and audio equipment. He has authored numerous publications and has received press for his work. Greg earned a Ph.D in electrical engineering in 2007, MSEE in 2003, and BSEE in 2002 from Michigan State University, and is a senior member of the IEEE, where he served on the steering committee for the 2010, 2013, 2016 IEEE International Symposium on Phased Array Systems and Technology and chaired the IEEE AP-S Boston Chapter from 2010-2011.


I’m told that serious antique radio restorers will hollow out the old capacitors and place the newer (much smaller) ones inside. That way electrical performance is restored and the circuitry still looks original.
http://www.eevblog.com/forum/reviews/fake-nippon-chemi-con-capacitors-at-ebay/msg450979/#msg450979 ;)
You are correct. The purists will hollow out the old caps, insert the wired-in new caps and then reseal the end(s) as necessary. To my mind this is somewhere north of hardcore, but a hat-tip to them nonetheless for so respecting the original design.
The repair shops will typically just replace components as needed to make the unit functional at the most reasonable price (warning: it’s still going to seem quite high on first blush, but they have to stay in business… they’re not trying to take advantage of you).
Splitting the difference gets you to where the unit is documented/photgraphed pre-repair, the old parts are removed and bagged, the new parts are installed, and the baggie of old parts is affixed to an empty portion of the chassis. In this way, if you were ever to pass on your unit (inheritance, selling it, whatever) and someone wished to regain the “original look/feel”, they could then take the purist route with the old components and “restore” the unit back to it’s original form.
Of course much of that argument hinges on the reality that you can’t be certain your unit wasn’t repaired in the past and that the parts you’re painstakingly trying to preserve aren’t themselves just pulls from a repair parts bin 50 years ago that put the unit back in working order at that point. Heck, there’s also the issue of the components being used at the factory… like anything else the components were produced/purchased in lots and (I hate to burst the idealistic bubble here) things changed from lot to lot. In nearly all cases of which I am aware, there is no “genesis model” standard… the same model number could have gone through an untold number of minor changes during its active production that wouldn’t have been documented like the more major changes would have been.
If you’re interested in these restorations, your best bet is:
1.) Study, learn, experiment on lesser units, etc… and then fix your unit as best you can (or pay someone else with these skills to do so for you). To wit: don’t start with your nicest unit or your family heirloom. AA5s are a dime a dozen (craigslist, feebay, etc…). Buy a few. Heed the warnings above (re: hot chassis… it can kill you, don’t take it lightly). Learn on them. Then use that knowledge on the piece(s) you actually care about.
2.) Do it NOW. If you wish to enjoy these early radios in the manner in which they were intended to operate, it is very possible that your window in which to do so (here in the USA, anyway) may well be limited. The present state of AM broadcasting is such that changes are inevitable. These changes might include abandoning the band (migrating to Ch 6 space below the start of our FM band), transitioning to an all digital encoding method, or some other option. In any of these possible outcomes, the odds of analog AM surviving in a useful form seem quite low at present. Of course, you can always build a simple AM transmitter with a vacuum tube or two and drive it with your own audio source, but that’s a different matter. To wit: the time we have left to tune the analog AM band is rapidly decreasing (either by interference or evolution). Don’t wait.
Right on!
Certain 1930s Philco radios use capacitors that are potted in bakelite boxes. It’s easy to pop the potting (and original capacitor) out and replace with a modern part. Since the open side of the box is attached to the chassis, they look original even if you don’t fill them with tar again.
I’ve done this, but I don’t know if I would go as far as gutting the normal style paper capacitor.
When I started at the electronics repair shop, used to fix tube radios alot.( damn I’m old) We used to leave the old cap’s in and hide the new ones underneeth. Lots of room.
Yes, there is alot of room. When replacing electrolytics my current preference is to put the replacements under-chasis and leave the can un-modified on top just as you have suggested. But on the 1920’s radios i will re-stuff the coupling caps because they are in such unusual big packages, i did this for the Radiola 18 and Colin B. Kennedy.
Why not roll your own?
Also take a cardboard tube with printed outer label in facsimile, put modern inside and get the sealing wax and paraffin out and start dripping wax.
This is how I usually do it. I am no pro by any means but this is how I cut my teeth. You are entirely correct about the space (a boon in today’s “cram it in there smd world”). The hollowed out cap is also a nice idea but the folks I deal with are generally no where near that level. They just know me as the local tinkerer and come to me with their stuff so I get to learn about gear that would be too costly and they get discount repairs. Some things I shy away from just from a logical standpoint of “what if something ever happens and insurance is involved?”. I can usually tell by the carbon in the glass if they tried to power it up at home lol. Many times I will see a repair where the previous tech has done exactly this (newer cap or resistor under plate) and sometimes will even has a pencil tick near the offending part :) I always enjoy the forensics of opening the units and seeing oh he had two dogs, a cat, and somehow a chicken roosted nearby must be barn. Met some very nice older tinkerers in the used tube market as well that were very helpful (also some royal sobs but that is law of averages) and got me out of a hole more than once, giving me the courage when I was a bit squeamish about a repair. I had a rush about four years ago, but this year have only seen a couple that were more modern and thankfully very easy repairs. Love the easy ones lol. My most common headache is dealing with cosmetic things as I do not have the room or facilities for the wood repair and such. Anyhoo cheers to all and happy tinkering :)
Greg, you are spot on as always :)
That is what I do with the Older sets I work on it takes more time and work but the end result is much more satisfying.
That’s actually brilliant.
if i need too replace a cap I’ll hollow out the old one.
Most modern car restorations use some modern parts if the car is going to be a driver.
I was wondering if anyone makes a kit to replace the guts of a case that had the radio stripped out. Maybe you could rebuild one from the manual.
Some of the best quality radio restoration videos are on Rick’s page here! You should update this post to show some of his videos too!!
https://www.youtube.com/user/AllAmericanFiveRadio
Holy crap. I have one of those Radiola 18’s.. It worked at one point in time, but the speaker unit died (someone crushed it when i was moving). I have no idea where to get a replacement either.
While replacements can be had from feebay (running above a hundred USD for decent specimens last I checked), it’s not difficult to find a transformer of suitable impedances (new or used) for under fifty USD or so and mate it to a modern speaker of your choice. These TRF style radios that used the external speakers put out significant voltage from their speaker outputs, so the standard cautions about high voltages in old radios continue to apply… but once you’ve got an acceptable transformer receiving that output, you can try out modern-style speakers all day long until you find one that sounds right to your ears.
Heck, if you’re handy with wood or resin or metal, you could even fabricate a speaker enclosure of whatever style you wanted… clone the old style, pick something more recent, design something entirely novel… sky’s the limit. Plenty of vintage and modern grill cloth to be had out there too.
Just be safe with the voltage.
Rob is right.
To add to this, you can grab a speaker and output transformer from any ‘All American 5’ radio and plug it into the speaker jack on the Radiola 18. This is what i did, since i too do not have the right period appropriate speaker.
Thanks guys for your responses…
My electronics knowledge is almost nil.. I understand the dangers, but no idea how to find the correct transformer.. I do work with some elect engineers though, so I can bounce this off of them.. Right now the radio sits prettily on an old bookcase.. Just never expected to come here and see pics of that same radio…
Just locate the speaker and trace the wiring back to whatever transformer the speaker is tied to. Speaker will not be tied to anything else. Often times the output transformer is riveted directly to the speaker itself.
I have restored many 30’s and 40’s era radios, and love those ’37 “TeleDial” designs… mine was a Philco. Very innovative selectors for the day.
Can you guide me on restoring a 1937 Golden Voice radio? Not sure where to start.
valve radios are mostly rubbish.
a few of the better ones have useful transformers in and a few have valuable valves, but most are junk.
i work at the uks biggest antique hifi dealer and we dont even bother accepting them for free (with a few exceptions).
As far as valve servicing and repairs go, there is plenty of modern caps that look appropriate, we mostly use soviet caps at the moment where we can, electrolytics ALWAYS need changing or reforming (turn the amp up slowly on a variable volt meter over about 20 mins, or use a bridge to do the same for just the cap.)
if people are interested i’ll make a how too blog with a load of good tips and what to do/not to do if you want to do a good service to sell or for pleasure.
That would be a very valuable resource and a good addition to the body of knowledge about tube radios/amps here on HAD. Please do!!!
You or may not find the YouTube channel interest and useful.
https://www.youtube.com/user/AllAmericanFiveRadio
Try Shang006 or best of them all Glasslinger
Sorry, I don’t believe a radio ever cost as much as a car or a house. That’s just ridiculous.
Computers used to cost as much as a car too, why wouldn’t radios have been the same at some point? They were luxury items, much like computers were when they first came around.
I want an All American 5 table top radio for the hell of it, not many of them floating around anymore.
Still plenty of them in thrift stores around here.
I have an old wall mount. Radio tuner string has come unwind been trying to fix but don’t know how
Getting furtrated. You fix radios
I have alot of old radio and TV parts from when my husband was in radio/TV service in the 1960’s.
Joy, I have a 1937 Philco table radio that needs electrolytic capacitors. Do you have anything in that line?? 8 mfd. 600V; 12 mfd. 600V; 16 mfd. 600V. Does anyone have a source for old electrolytics?? clyde.w7cza@gmail.com.
Google JUST RADIOS, small company in Canada. Specialize in capacitors and resistors for vintage radios. Great selection, quick shipment.
Forgot to mention that I am packing them up since my husband passed away, if anyone is interested.
Always interested if still available
I have a 48-250 Philco radio that needs a 4×6 oval speaker, any thoughts?
They used to be common in automobiles…
Is it harmful to run a typical late 40’s AA5 at 90 to 100 VAC?
I use a variac to feed my newly rebuilt Delco, and it starts playing around 80 volts. Just wondering if there is any harm or advantage other than a dim dial light?
I have a grundig vintage valve radio. But in that “OUTPUT TRANSFORMER” was removed for some repair work. But repair work was not a success. Now, the radio is without the output transformer and I have no specification of the output transformer. If the output transformer is available, can you supply it to me?
Greetings, new to this site. I am restoring a 1941 Farnsworth BC1020. It is all back together and I’m trying to figure out what’s going on with it. Once it warms up, a loud pulsing comes from the speaker. There are two sliders on the face, bass and treble, by moving these out of their current position, it gets rid of the pulsing hum for a moment and sounds like an AM radio. During one of these times I tuned in a brief broadcast of a Titans game. Then the signal disappeared and the pulsing started again. Varies with volume. This feels more like an overload than a straight tuning problem, or could it be something with the speaker itself? Any thoughts out there? Appreciate any wisdom! Cheers
Some old radio’s had a beautiful warm sound. :-)
Where would I look for a handle for a green Zenith K725 radio that I have?
I have half of dozen antique radios. Some of them aro too old that doesnt receive FM radio stations ( and nowdays there are not else). I want ro turn them in function. What is better:
1 To instal new , modern music players, (streamers, BT, USB…) and modern amplifier (D Class), new speakers
OR
2 Try to restore functionality on original way?
What do you suggest?
I have a Kolster K100 but cannot find any information on it. It works but I would like to find some info. Where can I look? Not listed as a Kolster model on the web.