Light painting, or taking a few RGB LEDs, a camera with a long exposure, and turning the world into Tron, has been around for a while. We haven’t seen many people using their household CNC machines for the same effect. [ekaggrat] is the exception. He’s already used a 3D printer to do some light painting, and now he’s doing it in color.
This build is an extension of an earlier project we saw that used a white LED to draw pictures within the build volume of a delta printer. Just like the last time, [ekaggrat] wired LEDs up to a RAMPS board and toggled pins with the M42 command. This build merely triples the complexity of the wiring; the RGB LED is wired to pins 4,5, and 6 of the controller board, and the shutter release button of his camera is wired up to pin 11 with an optoisolator.
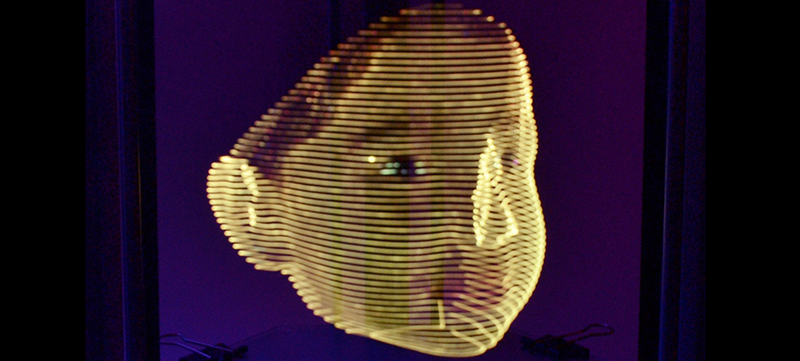
The ability to blink out Gcode is one thing, getting his two-year-old daughter to stand still for 3D scanning is another thing entirely. With the data in hand, [ekaggrat] was able to run this model through a script that would generate a light painting of his daughter. You can grab the script for that on GitHub, or check out the video below.


That is really neat!
Useless, but neat!
Note: I can see the utility in the learning that went into achieving this – particularly the 2d interpolation in the title sequence
Might be a good way of testing prints to see if they’re going to come out the way you expect!
This occurred too me – but, in practice, i think it would be a poor method for that.
Might be on very large area prints, but some automation of the camera (USB->chip-of-choice->camera-trigger) and maybe breaking the print down vertically into smaller layers so you could “see” into them better.
ya very useless… was trying to kill time u see… and had no filament to print :)
It seams like you could get the same effect with an LCD monitor and a translation stage that moves the LCD in front of the camera in controlled steps. The camera angle would need to be set for the appropriate view. One slice of the 3D volume would be displayed on the monitor, a photo taken, the LCD moved, then the next slice displayed, and so on.
That seems like it would work. And it could be much faster and have far higher resolution.
good idea…
Do it yourself 1980’s Sci-Fi movie SFX. ;)
Why isn’t there motion blur from the print head?
I was wondering the same thing.
Pictures taken when the device is at rest, then combined?
Soundtrack added for effect?
it is not fake !!!!!! all real … i would take much longer to fake it…. :)
Because it’s two layers of video. One is the un-touched original video that just shows the blinking, moving print head, and the other is a brightness or luma mask that is updated every time a point gets above a certain brightness (the LED glows). That let’s the trail of light appear to stay behind after the print head has moved the LED.
Thanks.
the video is editted in kdenlive using light grafitti plugin … really neat plugin
u mean the video? for the pics the camera was in bulb mode and the head has no lighting so cant be seen, For the video the video was post processed in kdenlive to get the led points from every frame to overlap in the next frame to create the line effect … so even i have no idea why ther is no blur :) the video or pics are not fake FYI
Since it’s 3D perhaps the camera should slightly rotate around the target while the image is being constructed, for a more impressive effect.
Although you’d have to try to see how it comes out.
yes thought of that but didnt have a automated dolly on hand to do that..but yes maybe next time
For more projects like this I expect there is a r/FirstWorldDecadence forum on reddit, right?
Really clever !!!