[Andrey Nechypurenko] has put together an excellent design guide describing the development of his a20 grou1nd vehicle and is open sourcing all the schematics and source code.
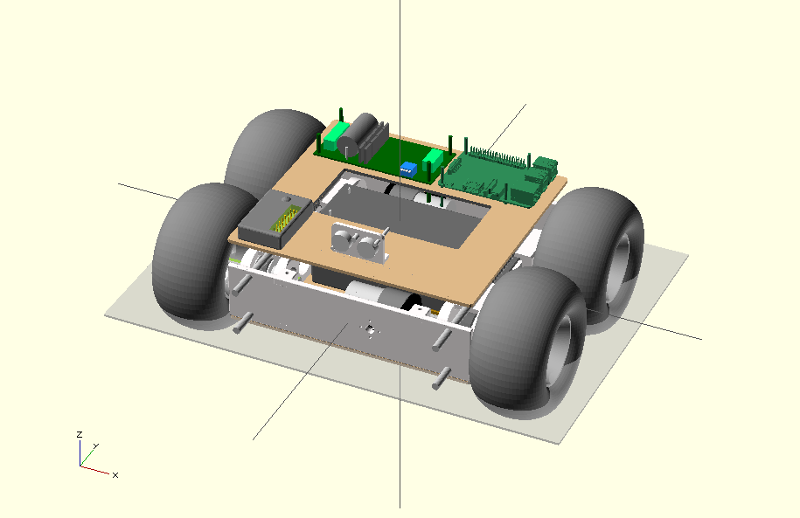
 One of [Andrey]’s previous designs used a Pololu tracked chassis. But this time he designed everything from scratch. In his first post on the a20, [Andrey] describes the mechanical design of the vehicle. In particular focusing on trade-offs between different drive systems, motor types, and approaches to chassis construction. He also covers the challenges of using open source design tools (FreeCAD), and other practical challenges he faced. His thorough documentation makes an invaluable reference for future hackers.
[Andrey] was eager to take the system for a spin so he quickly hacked a motor controller and radio receiver onto the platform (checkout the video below). The a20s final brain will be a Raspberry Pi, and we look forward to more posts from [Andrey] on the software and electronic control system.


It’s cool but ditch the lead acid. No reason to use them these days. They can’t stand a lot of recharge events, they are very heavy compared to output, and don’t play well with the voltages most RC stuff operates at.
But are dirty cheap for Ah per $.
It’s true, but that’s convenience given to stationary use of the battery or in situations where the power to weight ratio is so significant that literally using lead won’t degrade performance by a considerable amount.
In addition, it was easier to find the charger for it. We used this one (but it is definitely not the only option): http://www.mini-box.com/picoUPS-120-12V-DC-micro-UPS-battery-backup?sc=8&category=980 . Nice thing about this module is that it can switch instantly between external and battery without the need to power cycle the whole system.
What about the electronics, what kind of control he used in this robot?
I am currently writing next parts on electronics and software where all details will be provided. The quick answer is – we used MD22 motor controller over I2C, Raspberry Pi 2 as an on-board computer and simple custom interface board (mainly provided convenient connectors for I2C and regulated power source). You can take a look at schematic of the custom board here: https://goo.gl/5A3yqx and here: https://goo.gl/9SvAPc . It is also very easy to connect Arduino with this board (just need small adapter) if Raspberry Pi is not needed.
any suggestion about heavy-duty version: I mean..a robotics vehicle that can left-up around 500 kg (or ~ 1000 lb) loading?
thanks..
HI Marcus
what would you use the heavy duty version for? I was thinking the same, helping in a storage hall of a factory to automatically move around parts …
Nice project, I like it.
Thanks! :-)