If you’re looking to add a bit of the future to your living room, you might want to look at this tutorial to build a very professional infinity mirror table.
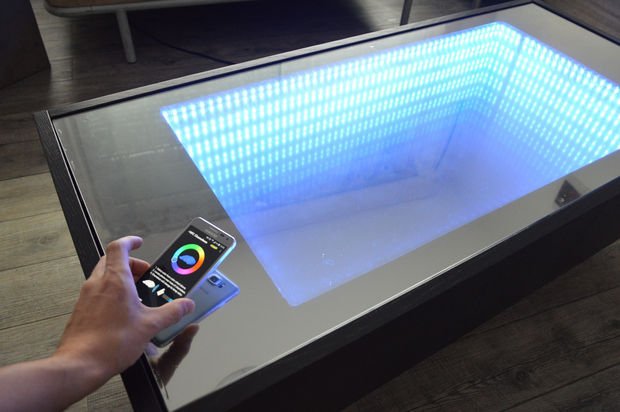
It’s an IKEA RAMVIK coffee table, modified to include RGB LEDs and a one-way mirror for that ever-so-awesome infinity effect. And technically, you only have to cut one hole in the table.
By placing a large mirror underneath the glass, wrapping the inner edge with a strip of RGB LEDs and coating the original glass top with a reflective car tint, it’s a pretty simple hack that results in a very polished product — not something that can be said for most of our projects! But to make it even better, [Pierre] added an NFC chip under the table, allowing you to control the color with just a tap.
The device he’s using to control the LEDs via NFC is called a KeyDuino, an NFC enabled Arduino that is currently on Kickstarter and doing quite well.
http://www.youtube.com/watch?v=mML4pEM4C_A
Now we kind of want to make one for our office lounge… Or maybe some Infinity Mirror portals for the washroom…


Current calculations are wrong. Autor said 20mA per LED. Actualy thats right, but each WS2812 have 3 LEDs. He calculated 3A of total current. But he needed 9A max..
Good catch.
Only in cases where output is white, but that should most definitely be a concern.
Yes, only when output is white. He have a 6A power supply, so is OK.
I made this 2 days ago with 150 LEDs. http://www.youtube.com/watch?v=J-PvVSVwe4o
I needed 9A also, but most os the animations don’t draw more than 2A.
20mA per diode, 3 diodes per chip, AND ~5mA per IC. At 150 leds (3 A / 0.02A), that’s another 750mA minimum. But then you also have to factor in voltage droop from FPC length.
You’re right, in fact I didn’t saw the official datasheet and I only focus on the chiness informations 20mA per led and not by diode (wrong as you said).
I will change that on the video; thank you :)
Why would you want to saw a perfectly fine datasheet?
It’s pretty obvious his first language isn’t English. You don’t have to be a dick about it. Google translate, ain’t soup nuts great.
You’ll probably want to feed power into both ends of the LED tape to avoid brightness drop-off towards the far end. Easy to do as the ends meet up.
A piece of mirrored MDF along the bottom attached to a couple of servos could make for some interesting effects.
Very cool project!
I would have mounted the mirror with double sided adhesive tape – the foam backed variant – which is sometimes even called “Mirror tape” or just “mounting tape”, because this is normally used to mount mirrors to furniture. With the foam backing it is a little more flexible than epoxy and it is also possible to remove it, if e.g. the mirror breaks by accident.
My thoughts exactly. You want a strong adhesive that can also absorb shock and be removed if needed (epoxy is a pain to remove).
IMHO silicone would be the best choice for this.
Make sure it’s mirror safe silicone though….
Some normal silicones can attack the metal and discolour the mirror.
I have tried the ESP8266 with the pixel led library and it’s working quite well, wouldn’t it be more convenient to use wifi instead of NFC ?
It probably would, but they’re trying to sell-through more of the KeyDuino devices with the Kickstarter. (This table is even featured in the KS campaign)