A well organized approach to a project is a delight to see. [Pavel Gesyuk] takes just that approach with the experiments on his blog. Experiment 13 is a multi-part series using a Raspberry Pi as the heart of a weather station. [Pavel] is looking at wind speed and direction, and temperature measurement, plus solar power for the station. One of his videos, there are many, is after the break.
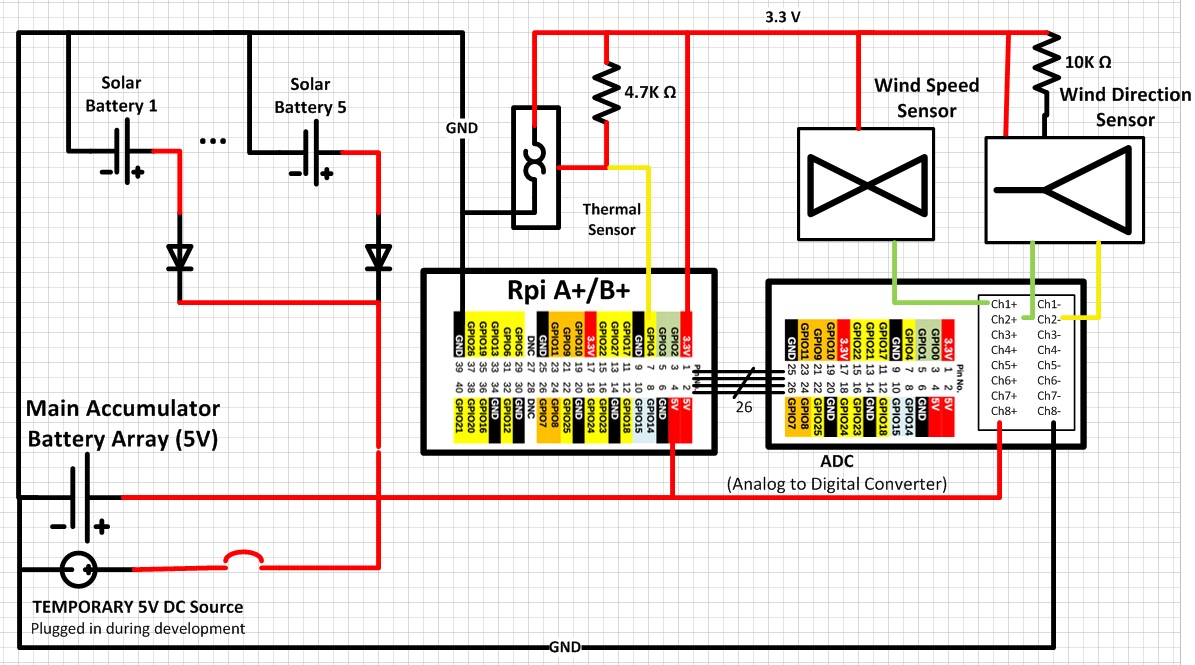
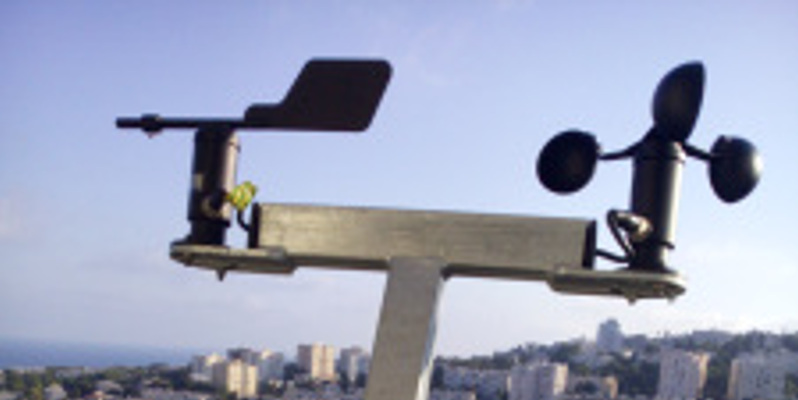
 The anemometer and direction sensors are stock units wired to a Raspberry Pi A+ using an analog to digital daughter board. The data from the temperature sensor is acquired using I2C. During one part of the experiment he uses an EDIMAX WiFi adapter for collecting the data.
Python is [Pavel’s’ language of choice for development and freely shares his code for others to see. The code collects the data and displays it on a monitor connected to the Pi. The experiment also attempts to use solar power to charge batteries so the station is not dependent on mains power.
The mechanical assembly shows attention to detail commensurate with his project presentation and we respect how well organized the work is.


Thanks, Rud, for so laconic description and for the publication. Word-press statistics jumped at once x20. I felt this theme of green energy using and measurement interests much more than ~20 persons a day :) Thanks a lot for chosing my experiments for publication. I believe this will give also a feed-back boost to these experiments and enreach my experience too. Pavel
I find the use of an analog interface for the windspeed and direction sensors odd but it does seem common. Sounds like a digital version would be a good project for a 3d printer.
Isn’t a pi a bit of overkill for this? Maybe an ESP8266? You could multiplex the A2D.
If you’ll examine his list of experiments, the majority use an RPi. I believe it’s a matter of “how this can be done with an RPi”, not “What other alternatives to an RPi could be used”. There’s dozens of other choices he could of used, if he was of a mind to do so.
Thanks guys! I think the truth about my choise is in the middle. RPi A+ is as I had already an experience with RPi B, when the idea of weather station appeared, but B was too heavy from the perspective of power consumption. I believe though, that to have this device living more than 2 days on sun energy I need to move to smaller solution with only essential circuits on it. So that, I’m kind of agree with you Iwatcdr. Tnx for both the comments, guys! Appreciate it.
BTW, guys… I find RPi as an excellent platform for fast learning how to work with sensors and for building system prototypes (with tiny time to market). This is thanks the comfortable set of interfaces (HDMI, USB) and tools (Linux, CShell and Python) it has for development directly on RPi and for inter-connection with sensors. So, on my opinion, its initial predestination (defined by its developers) being educational platform is reached. See also the size of Python-writing community for RPi: you may find answer to almost every question you face during your studies.
Of course, refining a prototype to a final product with higher performance (lower power) HW and SW is the next stage after this learning stage with RPi. Hope time will let me to get to that advanced stage with this kind of station myself. I know there are lots of standard products, but I like this feeling of knowing how things work exactly when they passed through your hands. You know what I’m talking about ;)
I failed to point out that you did a great job of documentation. Great job overall.
Thanks! :) I did it for myself as I had interrupts and wanted to be able to reproduce things ASAP if something burns out. Also, I treat this as my investment back to the community I learned from. I’m glad you like the style of me reports, guys :)
If someone wants to do this but with a bit less effort and around $120 spent. get the Sparkfun weather shield and the instruments. easily interfaced to the Pi.
Theyare not anywhere as good as the pro units the project here used, but it will get someone going pretty fast. I used the Sparkfun stuff with a Pi and a Pi TNC board to make an APRS repeater/weather station for my location.
Interesting approach. I din’t hear of this shield before and the requirements came one by one so I built things incrementally. Can you, please, drop here a link to your project description (if such exists). Tnx
Here: https://www.sparkfun.com/products/12081
Tnx
Do you have YOUR project described though? Usually people find authentic solutions with even standard shields. I’m curious to see this.
Any reason you didn’t try the new PiZero for this one ? The RasPi site reports it uses 1/3 the power of a A+ and 1/6 the power of a model-B. There are ‘many’ people just running weewx on a Pi to interface with commercial and home-built weather stations. It’s very extensible and writing drivers for special hardware is straightforward. Might be worth a look.
Tnx. I detected RPi zero only few days ago through Rud’s publications. The project started long time ago and was interrupted by life and other projects. I suspect, Zero did’t exist yet when I started… Thought to try this if power consumption will be much lower. A+ was defined as 1/4 fro B and has all necessary interfaces w/o tweaking though: usb which can become wi-fi with dongle. Afraid, that if Wi_Fi will be added this will be comparable to A+. I think, that if I’ll think about lowering power I will look for very slim uC and will need to implement power-management control and reporting/download policies for Wi-Fi. This is to ensure the battery is not wasted in not so sunny days. But, thanks again for the idea. I definitely will take zero to account
The hardest part of building a weather station is finding a location for it that will allow it to record useful information. Anywhere near a building and you can get heat island and turbulence effects. We had fun the other day using bubbles to trace the airflow around my property, we even found a really compact vortex where you could send them off in different directions just be moving a small amount. Does anyone know how to make a DIY Doppler wind radar?
Bubbles – nice idea :) I could ask my daughters doing this for me :) All great ideas are simple :). What do you think about a roofs of tall buildings? How about turbulence there? I’m at 15-th floor of 17 store building on a heel.
Yeah the bubble are good fun, and science. I am tempted to set up a camera on a tripod with a long exposure, at an angle that picks up the highlight from the bubble.
But you can always do this, https://www.youtube.com/watch?v=e9ZzlPPHIxM
Yeah, bubbles with 17 store building is hard thing to do, even having 100 kids’ assistance :) Very nice simulator. I saved the link. Tnx.
You could try a time-lapse photo at night with some LED Balloon Floaties, that have just over neutral buoyancy so they do not go up fast.
https://www.youtube.com/watch?v=pw8WovNeAB4