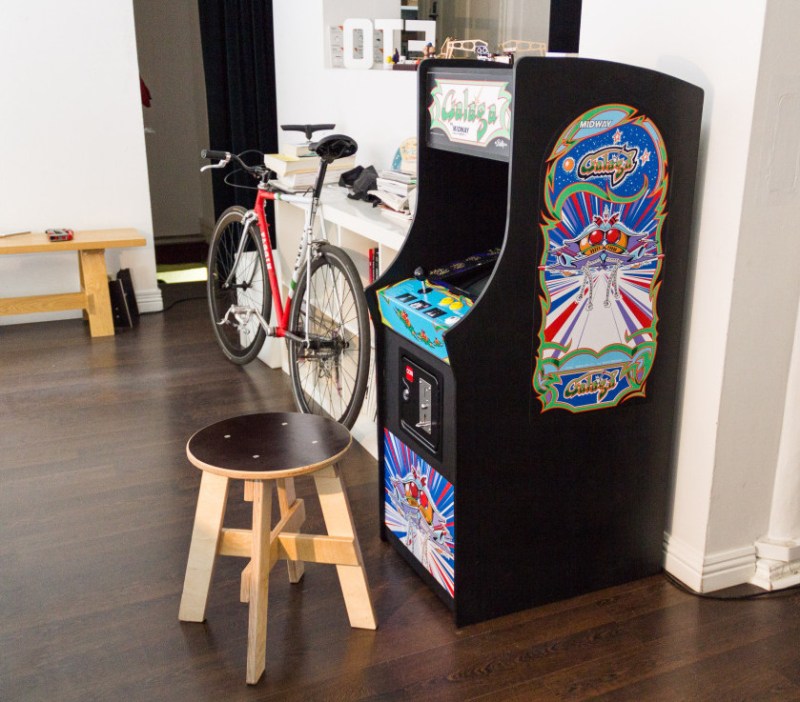
Like many of us, [Alex] spent a large part of his childhood feeding coin after coin into one arcade game or another. Galaga is one of his all-time favorites, and he has wanted to build a Galaga cabinet for a long time. Once his workshop was ready for the job, it was time to cross it off the list.
The cabinet is built to 4/5 scale. This is a great size because he gets the stability and feel of a full-size machine, but it’s much easier to move it around. As you might expect, there’s Pi in the cabinet. The display is an old TV that [Alex] found in a Dumpster. And although it works great, it would go into standby instead of powering off along with everything else. To get around this, [Alex] built an automatic remote control with an IR LED and an Arduino Diecimila. After a five-second wait, it sends the power-on code to the TV and switches the input. The TV is supposed to be in portrait mode for Galaga, but this proved to be a challenge. Changing the orientation at the Pi level resulted in poor performance and choppy sound, so he changed it at the game execution level.
We are continually impressed by the diversity of [Alex]’s builds and the care that goes into them. Who could forget his beautiful sidewalk graffiti machine or the time he showed us how to photograph stuff that’s not there? Make the jump to see a brief demonstration followed by a two-part build video.


Color me impressed. Woodworking is a skill I do not possess whatsoever but kind of wish I did.
I should be inspired to jump up right this second and do something with the bootleg galaga boards I’ve got….. but today is not that day.
Nice cabinet, but I’m actually eyeing the stool and the bench seat. They look more like my level of woodworking. (c:
the stool is homemade, the bench is not :)
Funny. I just took a second look at it and thought that some of the joineries look pretty far out of my league. (c:
Fine work, though I don’t understand why a person would put a coin slot in a personal arcade cabinet. Why not just a switch?
Beer money
Nostalgia. The sound of the falling coin, the touch of the cold metal, the flicker of the tube TV, the smell of the wooden cabinet, and so on.
Then he needs to up the voltage on the Pi to get the authentic hot electronics smell.
Though probably the TV does that shut up in the cab and all.
Why build a cabinet instead of running an emulator? Authenticity. Recreating the tactile and auditory experience that was imprinted on all of us ducklings in our youth.
Oh, I’d be rigging a fence for some of those bandsaw cuts, don’t need no fractally interesting freehand “straight” cuts here thanks.
There’s a pretty good thread about making a simple “sawboard” on the BYOAC forums. Costs practically nothing, and you can use your circular saw to finally make straight cuts.
http://forum.arcadecontrols.com/index.php/topic,43568.0.html
Should work for the handheld scrollsaw and sabresaws too, or even a router. I had to knock together a special one for cutting countertop when I was doing my kitchen.
I would love to know more about getting the artwork printed and applied to the cabinet.
I searched for SVG artwork, then got it printed by a local sticker company. I did applying the stickers myself. Not perfect. Next time I’ll ask someone to do it for me.
Major props on using a CRT!
I’m telling you those sony BVM commercial monitors are as sharp as a tac
provided that you use a component input.