I’ve been soldering for a long time, and I take pride in my abilities. I won’t say that I’m the best solder-slinger around, but I’m pretty good at this essential shop skill — at least for through-hole and “traditional” soldering; I haven’t had much practice at SMD stuff yet. I’m confident that I could make a good, strong, stable joint that’s both electrically and mechanically sound in just about any kind of wire or conductor.
But like some many of us, I learned soldering as a practical skill; put solder and iron together, observe results, repeat the stuff that works and avoid the stuff that doesn’t. Seems like adding a little inside information might help me improve my skills, so I set about learning what’s going on mechanically and chemically inside a solder joint.
Solder != Metal Glue
It should come as little surprise that like other metal working methods, soldering has a strict definition. Soldering is the joining of metals by melting a filler metal into the joint. Unlike in welding, only the filler metal — the solder — melts. The metals being joined usually have a much higher melting point than the solder. Brazing is similar to soldering in this regard; even though the filler metal in brazing melts at a much higher temperature than solder, the joined metals still don’t melt.
The metallurgical details of solder itself could take volumes to discuss completely, but for our purposes it’s pretty simple stuff. Solder is just an alloy that has been engineered to melt at a specific temperature. For electronics uses, the king of solders for years was an alloy of 60% tin and 40% lead. New regulations in response to environmental concerns have led to the development of different lead-free alloys, but whatever the composition, solder’s job is pretty simple. Solder needs to melt at a predictable temperature and maintain its mechanical and electrical properties when it solidifies. In other words, solder needs to be strong enough to physically hold a joint together without introducing any undesirable electrical properties to the joint.

Solder needs to do more than just melt and solidify, though. People seem to think of solder as some kind of “metal glue” — apply it as a liquid and let it become solid to lock a joint together. That’s only part of the picture, though. For a soldered joint to be electrically and mechanically sound, the solder needs to wet the metals to be joined. In the context of soldering, wetting is the process whereby the molten solder partially dissolves into the copper base metal, forming a region that’s part solder and part copper. This creates intermetallic bonding and it’s the key to soldering. In most solders, the molten tin is the primary solvent that dissolves into the copper substrate and forms the intermetallic bond that electrically and mechanically stabilizes the joint.
Intermetallics are necessary to a good solder joint, but like so many things, too much of a good thing can be a bad thing. Intermetallics tend to be brittle, so if the intermetallic layer is too thick, the joint can be mechanically weak. There can also be voids within the intermetallic layer that add to mechanical instability.
Keeping It Clean
We all know that flux is critical to quality solder joints. But what exactly is flux and why do solder manufacturers go to the trouble of stuffing it into the core of solder wire?
The importance of flux is due to its ability to fight the mortal enemy of solder: metal oxides. Metal oxides are no good for solder joints — solder will not adequately wet a joint when there’s a metal oxide coating. Fluxes are designed to remove metal oxides, and to do so while the joint is being soldered. Pre-cleaning the metals doesn’t cut it, by the time the solder flows atmospheric oxygen has rebuilt the metal oxide layer enough to spoil solder wetting.
Electronic solder usually has a flux made of rosin. Rosin is a natural product derived from pine trees, notably the loblolly and longleaf pines for US-made rosin. It has the advantage of being more or less inert at room temperature but highly acidic when liquified, and has a melting point slightly lower than solder. The rosin core of electronic solder will therefore melt before the solder, flowing into and around the joint. The acidic liquid reacts with metal oxides, exposing clean metal for the solder to wet into. The acidic liquid flux converts the metal oxides to metal salts and water, which are typically locked up in the flux when it solidifies. The reaction products are generally harmless at that point, but some processes still require the used-up flux to be removed.
Of course there’s a lot more to soldering than this, but these are the basics about what’s going on inside that blob of solder at the end of your iron.


Your header image reminds me of photos like these:
http://makezine.com/wp-content/uploads/2016/03/Screen-Shot-2016-03-08-at-9.15.01-AM.png
This is not fair, you know.
Where’s the safety glasses?!?
https://i0.wp.com/makezine.com/wp-content/uploads/2016/03/stock-photo-beautiful-woman-repair-soldering-a-printed-circuit-board-204001492.jpg?w=988
Nope.
Safety glasses look cool and professional.
When soldering, “looks” and nothing else is the real thing … :-P
all she needs, now, is the infamous ebay/amazon ‘wireless anti-static wrist strap’. I hear they are fashonable and come in many pretty colors ;)
i am surprised of her capacity to support heat at the end is more precise if you hold the tool on the hot part
I was wondering the same :”D
Yep, I see.
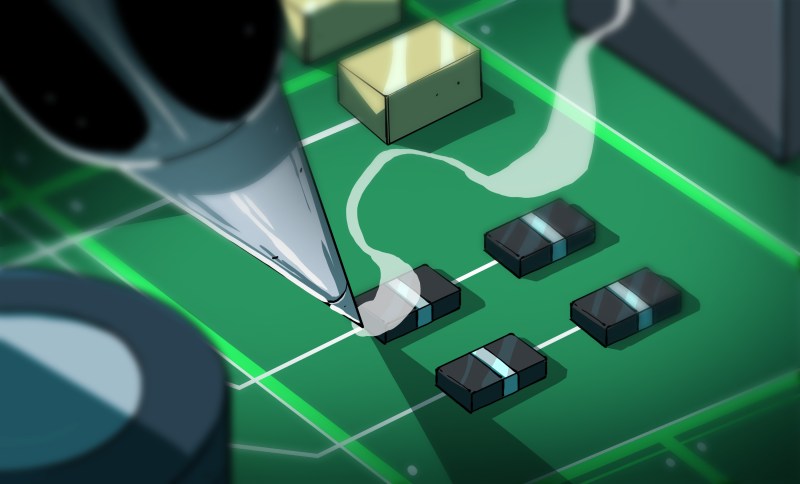
Why does the plastic/ceramic part of the component seem to be the implied part to be soldered?
Also…. why is there thin tracks going to the non-metallic parts of the components and without pads??? Wouldn’t that make a mechanically unstable joint (Unless epoxied after/prototype)?
Referring to the heading picture
Those are lines on the silk.
I think the metal tips on the SMD parts are just badly oxidized; there’s definitely a tab on the end that is being soldered. And the pads are way too small. Somebody needs to lay out a new PCB for version 1.1.
Maybe the contacts are actually highly polished, but the soldering is being done against a black dackdrop.
The splash screen for Altium Designer 16:
http://www.altium.com/resources/ad16_pr3.png
Has the same problem with the odd looking multi-pin inductor. ;)
BGA Multiductor. Never seen one?
It works in parallel with the Flux Capacitor.
It could be a multi-component module, I suppose. Still, you’d think if a company needs an image of a PCB for something, Altium would be able to get hold of a proper one.
And why not? http://www.electronicsweekly.com/news/products/power-supplies/tiny-dc-dc-converter-bga-2kv-isolation-2014-05/
you forgot the most important part – this TIP is SHIT for SMD.
95% SMD complaints come from people trying to solder with a shitty small sharp conical tip. Even so called pros, or people who should know better ( http://makezine.com/projects/skill-builder-soldering-iron-tips/ ) perpetuate this myth of using small sharp conical tip to do small smd :/
This photo reminded me of a fellow student that absentmindedly scratched the inside of his nostril with a hot soldering iron.
It bled.
My first day of soldering, I put the iron down, stuck a resistor into the PCB holes, and reached to pick up the iron without looking.
The cheap stiff power cable had caused it to turn when I put it down. I grabbed the hot end. Firmly. It left a white stripe across my palm.
Been there, done that.
The first time I soldered, I was 9, I think. I kept the solder by while grabbing a 555 timer. Once placed properly on the perfboard, I went for my iron. I mistakenly touched the wire. The soldering iron fell off the table, it hit my thigh (I was wearing shorts so..), hot end first. The mark still remains to this day.
I didn’t get that far. I hung the iron on the cable that was draped over the edge of the work surface then we wondered what the smell was. It was my jersey melting because I’d moved close enough to the work surface for the iron to touch my clothing. I was only 11 though. I used to try “painting” molten solder on to the things I wanted to join.
Last year I was repairing an amplifier and I dropped my 80W Weller off the bench. It fell tip downwards towards my trousers and melted straight through. In my brief frantic wiggling panic the iron managed to enlarge the hole it made enough to fall completely inside my trousers. The resulting mess of molten skin and leg hair was horrendous. Fully qualified electrical service engineer…
Am I the only person who is questioning why she’s holding the singed metal part of the soldering iron?
Ha Ha, had ta look,
Ha Ha , had to look, all the pic’s are, robots
Off the main topic , still; guess – “no pain no pay”
No, think we all got that. This picture’s somewhat famous round here for that.
what you don’t see is that its a 2-part before/after photo series. you are seeing the ‘before’ part. the ‘after’ part, I’m told, is in a medical journal ;)
so much this!
Something an alien would paint after hearing description of eating Mochi with chopsticks.
!?!?? No she couldn’t! It’s a 3V battery and she’s only touching one side. She’s also holding the soldering iron right by the blistery-hot part.
It’s quite possibly a lithium, but not a rechargeable one. The problems with lithium battery explosions were rechargeable ones, where inferior, possibly faulty batteries found their way into products they weren’t properly specified for. So, for example, they were being charged much too fast. It was suspected to be a problem in the supply chain.
The battery in the motherboard won’t be flammable or explosive. Even if it was a faulty battery, because the motherboard’s not plugged in, so no power’s flowing to the battery. Heat doesn’t make them explode, faults during charging do.
The error in the photo is the way she’s holding the iron, by the hot part, not by the handle. She’d barbecue her fingers long before she got any soldering done.
Maybe it’s a gag pen made to look like a soldering iron .She’s probably just putting the date she installed the battery 0n the battery…..right? I mean she has to be brighter than she looks in the picture. Somebody married her.
…and the next Kickstarter idea comes to life!
I don’t see the resemblance…? The header image is a sketch akin to what you would see in any wikihow tutorials, while your image is a stock photo of a real life person.
Seriously there is literally 99% no resemblance whatsoever, clearly there must be some sort of inside joke or reference that I’m not getting.
Must be an engineer for sure! I know a few….
We’re told a lot of lies about solder, like “don’t use acid-core solder”. OK, the stuff from the plumbing department will eat away at your PCB traces, so avoid that. The proper instruction is “always use rosin-core solder on electronics, never any other sort of core”, because rosin is an acid core as well, just a less harmful one, and most of our professed “experts” have never learned about it.
I encourage everyone to give hobby SMD a try. If you do it right, it’s actually easier and faster than through-hole assembly, even with manual pick-and-place. And the results look like they were made on a factory assembly line. It’s magical. And it’s not scary. I promise. Not only will you be pleasantly surprised with the ease of it, but no longer having to restrict yourself to the digikey through-hole parts catalog (or parts on breakout boards) will open up a whole new world of components and options to you.
I was watching a bunch of u-tube videos on this subject just last night. And they do make it look magical and a lot easier than I expected. The key seems to be to use a beveled tip instead of a pointed one and use lots of some mysterious fluid, which I expect is flux.
When I head to Fry’s next time, I’m going to pick up a beveled tip and muck up some old boards! :-)
It’s mostly rosin dissolved in isopropanol
That open HDD sparked my comment….
I have experimented in the realm of the DON’Ts of computers and electronics (Intentional computer stupidity when I knew better).
Only on HDDs that are 40GB or less, I (Still do when smaller than the last one) play with them open whilst getting an old distro out so I can DD if-dev-audio of-dev-hdb and watch the head moving like a record player in fast-motion.
Smallest HDD I’ve tried: 1GB-ish, Gave the best effect so far.
Also salvaged my bro’s music off his 5GB HDD by opening it up, lifting the heads and turning the HDD platters by the spindle before moving the head home and connecting to my PC IDE (Hotswapping in Linux, I went through a phase of hotswapping anything I could try after I found angrily hot-unplugging a soundblaster live PCI card gave a BSOD and no damage. But that is how I learnt stuff when young, by doing what i wasn’t supposed to, I WOULD NEVER DO ANY STUPIDITY THAT WOULD RISK MY OR ANYBODY’S LIFE!!!!)
About the heatgun in that picture, I’ve seen my ex-colleague go to pick up a heatgun thinking it was cold only to burn herself. Luckily the thing was colder than it was, otherwise it would be hospital, not ice-packs.
I thought the oxide on top of the cold solderpot looked funny so I poked it. Turns out someone left it plugged in for several days.
Hmmm, seems like women can tolerate pain better than men.
They also prefer the same mainboard…
TLDR on Wild PCS: this company is scamming people by offering “repair technician board level micro soldering” courses for couple $K a pop + probably another $K in garbage chinesium soldering equipment (Bakku/Yihua/home depot paint stripper). You should listen to the whole video (baldie is a victim) to comprehend how big of a fraud they peddle. Cougar/granny(depending who you ask :P) on the right is a stay-at-home mom fixing ripped width of a human hair traces (iphone/macbook long screw damage) under the microscope for a living, she would probably outsolder everyone here ;)
http://www.youtube.com/watch?v=nzJrp3gT_7s&t=5m22s
get ready for pr0n joke ;o)
This is a picture from WildPCS microsoldering class, no joke:
https://www.youtube.com/watch?v=fKhJLvG8D-8
You wanna tell us what to look for, and at what moment? I can’t be bothered watching 44 minutes without knowing the point you’re trying to make.
damn, got lost in comment depth, replied to you here http://hackaday.com/2017/02/23/what-the-flux-how-does-solder-work-anyway/#comment-3422509
I would say this as well, but remember to get some soldering braid/wick (been using prowick no.2). With a standard Hakko temperature controlled iron with ~3mm chisel tip I can happily solder up VQFNs with 0.45mm lead spacing. Using the wick after soldering to remove the bridges between leads.
It does look like a blast, and it’s absolutely on my list of skills to acquire. I just need to tool up and I’ll be there. I’d like to get into hot air rework as well.
Most of my designs are 805 smt or there-abouts.
I got bold and laid out a PCB with 402 resistors and capacitors. I BIT too small for hand soldering, at least with my caffeine-addled nerves.
I like SMD because I can laser cut solder masks in overhead transparency sheets. Once it’s pasted, place all the parts and put it in a toaster oven. I did the usual two stage heat profile then open the door. Far less fuss than hand soldering a bunch of through hole parts.
King of solders is 63/37
Indeed. That slight difference has a pretty large effect on how the solder transitions from liquid to solid, and therefore the resulting quality of the joint.
+1
the lead free stuff is god awful to work with. picked up a roll of it to try because you know, environment and all.
completely useless.
I will stick to the leaded stuff and just make sure all the old stuff goes to a proper recycler, thanks.
Most lead free solder is god awful. Work got a load in once, by pure chance it was the best solder I’ve used.
Landed up perma-borrowing a full reel for the home DIY…
It still sometimes sets a grey-matte colour when cooling (partially to do with large copper pours etc), but I’ve seen worse in manufactured soldering hold up the test of time (for as long as lead free can hold up)
Btw I mean:
best of the lead free solder was accidentally ordered by work, whereas what they usually get for solder is so bad that some nail-varnish and prit-stick glue would work better!
can you share which solder it was?
I will try… But I have a habit of pealing stickers off of everything I use… Seems to stop other engineers pinching things ;)
Lead-free smells awful, too.
Unfortunately, military sales means RoHS, and RoHS means lead-free.
Last time I heard military and aerospace banned the use of lead free solder.
Nope. Everything is so counter-intuitive in this industry. We were recently informed by Raytheon that they won’t accept products with BGA ICs because it make QC inspection too expensive.
New equipment requires GPIB and devices worth more than my house run Windows XP. My oscilloscope runs Windows and requires a Java applet for remote control.
It’s so weird.
isnt military exempt? I know mission critical is
You’d think so, I thought so, but apparently not. Perhaps it’s voluntary.
No, this is completely backwards. Our military customers are the only ones that still use (and mandate) lead solder. For everyone else, we have gone to SAC305.
The military is much more interested in performance and reliability than environmental concerns.
Annie: Like the poster above, you have it backwards. Lead solder is the superior solder. We are going away from it due to environmental and health concerns. It has nothing to do with budget.
Hands up if you have held the solder in your mouth when you needed a third hand.
I soldered lots of joints that way when most of the solder was 40% lead.
I have to write these things down now because I will probably lose my memory soon as a result of the lead in my system. It might even explain how I knew it all when I was 18 and know so little now.
Not me. I just keep the component/wire between thumb and index finger and the solder wire between my middle/ring fingers.
Funny how many techs burned their fingers trying to fix that exact same motherboard.
The curse of the motherboard!!!!
More likely the manufacturer had an outbreak of mind-altering super-disease/bug/virus that survived on those boards before infecting engineers…. these pictures are the first zombies!!!!
I also turn the controls of the soldering station away from me and look in the camera while I’m working.
@[Annie]
YES!, right now I am looking at the back of my monitor.
Oh, wait! So it’s not that women are more tolerant to pain than men.
Now I realize how sissy I am…
:o(
I’ve held the tube in my mouth.
I’ve held solder in my mouth before, and I haven’t brained my damage…
Me to but had as a matter now.
Check out this paper: https://www.jstage.jst.go.jp/article/jhs/56/4/56_4_451/_article
The main ingredient in rosin is a testosterone reductase antagonist. Since we aren’t seeing solder techs become more manly the longer they’re at it, I suppose it’s a minor effect. :-)
reductase antagonist… thats too many double negations for me to decide if it makes more or less manly…
With the proliferation of binary arithmetic, counting to two has become a forgotten art, I agree.
The banner image PCB layout could use a bit more solder mask expansion around the SMD pads. ;)
And less thin tracks going to plastic pins.
Um, actually I might have that backwards…
I fix PCBs at work alongside the other mostly fixed-by-dust-removal type repairs.
My soldering, when using a decent side cut angled chisel tip, has been regarded as “machine quality workmanship”!
Managers words, not mine.
I personally disregard my soldering skill to be OK as I cannot fix BGA issues yet (Still) and I cause so much heat damage with the current crop of sharp nails they are trying to call soldering tips (they are being cheap so I improvise and file a chamfer no deeper than the plating to aid in the angled heat transfer).
I can only (with limited sucess) reflow the uBGA between the silicon-uBGA-carrier sandwiches and some types of BGA devices.
Six days ago I reflowed the uBGA layer on some NVidia Quatro cards (4x from another Scrap-salvage and done this just for the challenge), I guessed what my luck per card would likely be based on how far gone each of the cards were gone.
One crash-on-post card failed to reflow and the “memory error” card reflowed a treat (It survived the rough knock whilst stress testing type test I’ve never seen an NVidia survive till recent)
ok
10 point to the first nerd who finds a photo of a “normal looking” middle-aged white male doing something stupid with a soldering iron.
At least I Tried!
Except the picture didn’t upload and didn’t make it past moderation.
Hint: It was such a terrible blag,
It was a picture from above, some MSPAINT and picture inversion later with “Close enough” slapped on…..
Maybe it took a while to be hand-moderated. It’s there now though. I’m sure you should be able to see it yourself.
See we aren’t that silly to let some one take a photo of us picking up the soldering iron the wrong way. The burns hurt like hell for a while though :(
I’ve still got a scar on my left thumb from reaching for my soldering iron without looking up from the board I was working on. I found the iron alright. That was over 40 years ago, so it must have been a very deep burn.
Don’t do what the drawing and use a thin soldering iron tip.
See this clip, buy a decent tip and some flux
https://youtu.be/5uiroWBkdFY
Professional soldering videos are incredibly satisfying to watch.
This is much more satisfying. https://www.youtube.com/watch?v=i5MNLTc7YhY
“Not available in your country…”
As an American, I have to say this is a first.
Awsome vid. , recently used a tube (no plunger) RMA-223 , “cheap from our over-worked friends in China”, thought it was crap but learned to lower my temp. down a bit and works like a charm.
This. I’ve stacked SOJ RAM chips 4 high with a big tip and lots of flux. Breaking the CS line out for each chip and hand wiring to the CPU with 30ga wire was fun.
With SMD, I can easily make a “good, strong, stable joint”. The problems really only arise because my one “good, strong, stable joint” should have been 144 good, strong, stable joints!
</sarcasm>
At my company everything is hand-soldered, and only one assembler is able to deal with parts smaller than 0805, and one of our flagship new products requires a 128-pin QFP.
I’m campaigning for a reflow oven.
Hello Steven, I read you comment and I work in a similar company (I guess) for the last ten years we’ve grown and now make (manually place components and solder) all our PCB’s ourselves. So I have a tip for you: don’t buy a reflow oven! Buy a vapor phase machine, I don’t sell these machines, I’m a happy user… or actually the company I work for is the happy user, I’m just the happy engineer who designs the PCB’s.
This method of soldering is perfect every time, does not require you to tune certain heating profiles. There is no chance of overheating, there is no risk of components not being soldered because they are in cold zones. Because in a vapor phase oven there are no cold zones. Everything is heated evenly by the vapor and only when the board is completely on temperature and the solder is completely molten the vapor can rise beyond the board, trigger a sensor and will automatically cool down. Then after a few minutes you can open the lid and the PCB is ready for testing.
We use a machine similar to this one.
http://www.smtnet.com/news/index.cfm?fuseaction=view_news&news_id=12332
This method of soldering is not cheap, but it is the best method for small series in a professional environment. If you are serious about soldering, please consider, you won’t regret it.
Kind regards and good luck,
Jan
Couldyou elaborate on the liquid? Name, manufacturer, can it be delivered to home addresses, how long it lasts?, does it get contaminated? how to dispose of it properly? Thank you
You’re not going to want to do vapor phase at home. It requires special equipment and hazardous, EXTREMELY expensive liquid.