The Prusa i3 Mk 2 is the hotness in consumer-grade, quality 3D printing right now. And things just keep getting more interesting. We caught up with Josef Průša at Maker Faire Bay Area this weekend to see the multi-material extruder in its final form. It’s an upgrade to the Mk 2 which allows a single hot end to print in four different materials, be it different colors or different types of filament.
A Bit of History
Jo has a reputation for turning out some of the most clever and dependable design improvements to 3D printers. Just one year ago he was at Maker Faire showing off the new version of the popular i3 printer, called the Mk2. He followed that up in September with an announcement for the multi-material upgrade which he had on exhibit for the New York Maker Faire last October. Check out Brian Benchoff’s coverage for in-depth details about how the Multi-Material extruder works.
A few details that went into manufacturing delayed delivery. But customers who pre-ordered the upgrade are now receiving their units. Anyone ordering now can expect delivery starting as soon as August.
Why it Works
In the past, common approaches for multi-material printing used a separate hot end for each material. But the big flaw in that design is the added complexity. With more than one hotend you need extremely precise calibration so that the nozzle heights (Z axis) are exactly the same and the X/Y alignment between the heads match.
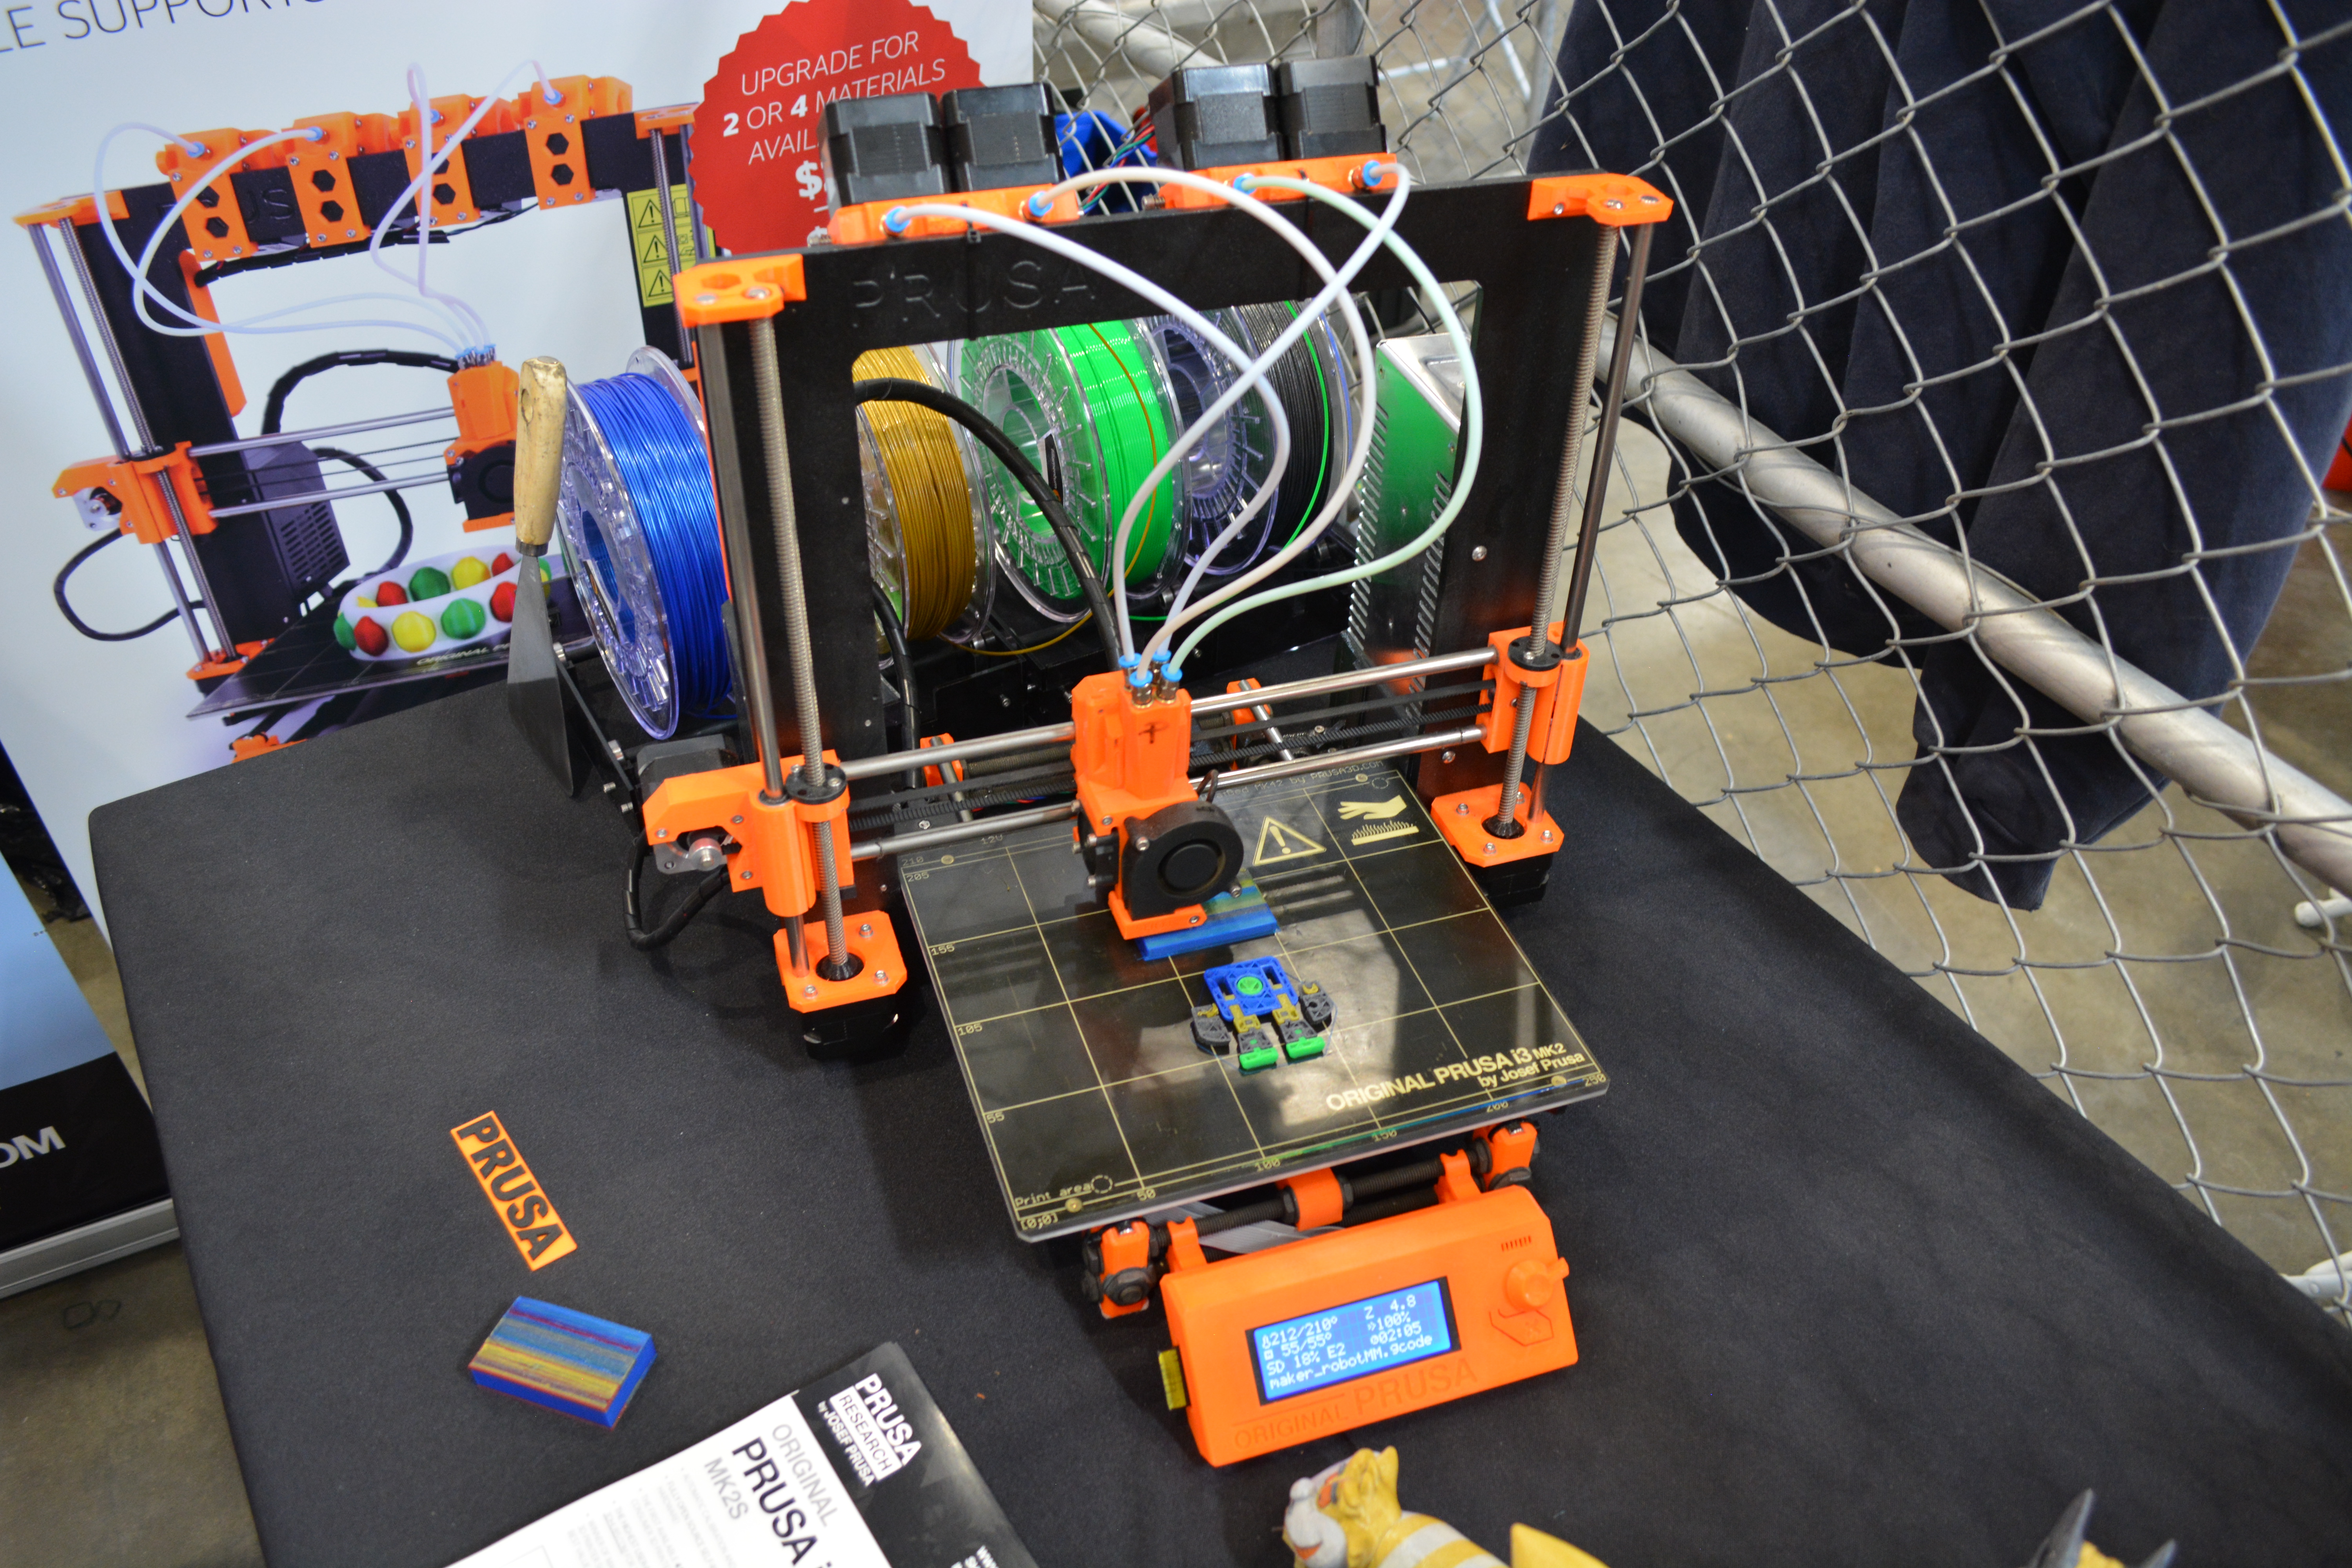
Prusa Research sidesteps this issue by using a single head. Four Bowden tubes all connect in a four-way splitter on the print head. When it’s time to switch materials the head travels to another part of the bed and purges the remains of the previous material before returning to the print with the new filament.


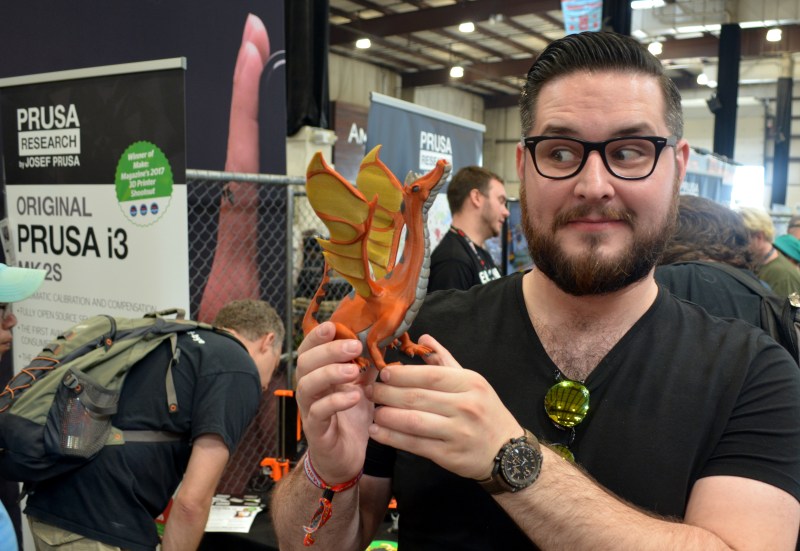
As you can see, the results are spectacular. The alignment of different materials is perfect. Add to this the already great resolution and printing capabilities of the Mk2 and you have another leap forward in affordable, high-quality printing. The printer itself starts at $699 and the multi-material upgrade is $299.


This is extremely cool! Now we just need a version that can switch between 16 different colors. :)
If you can mix them then you only need white, yellow, cyan, magenta and black.
You can’t mix, it’s one filament at a time to the print head. Didn’t this already get coverage a few months ago? I was also under the impression that it’s multi material capabilities were limited to those with a similar extrusion temperature.
Mixing is incredibly difficult. The viscosity if plastic means you need to mix a lot of each color. That means no sharp color changes.
its apparently doable. this company making one. its hella overpriced though. http://www.ordsolutions.com/rova4d-full-color-blender-3d-printer-pre-order/
You can do it much cheaper than that:
http://us.xyzprinting.com/us_en/Product/da-Vinci-2.0-Mix
The daVinci does not support rapid color blending, it’s just like the other low price solutions except that it uses proprietary filament.
From the way they’ve done this, it seems like with a bit of tweaking you’d just have to send different filaments through at the same time. You’d have to adjust the feeding to keep the pressure OK. Not an expert, but it seems like just a case of “some engineering required” rather than reinventing the Black-Hole Reverse-Quantum Drive.
Let’s be happy with the CGA version for a while before asking for the EGA version.
^ That.
/\ Somebody give this person a cookie!
Bit, nibble or byte size?
Megabyte, why skimp!
lol! Thx for taking me back a few years!
No, what we need is for Prusa to stop messing around and do something about the 7 week backlog he STILL HAS on orders for his 3d printer, 9 months after it was released.
Perhaps you have some experience and can suggest ways he can improve his supply chain??
Perhaps if there could be a hot chamber for mixing pigments in before the nozzle, we could have one single blank (i.e. transparent clear) filament, and add pigments as needed to tweak transparency and colour. With mixing controlled, we could get smooth transitions, or make a stop, purge, load new colour mix and continue.
Ditto for foreign particles (metal, ferrite, wood sawdust) additions
An interesting idea but it would require a fundamental redesign of the extruder’s functionality and may result in structurally weaker prints. It seems worth investigating though.
that is how pretty much how injection moulding prepares its plastic, mixing and extrusion is done through a heated auger though.
At the temps most extruders work at, dyes could diffuse quickly, and thoroughly.
We’ve been doing this since the early days of desktop 3D printing. A Sharpy is pressed against plain filament and the colours mix in the extruder.
It’s been made an automated process with the Shapries being pressed against the filament.
How well would that work for gradients?
Hmm, white filament with Cyan/Magenta/Yellow/Black sharpies surrounding it. Each on a servo that can optionally touch or not touch. Then, PWM each channel to get everything you could ever want.
Actually, there has been some action with adding color to white filament by pressing Sharpies against it, just before it goes into the extruder. Now it’s up to someone to take CMYK sharpies and make some kind of carriage that will color the filament on demand.
That’s basically just a solenoid and a bracket. Surprising that so much has been done to advance 3D printing, but this hack has been known about for however long and nobody’s worked on perfecting it.
Actually as far as the “bracket” goes you could 3D print that bit. And the solenoid’s core. So, wire, then.
Color mixing is theoretically possible with a pellet extruder but most likely getting high quality and the right colors will be really difficult to calibrate reliably:
https://www.youmagine.com/designs/universal-pellet-extruder-reprap-3d-printing
Spherical pellets could make something like that more reliable. I think the real problem you’ll face is getting the pellets to dispense without jamming.
Where’s that 300USD version on aliexpress? :wink:
These have been on ebay for a while – http://www.ebay.co.uk/itm/GEEETECH-Rostock-301-3d-printer-official-Delta-3-in-1-hotend-extruder-3-colors-/332171042573?hash=item4d56efdf0d:g:mxUAAOSwdzVXuqhS
Never seen a review of one, but it does claim to mix colours. Multi material slicing is tricky enough with >1 colour, I can’t imagine how you would slice for graduated prints.
Avoid these unless you want to spend the same amount of money to replace the crappy parts. And it will still wobble like crazy.
Which one is decent enough, feki00? Cost effectiveness in mind
The results look great but I don’t like the amount of waste it creates
Consider that most everything that you own that’s made out of plastic was injection molded. And injection molding inevitably leaves behind a significant mass of sprues and flash after trimming. Not to mention the energy consumed to keep the die and extruder at temperature for days on end.
injection molding machines work 24/7 and whatever is not part of product goes into grinder and back into machine. There are exception to what materials can be reused however.
Are you saying there could be a few unfortunate bits of plastic that always end up in the sprue in spite of having been through the cycle 14236994 times…? Dang, that’s harsh…
the amount of wasted material is insane… also, so much for “you don’t lose print space”, a big chunk of the bed must be dedicated to prime tower…
Lots of material waste, not being truly multi material is the reason why most other manufacturers (including us “Ultimaker”) are not doing this.
For example, you could never do this with PVA/Nylon (which is a great combination, as PVA sticks well to nylon and the other way around). But the PVA would burn up and clog your nozzle at Nylon temperatures.
True dual hotend systems just provide a lot more flexibility. For example using a 0.4 and 0.8 nozzle in the same print. Using a specialized nozzle for a certain material (like we do for PVA)
So, with a single point of entry for the filament, what about a way to rotate different hot ends e.g. have hot ends at different temps/sizes/used for different materials?
That is not so easy to make mechanically. Twisting wires become a thing, especially in rotating set ups. Robot cables are expensive. Also, the fans on the side of the hot end complicate things.
WHOA! I need to do this :D
Would it be possible to print in a hidden area while the transfer takes place? That way there wouldn’t be so much wasted material as the colour change filament would be dumped within the part instead.
That makes sense. Infill instead of a dump area? Probably trickier Gcode generation, but if it’s calculating for material changes anyway that shouldn’t be that difficult. If it’s done as solid infill, that ought to clear it pretty well.
Seems obvious to me, but if smarter people than me haven’t implemented it, there must be a reason…
I’ve seen it mentioned in the context of a slicer developer who hadn’t gotten around to implementing it yet.
In 3D printing there are lots of things people have though up, but haven’t implemented yet. (Non-horizontal layers for better bridging. Variable infill. Optimization for specified required load forces. etc.)
For non-horizontal layers, couldn’t you just tilt your finished object to whatever angle, before you sent it to the slicer?
Yeah my thoughts too. Use the transition material for infill.
What it needs is the same thing inkjet printers have, a prime/purge station and wiper. Have a blade at one end of the gantry to cut off the purging, with a chute to direct the waste away to a catch tank. No need for a prime/purge tower to waste a lot of material keeping up with the build height.
Most inkjet printers have an absorbent pad in the bottom of their case. It’s usually quite large, intended to last the lifetime of the printer. Some of the higher end HPs had an easily removable setup with a small pad. The whole thing could be hosed off with hot water in a sink to wash out the pad.
Such a setup on a FDM printer would be far less messy.
Stratasys has this kind of waste bin system.
Work out the problems with mixing, adhesion, and on/off control, and get dot matrix 3D printing (the “dots” being little blobs of varying-color plastic). Maybe about a googolplex times easier said than done.
Something like the Arburg Freeformer?
https://www.arburg.com/de/de/leistungsspektrum/additive-fertigung/system-freeformer/
It’s cool that he can print Blistex I guess. I mean I don’t have face herps or nothing, but its a neat trick. But isn’t it like trademarked or something? I mean wouldn’t P&G have a beef with you just printing tubes of their product?
Dude… you do know that the Blistex in the picture is real, and only in the picture to show scale, right?
You do realize that the Blistex is real and is only there for scale, right?
…and that I can double-post with the best of ’em
WHOOOSH!!!
It is but you have to print each carbon, hydrogen, nitrogen atom at a time. So prints take a long while. OTOH the feedstock is really cheap.
This would be handy for printing a squishy part (handle or case edges) over a rigid part. Think of meter cases, power tools, phone cases, etc..
or rubber tires with rigid rims in one piece…
Only problem is it can only print properly at 3 quite large resolutions once it’s been converted to the MM upgrade, and the waste tower is often bigger than the model you’re printing! Also as it’s a bowden setup printing with flex maybe very problematic!
I wonder if there is a plan to figure out less waste. I like the idea of printer knowing when its going to need to change colors and use the amount for the infill or support instead of just wipe on a separate area. I can’t wait to see if you guys figure this out because your guys printer is pretty awesome.
wow I needed to read this before sending insert the in between of __ printer and wipe should be wiping.