Prusa Picks Up The Pace With New MK4S Printer

One of the things you’re paying for when you buy a 3D printer from Prusa Research is, essentially, your next 3D printer. That’s because Prusa’s machines are designed to be upgraded and modified as time goes on. An upgrade kit is always released to allow each older printer to be converted into its successor, and while there’s occasionally been some debate about whether or not it’s the most cost-effective choice, at least it is a choice you have as an owner.

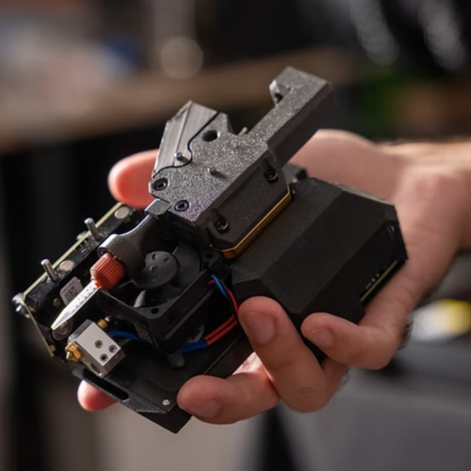
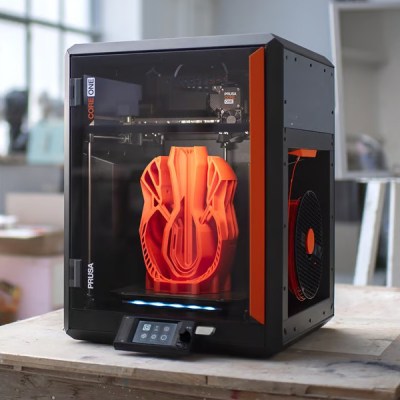
If you’ve got a Prusa MK4, you’ll soon get to make that decision for yourself. Announced earlier today, the new MK4S brings some notable changes to last year’s printer. The $99 upgrade is scheduled to be available by the end of the month for existing owners, but if you’ve been on the fence about joining Team Orange and Black, you can purchase the MK4S right now in both kit and assembled forms for the same price ($799 and $1,099 respectively) as the previous MK4.

Continue reading “Prusa Picks Up The Pace With New MK4S Printer”

FOSDEM Saved, With 3D Printing

If you were to consider what the most important component of a hacker event might be, the chances are you’d pick something that’s part of the program, the ambiance, or the culture. But as the organizers of FOSDEM in Brussels found out, what’s really the most important part of such an event is the toilet paper.

If you can’t keep the supplies coming, you’re in trouble, and since they only had one key for the dispensers across the whole event, they were heading for a sticky situation. But this is a hacker event, and our community is resourceful. The folks on the FreeCAD booth created a model of the key which they shared via the Ondsel collaboration tools, while those on the Prusa booth fired up their Prusa XL and ran off a set of keys to keep the event well supplied.

Perhaps for many of us, the act of running off a 3D model and printing it is such a mundane task as to be unremarkable — and indeed the speed at which they were able to do it points to it being a straightforward task for them. But the sight of a bunch of hardware hackers saving the event by doing what they do best is still one to warm the cockles of our hearts. We’re fairly certain it’s not the first time we’ve seen a bit of clandestine venue hacking save an event, but perhaps for the sake of those involved, we’d better not go into it.

Art of 3D printer in the middle of printing a Hackaday Jolly Wrencher logo

3D Printering: Speed Is So Hot Right Now

Speed in 3D printing hasn’t been super important to everyone. Certainly, users value speed. But some value quality even more highly, and if gaining quality means giving up speed, then so be it. That’s more or less how things stood for a while, but all things change.

The landscape of filament-based 3D printing over the past year or so has made one thing clear: the market’s gotten a taste of speed, and what was once the domain of enthusiasts installing and configuring custom firmware is now a baseline people will increasingly expect. After all, who doesn’t want faster prints if one doesn’t have to sacrifice quality in the process?

Speed vs. Quality: No Longer a Tradeoff

Historically, any meaningful increase in printing speed risked compromising quality. Increasing print speed can introduce artifacts like ringing or ghosting, as well as other issues. Printing faster can also highlight mechanical limitations or shortcomings that may not have been a problem at lower speeds. These issues can’t all be resolved by tightening some screws or following a calibration process.

The usual way to get into higher speed printing has been to install something like Klipper, and put the necessary work into configuring and calibrating for best results. Not everyone who prints wishes to go this route. In 3D printing there are always those more interested in the end result than in pushing the limits of the machine itself. For those folks, the benefits of speedy printing have generally come at too high a cost.

That’s no longer the case. One can now buy a printer that effectively self-calibrates, offers noticeably increased printing speeds over any earlier style machines, and does it at a reasonable price.

Continue reading “3D Printering: Speed Is So Hot Right Now”

Custom Prusa MK3 Fan Duct Gives Camera Perfect View

A growing trend is to mount a borescope “inspection camera” near a 3D printer’s nozzle to provide a unique up-close view of the action. Some argue that this perspective can provide valuable insight if you’re trying to fine tune your machine, but whether or not there’s a practical application for these sort of nozzle cams, certainly everyone can agree it makes for a pretty cool video.

[Caelestis Cosplay] recently decided to outfit his Prusa i3 MK3S+ with such a camera, and was kind enough to share the process in a write-up. The first step was to find a community-developed fan duct, which he then modified to hold the 7 mm camera module. Since the duct blows right on the printer’s nozzle, it provides an ideal vantage point.

The camera module included a few tiny SMD LEDs around the lens, but [Caelestis Cosplay] added holes to the fan duct to fit a pair of 3 mm white LEDs to really light things up. While modifying the printed parts took some effort, he says the hardest part of the whole build was salvaging a 5X lens from a handheld magnifier and filing it down so it would fit neatly over the camera. But judging by the sharp and bright demo video he’s provided, we’d say the extra effort was certainly worth it.

After covering how the camera rig was put together, [Caelestis Cosplay] then goes over how it was integrated into OctoPrint, including how the external LEDs are switched on and off. He’s running OctoPrint on a Raspberry Pi, though as we’ve covered recently, a small form factor desktop computer could just as easily run the show.

Continue reading “Custom Prusa MK3 Fan Duct Gives Camera Perfect View”

RotBot Adds A Extra Dimension To 3D Printing, With A Twist

It always seemed to us that the Z-axis on a 3D printer, or pretty much any CNC machine for that matter, is criminally underused. To have the X- and Y-axes working together to make smooth planar motions while the Z-axis just sits there waiting for its big moment, which ends up just moving the print head and the bed another fraction of a millimeter from each other just doesn’t seem fair. Can’t the Z-axis have a little more fun?

Of course it can, and while non-planar 3D printing is nothing new, [Stefan] over at CNC Kitchen shows us a literal twist on the concept with this four-axis non-planar printer. For obvious reasons, it’s called the “RotBot,” and it comes via the Zurich University of Applied Sciences, where [Michael Wüthrich] and colleagues have been experimenting with different slicing strategies to make overhang printing more manageable. The hardware side of things is actually pretty intuitive, especially if you’ve ever seen an industrial waterjet cutter in action. They modified a Prusa printer by adding a rotating extension to the print head, putting the nozzle at a 45° angle to the print bed. A slip ring connects the heater and fan and allows the head to rotate 360°, with the extruder living above the swiveling head.

On the software side, the Zurich team came up with some clever workarounds to make conical slicing work using off-the-shelf slicers. As [Stefan] explains, the team used a “pre-deformation” step to warp the model and trick the slicer into generating the conical G-code. The G-code is then back-transformed in exactly the opposite process as pre-deformation before being fed to the printer. The transformation steps are done with a bit of Python code, and the results are pretty neat. Watching the four axes all work together simultaneously is quite satisfying, as are the huge overhangs with no visible means of support.

The academic paper on this is probably worth a read, and thankfully, the code for everything is all open-sourced. We’re interested to see if this catches on with the community.

Continue reading “RotBot Adds A Extra Dimension To 3D Printing, With A Twist”

The Prints Don’t Stop With This Prusa I3 MK3 Mod

One of the issues with 3D printing is that when a print is done, you need to go back and pull the print off the bed to reset it for the next one. What if you needed to print 600 little parts for whatever reason? Most people might say get lots of printers and queue them up. Not [Pierre Trappe], as he decided that his Prusa i3 MK3S+ would print continuously.

The setup was dubbed Loop and consisted of a few parts. First, there’s an arm that sweeps the build plate to clear the printed pieces, a slide for the pieces to descend on, and a stand for the printer to sit on that puts it at an angle. The next step is to modify OctoPrint to allow a continuous print queue. The slicer needs to change as [Pierre] provides some G-code to reset the printer and clear the print.

We were especially impressed with the attention to detail in the documentation for this one. There’s extensive guidance on getting the bed adhesion just right, as you can’t have it come off mid-print, but you need it to detach cleanly and easily when the arm sweeps across the bed. Calibrating that first layer is essential, and he provides handy instructions to dial it in. Additionally, temperature and material play a crucial role, and [Pierre] documented the different materials and temperatures he used while developing Loop.

While continuous belt printers are arguably the “correct” answer to the question of printing 600 little parts, they come with their own baggage. Being able to pull off something similar on a printer as reliable and well supported as the Prusa i3 makes for a compelling alternative.

Continue reading “The Prints Don’t Stop With This Prusa I3 MK3 Mod”

Prusa’s Official Enclosure Pulls Out All The Stops

It’s well known in the desktop 3D printing world that you get what you pay for. If you want to spend under $300 USD, you get a Creality Ender 3 and deal with its slightly half-baked nature. Or if you’ve got the money to burn, you buy a Prusa i3 MK3 and know that you’ll remain on the cutting edge thanks to a constantly evolving slicer and regular hardware revisions.

Now it stands to reason that an expensive product will have expensive accessories, but even still, the recently unveiled “Original Prusa Enclosure” is sure to induce a bit of sticker shock in even the most ardent of [Josef Průša]’s fans — the most bare-bones configuration of the 10 kg (22 lbs) box rings up at $349 USD. You read that right, just the enclosure for Prusa’s flagship machine costs more than the average Chinese 3D printer. In fact it costs as much as the kit version of the Prusa Mini, which incidentally, is set to get its own version of the enclosure sometime in the future. If you select all the bells and whistles, a fully-decked out Prusa Enclosure will cost you $700 USD, plus shipping.

Continue reading “Prusa’s Official Enclosure Pulls Out All The Stops”