It’s the eternal question hackers face: do you built it, or do you buy it? The low cost and high availability of electronic gadgets means we increasingly take the latter option. Especially since it often ends up that building your own version will cost more than just buying a commercial product; and that’s before you factor in the time you’ll spend working on it.
 But such concerns clearly don’t phase [Andrea Cavalli]. Sure he could just buy a scientific calculator, but it wouldn’t really be his scientific calculator. Instead, he’s taking the scenic route and building his own scientific calculator from scratch. The case is 3D printed, the PCB is custom, and even the software is his own creation.
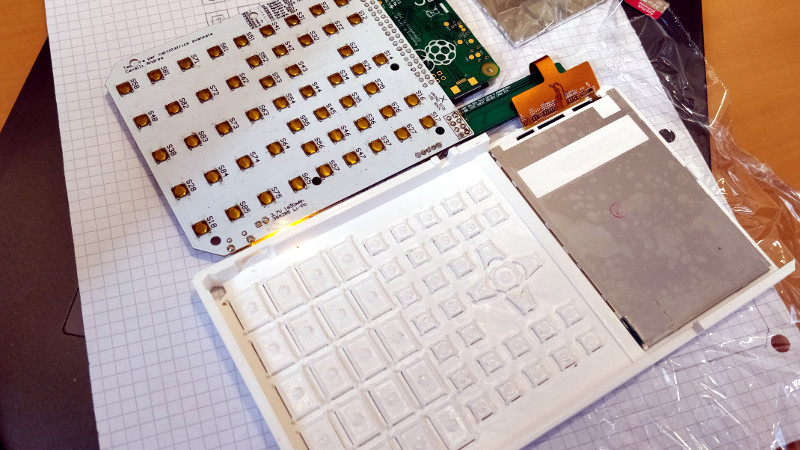
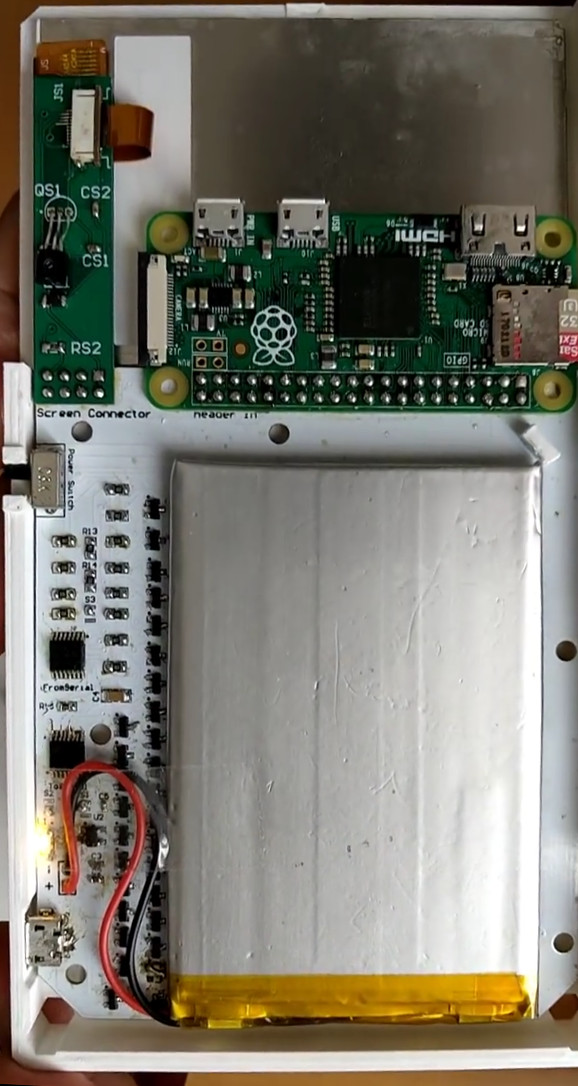
His PCB hooks right up to the GPIO pins of the internal Raspberry Pi Zero, making interfacing with the dome switch keyboard very easy. The board also holds the power management hardware for the device, including the physical power switch, USB connection for charging, and TPS79942DDCR linear regulator.
The case, including the buttons, is entirely 3D printed. At this point the buttons don’t actually have any labels on them, which presumably makes the calculator more than a little challenging to use, but no doubt [Andrea] is working on that for a later revision of the hardware. A particularly nice detail is the hatch to access the Pi’s micro SD card, making it easy to update the software or completely switch operating systems without having to take the calculator apart.
After the kernel messages scroll by, the Pi boots right into the Java calculator environment. This gives the user a fairly standard scientific calculator experience, complete with nice touches like variable highlighting. The Mario mini-game probably isn’t strictly required, but if you’re writing the code for your own calculator you can do whatever you want.
Here at Hackaday we’ve seen a calculator that got a Raspberry Pi upgrade, a classic scientific calculator emulated with an Arduino, and of course we’ve raved about the NumWorks open source graphing calculator. Even with such stiff competition, we think this project is well on its way to being one of the most impressive calculators we’ve ever come across.


There’s that old TI30 feeling again: Having to carry around at least 2 replacement batteries, because it sucks them dry in no time.
Really? We (classmates) just carried around the wall wart for the rechargeable battery pack.
And how many outlets did YOU have in your classrooms back then? I’ve seen people nearly come to blows during exams…
Sounds like engineering school used to be more fun, or at least more physically demanding!
There was also more crying
WOW, it’s pretty big project, especially custom java software. I thought more straight approach would be running/emulating some existing calculator software, for example HP48, but with Pi inside you can also run Octave, Maxima or even this pi-edition of Mathematica which would make it extremely powerfull. Programming NumWorks is based on Micropython and here you can have real python with any libraries and IPython/Jupyter which also could be great if sensibly coupled with keyboard.
lol. y*y / y²…
One wonders what one was thinking, doesn’t one? One.
One might even wonder why.
One is the loneliest number.
– Three Dog Night
Isn’t this a repeat
Doesn’t seem like it. Are you thinking of the NumWorks calc?
When I started this project NumWorks didn’t exist.
I think the advantage of writing your own from scratch is getting it right. I personally find a lot of calculators fall short in one area or another so using an emulator would perpetuate the problem.
But having multiple emulators… you can pick and choose when you use HP software, or TI software, or even mathematica, leverage the strengths of each while not bothering to use the weaker functionality.
And While I appreciate the hubris of believing you might get it right where others have failed before, seems like the best of all worlds would be emulators alongside a customized version… so at boot you can choose, HP, TI, Mathematica, Custom rolled software, etc… find an issue in the custom rolled software but need the functionality now? TI, HP, Mathematica, one of them probably has you covered…
“It’s the eternal question hackers face: do you built it, or do you buy it? The low cost and high availability of electronic gadgets means we increasingly take the latter option.”
Well, level of skill as well. Just because ingredients are cheap doesn’t make us all cooks.
What screen connector is he using? I can’t seem to read the number on it in any of the photos or video. I’m guessing it’s something off the shelf since the PCB is green instead of white. That looks incredibly compact compared to everything I’ve seen that stacks on top of the Pi headers.
It’s a compact version of the official PCB of that screen.
I made it because of the limited space available. There is no reason on the choice of the color.
So what screen are you using? That’s super cool how compact you got that!
This 3.5″ TFT LCD
http://www.neosecsolutions.com/products.php?28
Wow! That’s amazing how much more compact you made that PCB!
Nice one Cavallium.
Do you plan to publish the mechanical design files too?
I’m pretty keen to replicate your build – have always wanted a calculator running SpeedCrunch.
Ok, I will publish the STL files on Thingiverse today.
Here you are
https://www.thingiverse.com/thing:3040116
Brilliant. Thanks a bunch!
I’ll let you know how it turns out.