Clocks are a popular project on Hackaday. They’re a great way to showcase a whole range of creative build techniques, and can make an excellent showpiece as well. We’ve seen everything from the blinkiest binary build to the noisiest alarms, but [Benoit] has delivered something different — a stylish build that looks like it came right off the store shelf.
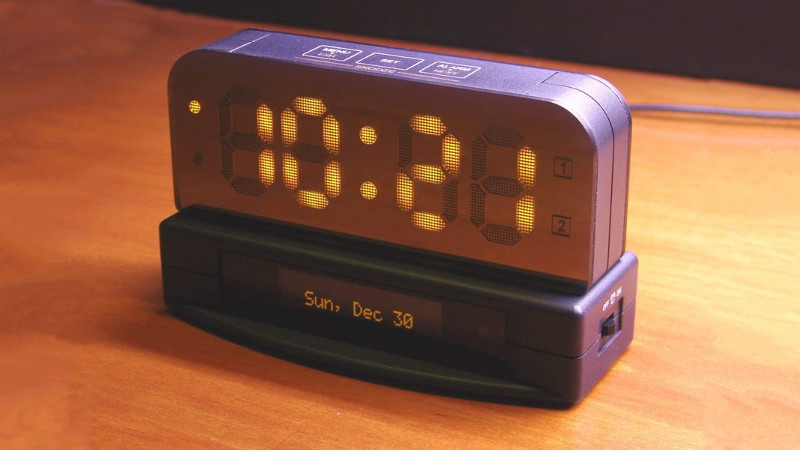
The clock features a large 7-segment display built with IN-PI554FCH LEDs, which are similiar to the popular WS2812Bs but with lower power consumption. There’s also an OLED display for reading the date and going through menus, capacitive touch buttons for control and an Arduino Mega to tie everything together.
The real party piece is the enclosure, however. [Benoit] spent significant time honing a process to get a nice surface finish on Shapeways SLS parts. The 3D printed components are first cleaned with a toothbrush to free any loose powder, before several stages of primer, sanding, and paint. The final product is then finished with decals that lend the device that perfect factory look. If you’re eager to replicate the build, the parts are available at Github.
[Benoit]’s clock is a great example of what can be achieved by the home builder who is willing to wait a couple weeks for high quality 3D printed parts and decals to ship. It’s not [Benoit]’s first build to grace these hallowed pages, either – his transparent clock runs Linux!


Shapeways… I was hoping for some amazing new DIY printing technique :/
me too :/
Right? So, it looks like store bought, because it uses store-bought plastic pieces.
I designed those plastic parts so no they are not store-bought…
i used Shapeways simply because it was more convenient for me as i don’t own a 3D printer… The same technique can be used to finish 3D parts from anywhere. In fact, in an earlier prototype, i used 3DHub to find someone in my area with a standard 3D printer and was able to obtain the same finish.
Well I don’t see an Arduino Mega and jumper wires to various modules so the professional finish is more than skin deep with a custom PCB. With Wi-Fi it would be able to support NTP and with a DS3231 which includes a TCXO it will keep time accurately. You won’t get that in even top end store bought products.
I have seen how well the DS3231 keeps time over a year and it’s really pretty amazing. But with the ESP8266 and even cheaper WiFi chips I can’t even imagine building a clock now without WiFi NTP.
Because a lot of clock designs use NMEA GPS for time, I’ve considered writing ESP866 code to “retrofit” GPS based clocks to WiFi, where the ESP8266 would get NTP and emit fake NMEA messages after web-based setup.
Yeah that makes it at least not a total nightmare. Those SLS parts survive painting and sanding way better than PLA strings…
Ah, that don’t look store bought, it looks better!
Really impressive, I love how much work has gone into refining every single stage of the project!
Ahem – that’s an INDUSTRIAL 3d printer…
This alarm is beautiful
Hmmm… I’m slightly surprised how most comments seem to concentrate on the fact that the printer used wasn’t a DIY version, but a professional one. I have to admit that I also didn’t expect this but there is so much more to this build then printing some parts!
The photos show the great details, time and effort put into the lettering and finishing of the part. But also keep in mind that this parts had to be designed/drawn first. In other words, plenty of case building skills are required to pull this off and I must say a job very well done!
I must now stop my commenting and go back to watching the project photos as there are many this for me to learn from.
Thanks for posting.
+1
hey, that’s my birthday!
it looks very good, I think I’ll give it a try at replicating it.
thank’s for the article.
From where can i get the top display?
hello congratulations for the project. I wanted to know, there is material used for stickers on the 3D pieces