Cheaply Charging Cylindrical Cells

For one reason or another, a lot of us have a bunch of 18650 cells sitting around. Whether they’re for flashlights, our fancy new vape pen, remote controlled toys, or something more obscure, there is a need to charge a bunch of lithium ion cells all at once. This project, by [Daren Schwenke], is the way to do it. It’ll charge ten 18650 cells quickly using a stock ATX power supply and less than twenty bucks in Amazon Prime parts.

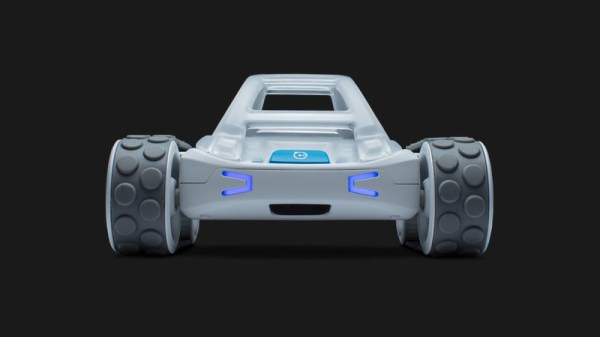
The idea began when [Daren] realized his desktop lithium ion charger took between 4-6 hours to fully charge two 18650 cells. With a Mountainboard project, or a big ‘ol electric skateboard waiting in the wings, [Daren] realized there had to be a better solution to charging a bunch of 18650 cells. There is, and it’s those twenty bucks at Amazon and a few 3D printed parts.

The relevant parts are just a ten-pack of 18650 cell holders (with PC pins) and a ten-pack of 5V, 1A charging modules (non-referral Amazon link, support truly independent journalism) meant to be the brains of a small USB power bank. These parts were wired up to the 5V rail of a discarded ATX power supply (free, because you can scavenge these anywhere, and everything was wrapped up with a neat little 3D printed mount.

Is this the safest way to charge lithium ion cells? No, because you can build a similar project with bailing wire. There is no reverse polarity protection, and if there’s one thing you never want to do, it’s reverse the polarity. This is, however, a very effective and very cheap solution to charging a bunch of batteries. It does what it says it’ll do, nothing more.

Visualizing Eddy Currents

If [Electroboom] gives up making videos and decides to become a lounge lizard in the Poconos, we hope he adopts the stage name Eddy Currents. However, he is talking about eddy currents in his recent video post that you can see below.

We know he doesn’t really think he can get the magnet to slow down with one sheet of aluminum foil and that he stages at least most of his little electric accidents, but we still enjoy watching it. Meanwhile, he also has a good explanation of why a copper pipe will slow down a magnet and how eddy current affects transformer efficiency.

Continue reading “Visualizing Eddy Currents”

Sphero RVR’s Quest For A Niche In Introductory Robotics

Thanks to internet commerce opening up a global marketplace, it is now easier than ever for a budding roboticist to get started. There are so many robot kits available, across such a wide range of price and sophistication, that deciding which one to buy becomes a challenging project in itself. Is there room for another product in the crowded introductory robotics market? Sphero believes so, and they’ve launched RVR to explore not just workshops and classrooms, but also to see if they can find a market niche.

At the low end of this market, we can go online and buy a super simple chassis – two small wheeled gear motors and a chassis plate of laser-cut acrylic – for pizza money. At the high end, we have robots that cost as much as a car. Sphero’s RVR slots somewhere above Wonder Workshop’s Dash, but below LEGO’s Mindstrom EV3. Products in this range are expected to take care of low-level motion control details, so beginners won’t get bogged down by things like PID tuning before their robot can drive in a straight line. Sphero engineers are certainly capable of hiding such annoying details from beginners, with their experience in consumer robotics.

But a big selling point here is completely opposite from closed-box consumer electronics: RVR is built to be extensible. Not with proprietary accessories & add-on kits like many of its competitors, but with the components we know and love on Hackaday pages: Raspberry Pi, micro:bit, and whatever else willing to communicate with RVR via its UART port and powered by RVR’s on board five volt power supply. Proper care and feeding of a lithium-ion battery is also one of the beginner-unfriendly details taken care of. But RVR isn’t finalized – one of the reason Sphero stated for launching via Kickstarter is to get customer feedback. Certainly the funding goal of $150,000 (easily met in a few hours) was unlikely to be the most important part for a company of Sphero’s size.

We hope RVR will help introduce a new audience to building their own robots. When they’re ready to grow beyond Sphero’s kit, Hackaday is happy to help show the way. If you have a 3D printer, there’s never been a better time to build your own robot. (Zerobot is on one editor’s to-do list.) Those fascinated by electronics can peek under the covers of low-level motor control, and there’s always room to explore high level machine vision and neural networks.

Whatever it takes to get you started, just get started!

Continue reading “Sphero RVR’s Quest For A Niche In Introductory Robotics”

Building A 1.4W Laser Pointer In A Tiny Housing

Laser pointers were cool for about 30 seconds when they first came out, before becoming immediately passé and doing absolutely nothing to improve the boss’s quarterly reports presentation. However, just as with boom boxes and sports cars, more power can always make things better. [Styropyro] was unimpressed with the weak and unreliable laser pointers he’d sourced from eBay, so gutted one and began a fresh build.

After fiddling with some basic 1mW eBay green lasers, [styropyro] had some fun turning up the wick by fiddling with the internal trimpots. This led to the quick and untimely death of the cheap laser diodes, leaving a compact laser pointer shell ripe for the hacking.

To replace the underwhelming stock components, [styropyro] chose a Nichia NDG7475 high-powered laser diode, fitting it into a small heatsink for thermal management. Current draw was far too high to use the original switch, so the stock housing’s button is instead used to switch a MOSFET which delivers the full current to the laser driver. To reach the higher output power of 1.4W, the laser diode is being run over specification at 2.3 amps. All this current draw would quickly overwhelm standard AAA batteries, so a pair of lithium polymer 10440 batteries are substituted in to do the job.

The build shows that with clever parts selection and some easy hand soldering, you too can build an incredibly dangerous laser pointer at home, that fits neatly in your shirt pocket. Alternatively, you might prefer something on the larger scale. Video after the break.

Continue reading “Building A 1.4W Laser Pointer In A Tiny Housing”

3D Printed Alarm Clock Looks Just Like Store Bought

Clocks are a popular project on Hackaday. They’re a great way to showcase a whole range of creative build techniques, and can make an excellent showpiece as well. We’ve seen everything from the blinkiest binary build to the noisiest alarms, but [Benoit] has delivered something different — a stylish build that looks like it came right off the store shelf.

The clock features a large 7-segment display built with IN-PI554FCH LEDs, which are similiar to the popular WS2812Bs but with lower power consumption. There’s also an OLED display for reading the date and going through menus, capacitive touch buttons for control and an Arduino Mega to tie everything together.

The real party piece is the enclosure, however. [Benoit] spent significant time honing a process to get a nice surface finish on Shapeways SLS parts. The 3D printed components are first cleaned with a toothbrush to free any loose powder, before several stages of primer, sanding, and paint. The final product is then finished with decals that lend the device that perfect factory look. If you’re eager to replicate the build, the parts are available at Github.

[Benoit]’s clock is a great example of what can be achieved by the home builder who is willing to wait a couple weeks for high quality 3D printed parts and decals to ship. It’s not [Benoit]’s first build to grace these hallowed pages, either – his transparent clock runs Linux!

Ask Hackaday: Is There A Legit Use For Operator Precedence?

Computing is really all about order. If you can take data, apply an operation to it, and get the same result every single time, then you have a stable and reliable computing system.

So it makes total sense that there is Operator Precedence. This is also called Order of Operations, and it dictates which computations will be performed first, and which will be performed last. To get the same results every time, you must perform addition, multiplication, power functions, bitwise math, and all other calculations in a codified order.

The question I’ve had on my mind lately is, does this matter to us or just the compiler?

Continue reading “Ask Hackaday: Is There A Legit Use For Operator Precedence?”

Flux Engine Reads Floppies

It is a bit of a paradox that we are storing more and more information digitally, yet every year more and more of it is becoming harder to access. Data on a variety of tapes and disks that were once common, is now trapped on media due to lack of hardware to read it. Do you have a ZIP drive? Do you have a computer that it will work with? Floppies are problem too. You might think you beat the system just by having a USB floppy drive. While these do exist, they typically won’t read oddball formats. That is, except for Flux Engine, an open source USB floppy drive.

The device uses a $15 Cypress development board and just some wiring (along with a 3.5 or 5.25 floppy drive, of course). Currently, the firmware only supports read only access to IBM standard disks and Acorn DFS/ADFS disks. It can also read and write Brother word processor disks. However, being open source, it could do more. The author, [David Given], is looking for Commodore 1541 and Apple CLV disks to borrow so he can get those working. He’s also offered to entertain other formats if you are willing to loan him a disk.

The software uses libusb and is known to work on Linux and Windows with Cygwin. It should also work with OSX. However, you will need a Windows box of some sort to build the Cypress firmware because the Cypress tools won’t work anywhere else. [David] wants to change processors because of this, but if he does, he’ll miss the PSoC function blocks, we are guessing.

The design is actually rather simple. The firmware only measures the time between flux transitions and sends them to the attached PC. All the heavy lifting occurs on the PC, which means it should be pretty easy to analyze and decode new formats. While writing is possible, it appears there is more work that needs to happen to make it reliable. [David] comments that you really need a real drive to test your writing with so you don’t write things only you can read back. Makes sense.

This certainly is more user-friendly than the last method we looked at. We had to wonder if [David] has thought about 8-inch floppies.