Does your drill go as fast as the manufacturer says it will? Well, you’d need a tachometer to figure that out. They’re not that expensive to buy, but as [Elite Worm] shows, they’re not that expensive to make, either — about $10 total if you get your parts from the right places. Lucky for you, he has links to everything.
Really, the links are just the tip of the iceberg here as far as the gifts that [Elite Worm] bestows upon those who choose to undertake this project. The build video (after the break, as usual; our favor to you) is fantastic, and would be perfect for a beginner because of the entrancing speed at which he builds it. The video is straight up relaxing to watch, whether you want to build one or not.
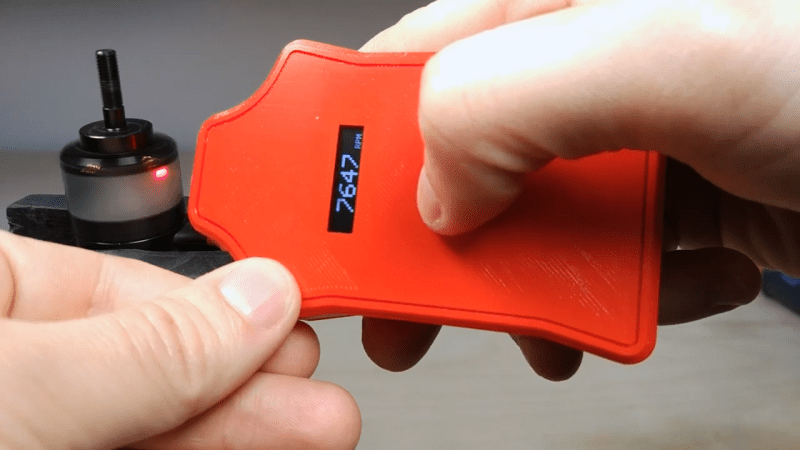
It’s a fairly simple circuit — just push the momentary switch, and the laser diode and sensor pair count the revolutions over one second. The Arduino Nano multiplies this number by 60 and displays the RPM on the OLED screen. What we absolutely love about this build is the care that taken in designing the case. There’s a designated spot for each component, and the ones without their own special holder are kept in place with printed crossbar pieces. [Elite Worm] says this has a higher refresh rate than his store-bought tacho, and we say it looks way cooler, too.
Still don’t want to make one yourself? Well, okay. Before you buy one, try using your phone to calculate RPM.
Via r/duino


Looks like one could gin this up on a breadboard with one of those sensor kits, so great for learning. If you don’t have a handy display you could have it report RPM back to the console. Don’t necessarily need a dot matrix one either, 4 figure 7 segment types are rather easy to dig out of the junk pile, whether it was a tony the tiger free in a cereal box pedometer or a larger clock. Check for sketch segments for driving these, or write your own. Ideas for cases should you not have 3D printer access are stick deodorant containers, smaller oval toiletry bottles, maybe a hard glasses case, some toys may work also, sawn off water pistol for example.
I’m definitely building one of these, and I have 98% of the components within about 3 feet of me right now! Very cool, never thought something like this would be as feasible as this.
Nicely done. Looks professional. Can’t argue with the results.
Does anyone know what photo-transistor those china modules use? I guess something
which reacts mostly to the standard red wavelengths? The rest of the “circuit” seems like standard
circuitry for a photo-transistor anyway….
I’m seeing a part number of IS0103 for the photodiode, but none of the usual sources (digikey, arrow, lcsc, newark) seem to carry it. You can find a datasheet on it, so I’m trying to identify another part with similar specs. Will post if I do, because I’d like to build one of these all on one board vs. using a standard nano, display and other modules.
Thanks for the tip. Found this site with a few specs: https://www.aliexpress.com/item/32815040232.html?spm=a2g0o.productlist.0.0.7a9768e1eosKxO&algo_pvid=498c7101-8f23-43d6-a054-77445e7cb47c&algo_expid=498c7101-8f23-43d6-a054-77445e7cb47c-0&btsid=0b0a187915816132632741491ea3a2&ws_ab_test=searchweb0_0,searchweb201602_,searchweb201603_
Seems like it has an voltage regulator, amp and schmitt-trigger included. Wavelengths 400 – 1000nm are supported with a peak at 900nm.
Fun tip: in an URL you can omit everything after and the question mark itself.
So just https://www.aliexpress.com/item/32815040232.html works.
That’s heavily dependent on how the site is coded though.
This looks about as close as I can find. Going to order a few and see if they work.
https://www.digikey.com/product-detail/en/OPL560-OCA/365-2073-ND/1637969/?itemSeq=317684527
Huh, that’s more expensive than buying modules on eBay ;)
Thanks for checking though, the datasheet reads exactly like the one above function-wise!
“Huh, that’s more expensive than buying modules on eBay ;)”
Yea, sucks, I know, but being able to build it all on one PCB is worth it for me at least.
““Huh, that’s more expensive than buying modules on eBay ;)”
Yea, sucks, I know, but being able to build it all on one PCB is worth it for me at least.”
With that I meant: Why not buy the cheap module and snip the laser-sensor off the board?
not even a single text based write-up?
no time for videos. wont watch when the maker is too lazy to provide a github or other readable site.
the u-tube only submissions SUCK. makers should friggin know better. and this site should REQUIRE more than just videos.
why do you guys encourage this bad behavior?
If you click through and look at the description of the video, there is a write up and a git hub project with the code. It may not be a textbook level write up but there certainly is some documentation to go with it. How is it the makers responsibility to cater to your needs? They designed a project, compiled the resources, and put it out there for free.
I agree with Cole. I was able to find plenty of details between the bill of materials and connection mapping typed out int he YouTube description, and the available info on the GitHub repo you can get all the info you need without watching the video. You could also watch the video…
I have two friends who were trying to make a living posting hacker/maker stuff, with excellent documentation and copious write-ups, on their blogs. They both moved to video on youtube and get 20-100 times the response (one is getting 20 times, the other 100 times, hence the variation) and this is with a pretty good database of several dozen posts and several dozen videos.
If you want lots of people to see it, you put a video on youtube. If you want a few dozen people to read through all the work you’ve put into something, you do a text-based writeup. It sucks, but it’s not laziness, it’s realism.
It depends, though, on whether what you want is for people to *see* it or for people to *understand* it. Perhaps a larger percentage of the readers of the excellently documented projects actually make the projects, as opposed to just looking and thinking “This is cool.”
Of course, if you’re trying to make a living, then your priorities might be different, and that’s understandable.
I also understand that sometimes it’s faster to make a video, and our time is limited.
Or he could’ve just not posted anything at all, which do you prefer? Calling someone lazy for not catering to your preferred format is pretty damn disrespectful.
+1
Though I prefer mostly-text write-ups as well, I won’t complain if a video is all I got.
Just look at Youtube channels like Applied Science and so on. Image trying to transfer all that content into text and images, he’d need to write books for that…
Totally agree. There’s enough info in the video’s description, links to the components, program, case files. Complaining that it’s not a formal write up is really petty and arrogant. I’d say 95% of what I’ve learned about electronics has come from YouTube videos.
I post projects in YouTube only format because it is an approachable format for most people. Video is also an easy format for maker/creators, it’s a lot easy to show and tell than it is to sit down and write the Arch Wiki, particularly if the writer is not the IT minded, hacker variety.
An arduino tach isn’t breaking new ground its making electronics accessible to new people. Presenting a 0-day via snapchat or twitter is bad behavior.
I once just attached an LED to the microphone input on my phone, put something reflective on one side of the axis, shone a flashlight and got the rotation speed with a free audio input oscilloscope app. LEDs work in both directions: electricity to light and light to electricity. The cost was about $1: I just needed a 3.5mm jack.
Genius!
That’s really clever… And also a very niche reason to demand a phone with a headphone jack ;-)
The sensor can be found here as sharp IS485 and IS486. Its an amplified optical sensor see datasheet OR see OPIC sensors hence the three pins for being an active device. Probably some other equivalents by other manufacturers.