[Teaching Tech] sprung about $80 or a kit to add dual extrusion to his 3D printer, plus another $20 for an accessory kit. He did get it to work well, but it wasn’t without problems which he covers in the video below.
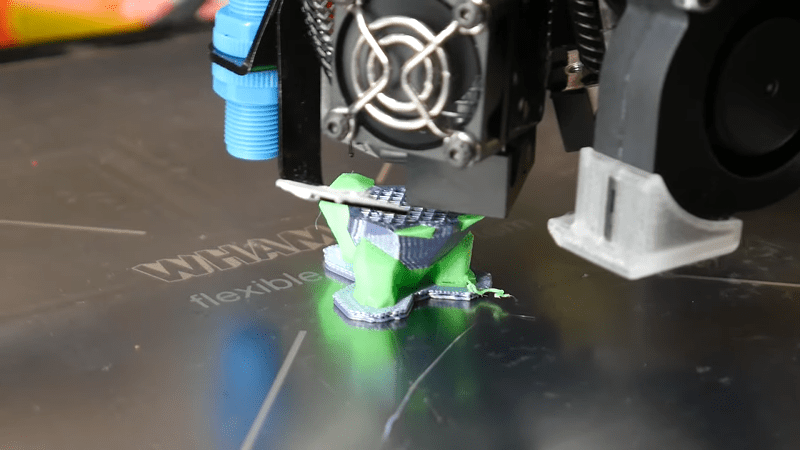
The design of the head uses a servo to swing two hot ends to — in theory — the same point. Each hot end has an ooze shield, so you don’t need to deal with that in your G-code by building a priming tower. However, there are some requirements for your printer.
For one thing, the carriage is made to fit on a 2020 V Slot. You might be able to adapt it to something else. The assembly is pretty big. In the video, it seems this reduced the build surface in the Y and Z axis by 50mm. The auto level sensor requires a metal bed, although you could fix that pretty easily. Of course, you also need a controller board that can handle 5 stepper outputs.
One thing [Teaching Tech] mentions that should be obvious is that you need a Bowden extruder. The kit comes with one, and presumably, you’ll use the other from your existing setup.
Most of the kit is pretty standard fare, but the servo bracket and high-torque servo is really the secret sauce to this dual extruder. However, there were quite a few finicky issues with putting things together and calibration looked like a lot of work, too.
It didn’t help that the servo died and it sounds like that happens often. It may be related to driving the servo beyond its stops. The bed leveling sensor also died. Still, when it was all done it did seem to work well.
Most people install two heads with an offset. Of course, you could just use the servo to move a gear instead of the whole hot end.


The servo is an interesting idea, but why not just throw a small stepper motor on there with a gear? Seems like it would be lighter and more reliable than the servo.
Do you even need a motor that you need angular position for, you need two set positions, not needing to know every 0.1 of a degree in between. Just any old motor with limit stops would seem to satisfy this.
Or a solenoid with a solid stop at each end of it’s travel.
The solenoid would be my choice – nice bistable sprung mechanism driven by it. Which should also be easy to configure end stop screw for each resting location to allow minor tweaks.
RW’s idea is sound, but seems a bit slow or bulky to me comparatively, though I’d happily use a premade system that made use of it well.
Servo’s really don’t make sense here, in my limited experience with them they are really not good warmed up much at all either… So a dud choice for that reason too.
Yes I was thinking of bistable sprung detents as well, but driven off an eccentric, only need to drive the motor one direction.
Could have a two lobed cam on the shaft that engages a microswitch to switch current to the motor, then disengage, drop off the cam at the right position. Then you don’t need to precisely time the rotation, just give it a fuzzy timed portion of the turn to get the microswitch engaged again, which keeps it running until cam releases it and it stops again. Worm drive the actuator wheel with the eccentric and it won’t go too far or backlash.
A servo just requires one PWM output from the mainboard, and the software already supports it.
None of the other choices offers a simpler solution.
If you can point me to a stepper motor that’s smaller, stronger, and cheaper than a $5 hobby servo, I’d appreciate it.
Well it was a $5 solution for a $10 problem.
stepper motors are heavy and only as reliable as their controller
Man, I seem to have enough trouble getting one extruder to work correctly.
I second that. Haven’t touched my printer in almost a year because I don’t have time to tinker with it every time I just want to print something.
Getting the right printer is a big factor. While I occasionally tinker with my Prusa i3 Mk2.5S (mainly simple maintenance and an upgrade once in a while) it’s mostly fuss-free and just works.
I’m wondering if it’s like how people fix marriages. It’s too hard to deal with one person, so you add a child and expect that to make it easier.
It does, because with that addition, you’ll finally realize a divorce is required to avoid so many breaking change. You’ll probably realize that the right language used at first was not good, and a complete rewrite is required for a version 2.0.
The hardest job here is to find someone else to support the maintenance of the old version…
I hear you, man. I hear you!
It’s an interesting approach to dual extrusion, with out going to the considerably higher expense of something like the Mosaic Palette 2. However, for a similar price and I’m thinking not quite as ‘fiddly’ an approach, there’s the 3D Chameleon. Yes, the Chameleon wastes more filament with purges, but I’m thinking that’s worth it for a lower level of frustration!
I’ve seen some prints where there’s more plastic in the purge tower than in the model. I’m thinking the best approach is the tool changer.
I dont know why people dont try a much simpler approach . Just ram the head on one side of the printer to tilt it left and then ram it the other side to tilit it back. All you need is a pivot which laches on to a magnet and some gcode for tool change.
Would some teeter-totter (seesaw) arrangement activated by pushing the head into a clear bit of bed be quicker. Unless you do a lot of really tall prints, I’d imagine an empty bit of bed would be nearer than the extremes of x or y motion.
Depends on printer, typically moving head in X is way faster than Z.
I’d imagine this would cause issues with consistent hot end alignment.
This is exactly how Stratasys applies this exact head switching method on the $50,000 dimension printers.
I wonder if it would be possible to prepare a unique filament by stitching multiple color filament based on computed extrusion length for each single color. That way, you’d only need a single extruder.
So basically a Mosaic Palette 2.
Or a Prusa MMU.
I’m surprised that no one has mentioned that this is how Stratasys has done filament switching on their printers for years.