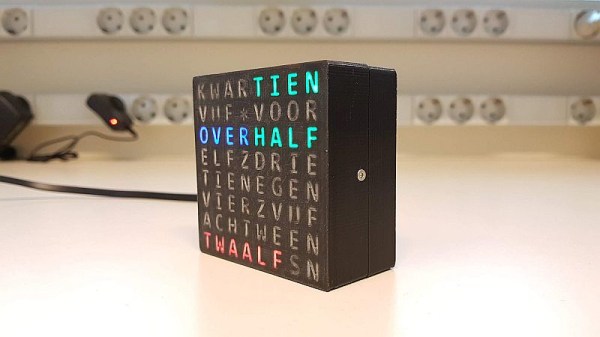
The word clock on a desk, with "tien", "over", "half" and "twaalf" lit

An Impeccably Documented Word Clock In Dutch

[Maarten Pennings] shares a word clock project – but not the regular kind. For a start, this clock is a shining demonstration of hobbyist-available 3D printing technologies, with embedded light guides for the letters printed in transparent filament, thanks to a dual-extruder printer. For a word clock, it’s surprisingly small – in fact, it uses an 8×8 addressable LED matrix, with words shown in different colors. If you’re looking to build a novel word clock, you’re all set here – [Maarten] tells all about this project’s story and provides a treasure trove of insights into designing all of its aspects!

The 8×8 limitation was initially set because he wanted to use a low-cost MAX7219 8×8 LED matrix module as a base for the clock. Thankfully, in Dutch, time can be expressed using shorter words — still, it had to be limited to 5-minute intervals. Extra effort had to be spent designing the layout — [Maarten] mentions his friend writing a solver that found a way to fit some words onto the layout diagonally. At some point, he switched from LEDs to Neopixels, and dug deep into addressable LED technology. For instance, he demonstrates Neopixel power measurements and current consumption calculations. This shows that the calculations indeed match the clock’s real consumption when measured by an external meter.

In the best of hacker traditions, all the source files are on Github — if you fancy yourself a Dutch word clock, you can build [Maarten]’s design easily! He provides extensive instructions on building this clock in the README, including a flashing and configuration tutorial, complete wiring diagrams, and a soldering guide. A manufacturing-grade amount of build information that won’t leave you guessing. He’s also added a fair number of animations, put plenty of effort into clock precision verification, and even investigated some Neopixel protocol minutiae. All in all, our hacker went all in on the capabilities while embracing the constraints. This reminds us of the similarly well-documented haptic word clock we covered just a year ago – check that one out, too!

Continue reading “An Impeccably Documented Word Clock In Dutch”

Doubled Up 3D Printer Upgrade Doubles The Fun

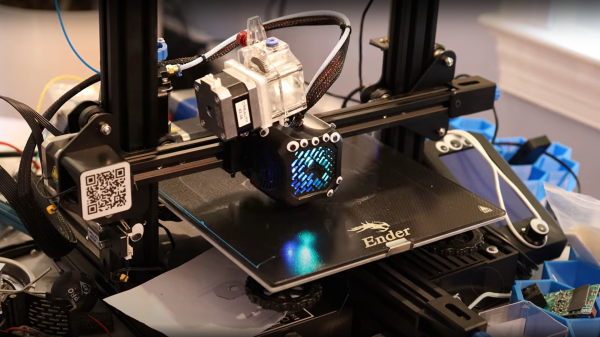
[Nathan] from Nathan Builds Robots on YouTube is no stranger to modding 3D printers, whether it’s a good idea or not, it’s just fun to find out sometimes. His latest escapade he calls the Double Ender (video, embedded below), where he not only doubles up the hotend, but the doubles up a few other bits too. The aim was to achieve dual material printing, with his specific goal to combine plain nylon and carbon fiber-loaded nylon in the same print, to get the best properties of both materials.

Perfects results on the first try!

Taking a stock Ender 3 v2, [Nathan] first installs a dual Z axis kit, doubling up the Z axis screw and associated stepper motors. Likely this was needed to compensate for the additional weight of subsequent mods. Since the stock Ender mainboard has only one Z axis port, the less obvious solution was to just install a second mainboard! By leveraging the immense hackability of the Klipper printer firmware/software stack,he was able to get this weird configuration to work.

Next the main part of the build; the Phaetus Tai Chi dual hot end installation. For some reason, initially, it was decided to combine the stock bowden injector/extruder with a direct drive second unit, which we guess keeps the reciprocating weight down a bit and does let you directly compare bowden and direct drive print results on the same machine. Anyway, the first dual material prints came out pretty good after a few (quickly glossed over) fails, and did work well enough that dual-nylon printing could now be an option. After switching the build to a dual direct-drive setup, [Nathan] found it easier to get the machine to switch filaments more reliably, which makes sense when you think about the impact of all that extra filament in the bowden tube.

[Nathan] clearly has been burned (haven’t we all?) possibly literally, by the curious habit of some Chinese suppliers, of randomly assigning power supply polarity to red/black wire pairs. The solution, somewhat belt-and-braces, was to simply make up custom power cables with an embedded rectifier. Well, we guess that’s one less thing to worry about, but do look away when those PSU hacks are being shown!

Multi-material or multi-color FDM printer options are plenty, here’s a cool way of using a servo to swing a pair of hotends to the same point, and we also saw a while back, a way of using a sprung-loaded rocker to flip the unused hotend up out the way when not needed.

Continue reading “Doubled Up 3D Printer Upgrade Doubles The Fun”

$80 Dual Extrusion Kit Might Work With Your 3D Printer

[Teaching Tech] sprung about $80 or a kit to add dual extrusion to his 3D printer, plus another $20 for an accessory kit. He did get it to work well, but it wasn’t without problems which he covers in the video below.

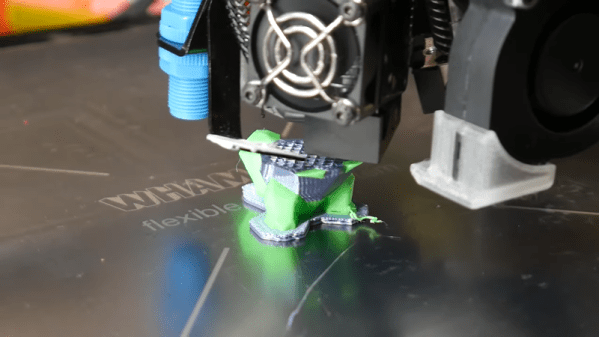
The design of the head uses a servo to swing two hot ends to — in theory — the same point. Each hot end has an ooze shield, so you don’t need to deal with that in your G-code by building a priming tower. However, there are some requirements for your printer.

Continue reading “$80 Dual Extrusion Kit Might Work With Your 3D Printer”

MRRF: 3D Printed 2D Paintings

3D printing is obviously best used in printing three-dimensional objects. Laser cutters, jig saws, and CNC routers are obviously well-equipped to machine flat panels with intricate shapes out of plastic sheets, plywood, or metal, but these devices have one drawback: they’re subtractive manufacturing, and 3D printers add material. What good is this? [Jason Preuss] demonstrated a very interesting 3D printing technique at this year’s Midwest RepRap Festival. He’s producing 2D paintings with a 3D printer, with results that look like something between very intricate inlay work and a paint by numbers kit.

[Jason Preuss]' multicolor 2D print. Notice the toolpaths in the reflection. Click to embiggen.
[Jason Preuss]’ multicolor 2D print. Notice the toolpaths in the reflection of the upper left hand corner. Click to embiggen.
[Jason] is using a 3D printer, a series of very specialized techniques, and a software stack that includes a half-dozen programs to print multicolor 2D scenes. This isn’t pigment, paint, dye, or ink; the artwork becomes a single piece of plastic with individual colors laid down one at a time.

The best example of [Jason]’s work is a copy of a paint by numbers scene. Here, [Jason] makes an outline of all the shapes, separates onto different layers by color, and prints each color, one layer at a time. It’s an incredibly labor-intensive process to even get models into a slicer. Actually printing the model is even more difficult. [Jason]’s paint by numbers scene uses about twelve different colors.

[Jason]'s 3D printed paint by numbers scene. About a dozen different colors were used for this print.
[Jason]’s 3D printed paint by numbers scene. About a dozen different colors were used for this print.
We’ve seen [Jason]’s work at MRRF before, including last year’s exhibition of a fantastic chocolate clock that was a 3D printed version of an old scroll saw pattern. Taking what is normally a 2D design and translating that into something that can be built with a 3D printer seems to be [Jason]’s forte, and the results are remarkable. If you don’t know what you were looking at, you would just think these art pieces are a strange industrial fabrication process. Once you look closer, you have an immediate respect for the artistry and craftsmanship that went into a sheet of plastic only a few millimeters thick and no bigger than a piece of paper.

[Jason] hasn’t documented his build process for these 2D pictures on a 3D printer quite yet. There’s a reason for that: it’s supposedly very complicated, and it’s going to take a while to get all the documentation together. Eventually, the process will be documented and a tutorial will pop up on [Jason]’s website. He’s also on Thingiverse, with a few semi-related designs available for download.

From what we’ve seen at MRRF, in the next few years, a dual extrusion printer will be a necessity. While dual extrusion won’t be able to recreate such colorful pictures, it will make the creation of these 2D plastic panels much easier, and they will surely be popular. We can’t wait to see what [Jason] comes up with next.

MRRF: Hot Ends, Extruders, Extremely Posh Brits, And Stoic Swedes

As far as locations for the Midwest RepRap Festival go, it’s not exactly ideal. This is a feature, not a bug, and it means only the cool people come out to the event. There were a few people travelling thousands of miles across an ocean, just to show off some cool things they built.

Two Colors, One Nozzle

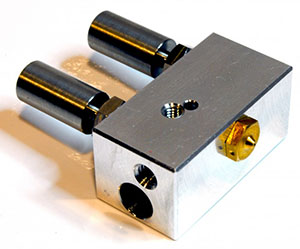
[Sanjay] and [Josh] from E3D came all the way from merry olde England to show off a few of their wares. The star of their show was the Cyclops extruder, a dual-extrusion hot end that’s two input, one output. Yes, two colors can come out of one nozzle.

cyclops

If you see a printer advertised as being dual extrusion, what you’re going to get is two extruders and two hot ends. This is the kludgy way to do things – the elegant solution is to make two colors come out of one nozzle.

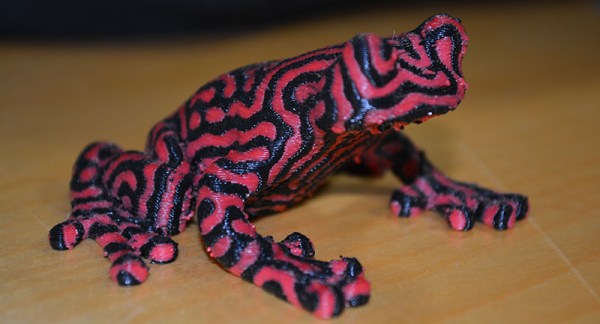
The guys from E3D were showing off a few prints from their Cyclops nozzle that does just that, including a black and red poison dart frog, and a blue and white octopus. The prints looked amazing, and exactly what you would expect from a two-color print.

Rumor has it the development of the Cyclops involved extruding two colors, freezing the nozzle, and putting it in the mill just to see how the colors mixed. I didn’t see those pictures, but there’s a lot of work that went into this hot end.

The Power of Two Extruders

[Martin] of bondtech.se came to MRRF all the way from Sweden. He was there showing off his new extruder.

The extruder uses a normal stepper motor, but instead of the usual knurled or threaded feed wheel and bearing to push filament though, he’s using two counter-rotating feed wheels attached to a planetary gear system. That’s a lot of torque that doesn’t distort or strip the filament. When you consider all the weird filaments that are coming out – ninjaflex, and even 3D printable machinable wax filament, this is extremely interesting.

Even if your filament isn’t exactly 1.75 or 3mm in diameter, this setup will still reliably push plastic; there is a bolt that will move one of the feed wheels in and out 0.4mm.

[Martin] had a pair of his extruders hooked up to a strain gauge, and it’s strong enough to lift your printer off the table without stripping the filament. Here’s a video of that demo from the bondtech page.

The LATHON Dual Nozzle 3D Printer

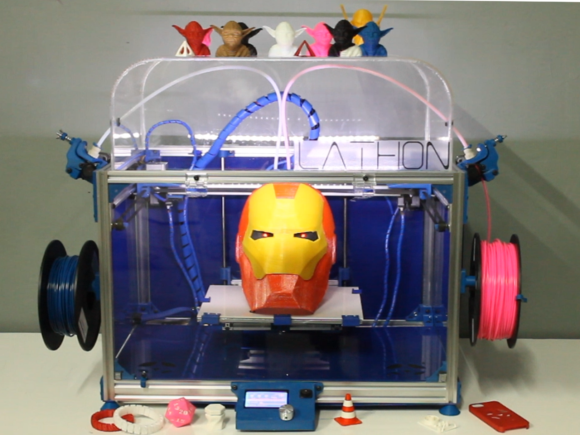
lathon

Our friends at Freeside Atlanta have been keeping busy despite the city-stopping snowstorms they’ve been suffering recently. This time it’s a 3D printer with dual extrusion: the LATHON printer. [Nohtal] bought his first 3D printer only two years ago, but his experiences led him to build his own to overcome some of the issues he encountered with standard printers.

The LATHON keeps the bed stable and instead moves only the nozzles, using Bowden extrusion to reduce the weight on the moving parts. A key feature is the addition of a second nozzle, which usually limits the print area. The LATHON, however, maintains a 12″x9″x8″ build volume thanks to the Bowden extruders. [Nohtal] documents the majority of his build process on Freeside’s blog, including using a plastic from GE called Ultem 2300 for the print bed, and running the printer through its paces with a slew of materials: ABS, PLA, HIPS, Nylon, TPE, Wood, and Carbon Fiber. You can find more information on the Kickstarter page or at lathon.net

Check out some videos below!

Continue reading “The LATHON Dual Nozzle 3D Printer”

Dual Extruders In The Space Of One Stepper Motor

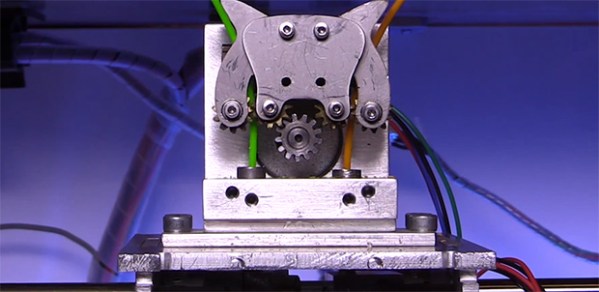
The new hotness in 3D printers is – and has been for a while – dual extrusion. With two extruders and the requisite filament supply, it’s possible to print objects in two colors or two different materials. There’s a problem with this setup, though: each extruder requires a separate motor, greatly reducing the print area should you want to print in two or more colors. [Carl] and [Brian] think they have the solution to this with their dual extruder that is powered by one stepper motor.

As you can see from the pic above, the idea is relatively simple. Two strands of filament are fed past one gear attached to a stepper motor. Each strand is moved into the hot end through two idler gears and side of the extruder feeds into the hot end is determined by the rotation of the motor. It’s really one of those, “why didn’t I think of that” ideas.

[Carl] and [Brian] are also offering a quad extruder, a dual-sized extruder able to pump four different filaments onto a printer bed. With this, we expect some people to experiment with CMYK (or CMYW) prints, truly turning any 3D printer into a machine that prints full color parts.

Continue reading “Dual Extruders In The Space Of One Stepper Motor”