
Using a bit of tech to make up for a lack of skill is a time-honoured tradition, otherwise known as cheating among those who acquired the skill the hard way. Learning to wheelie manual a skateboard is usually paid for in bruises, but [blezalex] got around that by letting his electric skateboard handle the balancing act.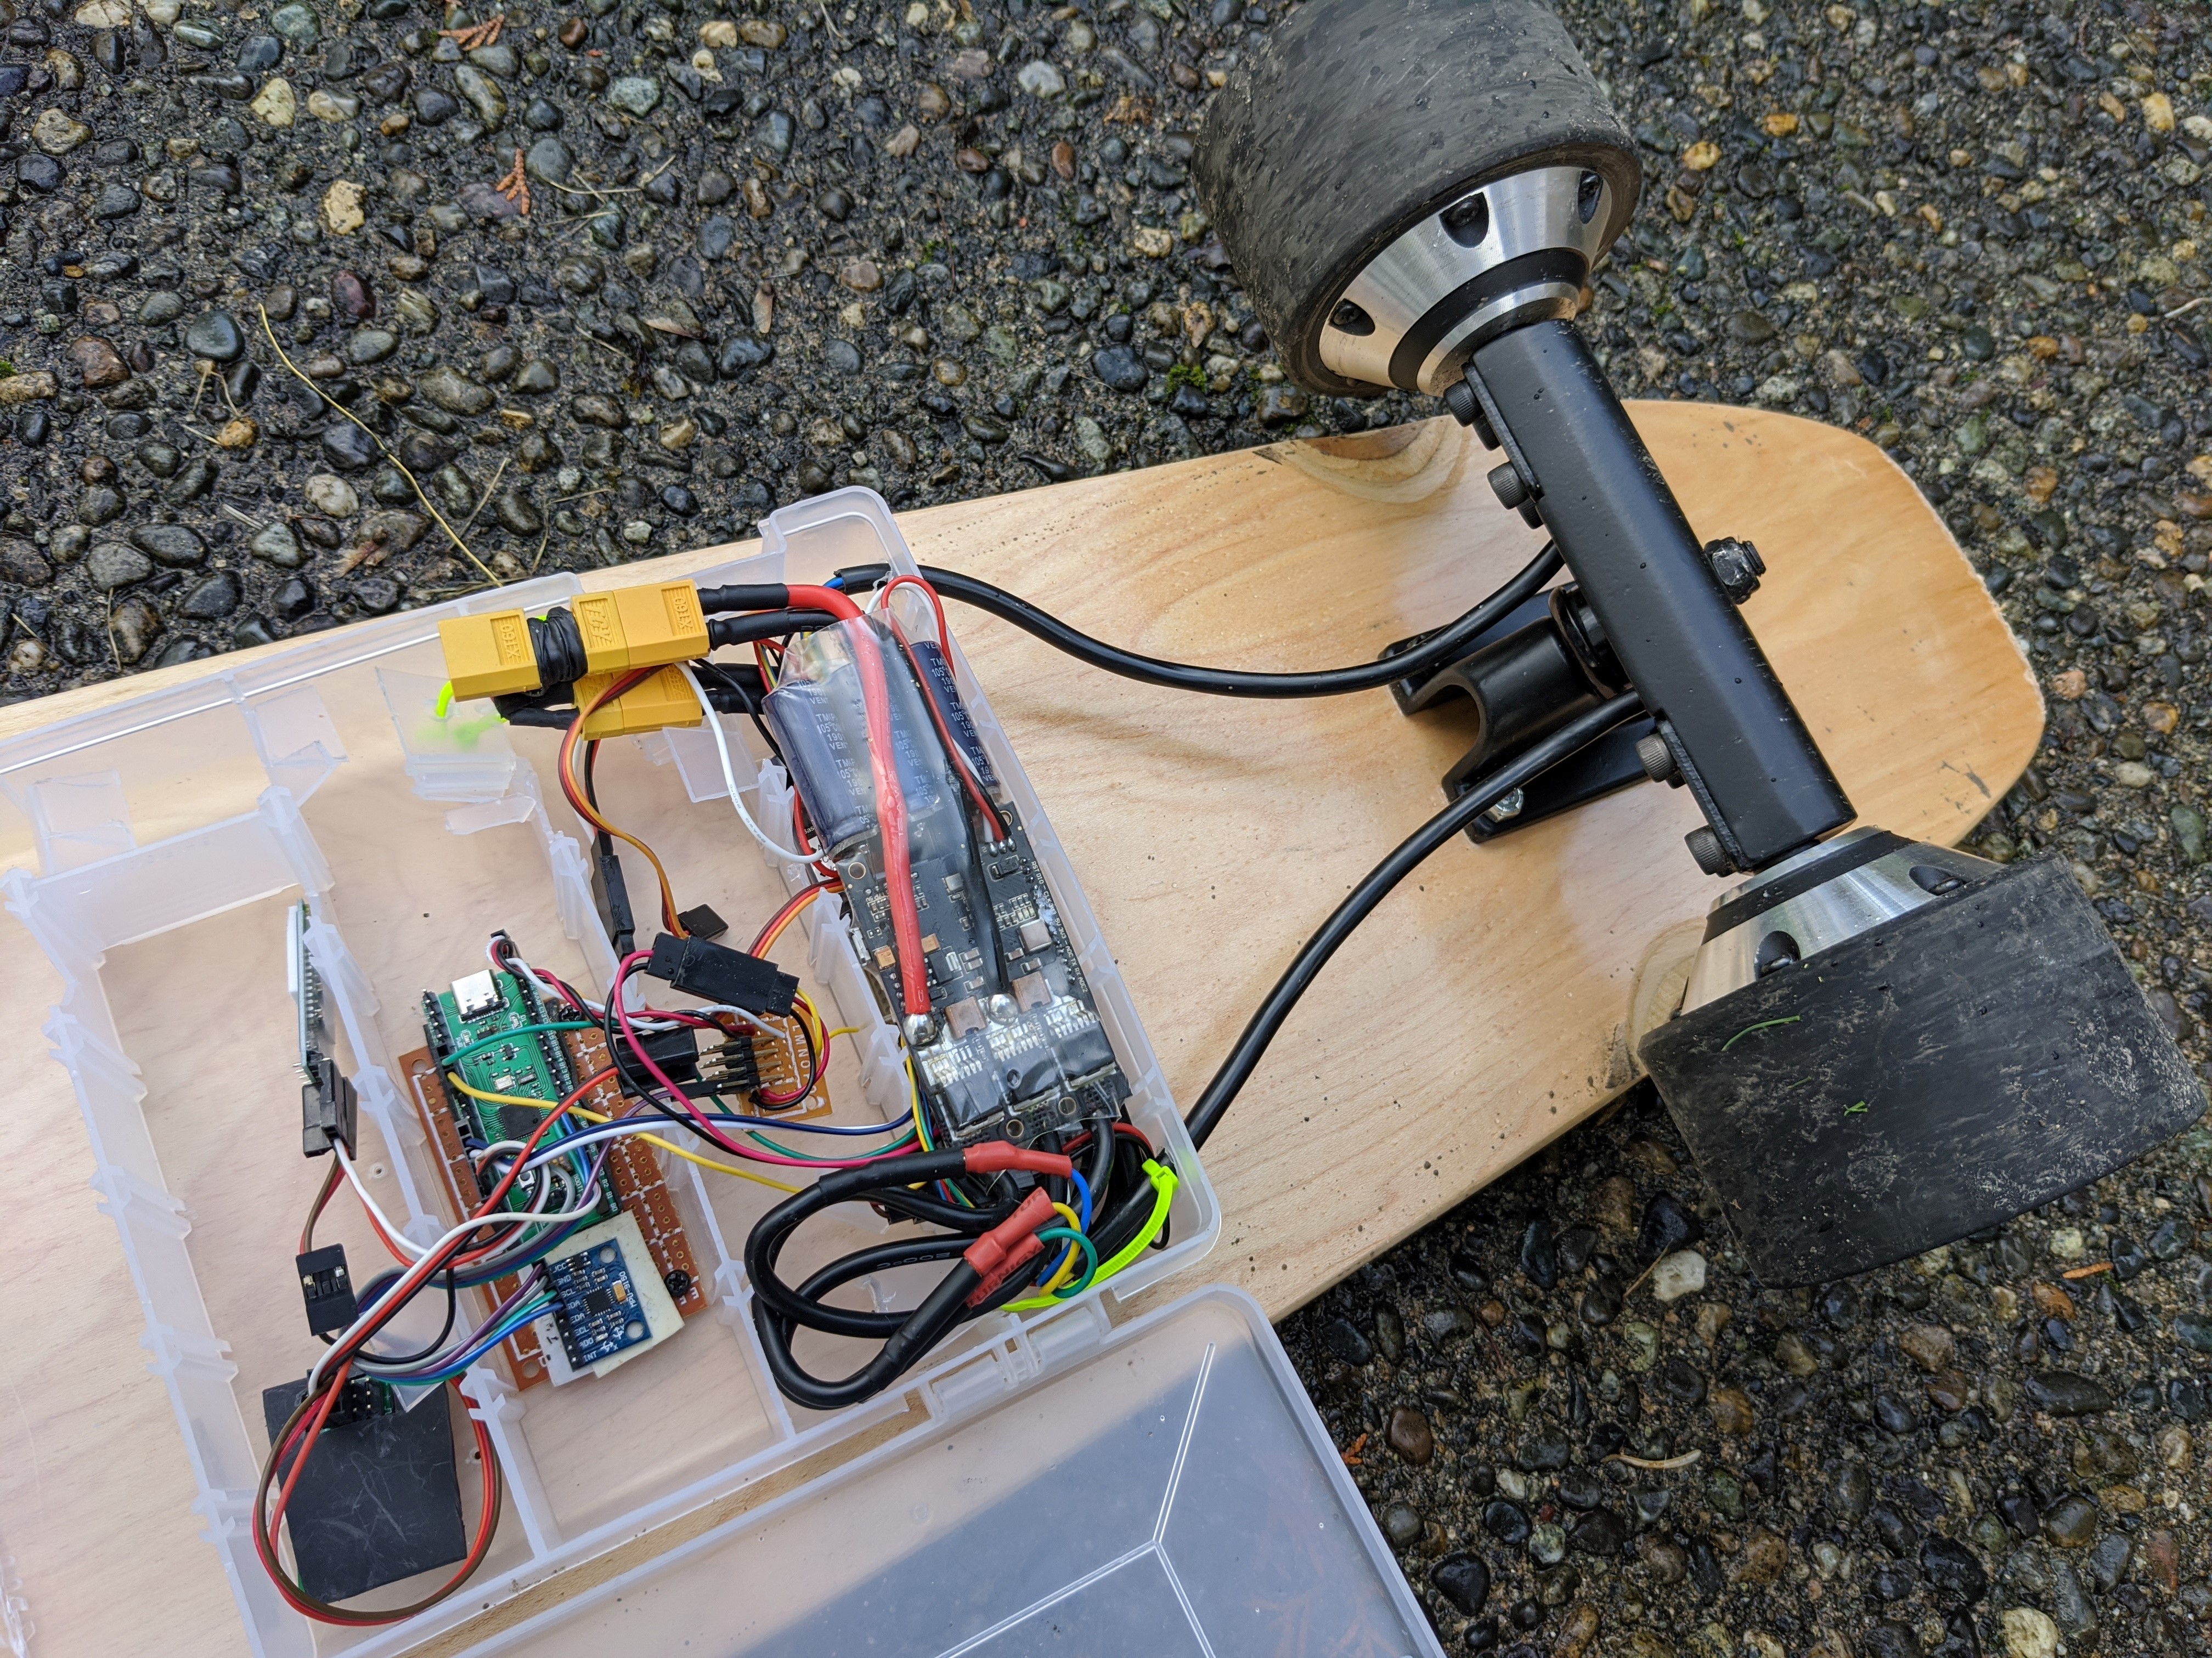
At first glance the board looks and rides like an average DIY electric skateboard, with an off-the-shelf a dual hub motor truck, VESC speed controllers and a wireless throttle. The party trick appears when the front wheel is popped off the ground, which activates the secret self-balancing mode. At this point a STM32F401 dev board and MPU-6050 IMU take over control of the motors, which is in turn controlled by leaning forward or backwards, like a hoverboard. The remote throttle turns into a dead man switch, which cuts power to the motors when released.
[blezalex] says he has had less that an hour of skateboard time in his life before getting on this one, which is a good testament of just how well it works. The biggest challenge was in getting the board to turn while on two wheels, which was solved by sensing side-to-side tilt of the board with the IMU and applying proportional differential torque to the wheels. With a bit of practice it’s also possible to smoothly shift between riding modes while moving.
We think this is a really elegant cheat, now we need to build one of our own. Fortunately the STM32 firmware and instructions are all up on GitHub. Building your own electric skateboard has become really simple with the availability of off-the-shelf components. We’ve also seen a bicycle with a wheelie cheat device to prevent you falling on your back


So basicaly a hoverboard with extra pair of useless wheels in the front? However i like the idea of being able to automaticaly switch between 4 wheel and 2 wheel mode.
2 wheel mode is for close-in maneuvering, 4-wheel for cruising range battery life.
This is a really good time to slip and wind up in the hospital.
Would have liked to see some shovits and reverts on this board.
As an skater I gotta correct you on this: balancing on two wheels while rolling on skateboard is called a manual not a wheelie
It is called a manual, not a wheelie. C’mon man, talk the talk even if you are cheating.
Fixed ;)
That is NOT a skateboard
Its an electric longboard
Don’t even try
That’s awesome, so cool !! The result look so smooth, congrats man !!
I have been trying to code mine for also with 2 Vesc and one teensy board that controls the 2 vesc but the result is way more jerky and difficult to ride. I get my angle value from directly from a BNO055, and control the current delivered with a PID but I cannot find the right settings to make the manual easy and smooth. Yours look so damn smooth !
I took a look at your code but my skills at coding are not good enough to understand each line of your code ..
Could you help me understand a litlle ?
Like you get the angle value from your MPU 6050 thanks to the MadgwickAHRS ?
What is the impact of the Digital Biquad Filter you apply on erpm input ?
I cannot find the PID settings you used. Are you actually using a PID to regulate the current output ?
Thanks you so much for your answer,you work inspire me lot. I was starting to give up on that project but seeing yours makes me wanna finish it so much now !