You might assume that you need a lot of expensive stuff to make your own PCBs, but that isn’t the case: you can do it with a vinyl cutter and a few common chemicals and tools. [Emiliano Valencia] has laid out the entire process. While we’ve seen plenty of make your own PCB guides before, this one goes a bit further as it covers using the vinyl cutter to make solder masks, so you can use it for surface mount designs.
The end result of the process that [Emilano] lays out is the tinyDice, a cute little electronic die that can fit on a keyring. The whole process is very well written up, and even experienced PCB makers will probably find a few useful tricks here.
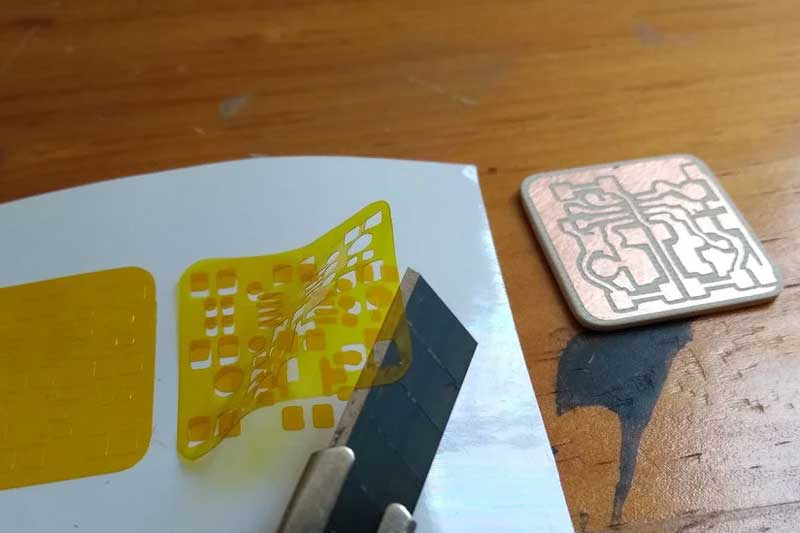
The really interesting part for us was using the vinyl cutter to make three parts of the process: the etching mask, the solder mask that protects the traces and the solder stencil that applies the solder to the pads for surface mounting.
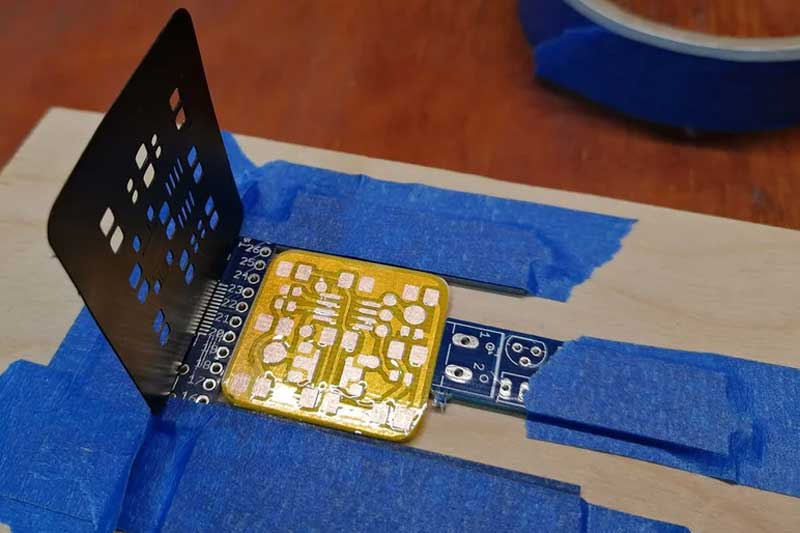 That is possible because the solder mask uses Kapton tape which is tough enough to stand the heat of the reflow process, and is a lot easier to use than the UV resins that are generally used. The etching and solder stencils are made from the vinyl material that is most commonly used in these cutters, but the solder mask is made from thin Kapton tape which is attached to a vinyl backing but then transferred onto the PCB. It does sound a bit fiddly in places, but there are plenty of photos to show how it is done.
Kudos to [Emiliano] for also coming up with a neat way to make the solder stencil out of vinyl by stacking four vinyl cutouts on top of each other. That gives the applied solder enough thickness that it should melt and flow without problems, but also gives nice clean solder pads. Now, if only he could work out how to make a pick & place out of sticky-back plastic and popsicle sticks, we would be sorted…
We’ve covered plenty of other ways to make PCBs, from expensive mills to using the same vinyl cutter to make PCBs on glass. What tips do you have for making PCBs out of common household materials?


Laser printer and vinyl sticker method worked well for me in the past.
yes but this is also building up a mask for applying the solder paste cleanly to the pads
Yeah, that’s true.
You can use the craft cutter to cut your traces work well with the newer craft cutters.
You need to make a few passes and use a sharp blade or one of the after market carbide blades
Not clear what you mean: Do you mean, cutting the copper foil directly, instead of using a stencil? Otherwise I’m not sure why carbide blades are necessary.
Sounds like he is saying the copper layer can be cut to produce traces.
https://www.microsoft.com/en-us/research/project/quick-printed-circuit-boards/
found the link
I like the idea of using multiple layers of cut vinyl to make a solder stencil – I think I would try this before trying 3D-printed stencils. I think you can control the thickness much better this way, resulting in exactly the right amount of solder paste on the board.
And heck, I even like the idea of using vinyl transfer stickers for etch resist.
Also, the Kapton solder mask idea is great. I’ve worked in industry, where Kapton tape was used to keep solder out of through-holes that needed to be kept clear for a later assembly step, and it worked great. I don’t think I would leave it on the PCB, though. I would first plate the PCB with tin, using “Liquid Tin” from the usual sources, before doing the solder mask, then apply the solder paste, populate, and reflow, then remove the Kapton. Otherwise the Kapton is likely to peel off on its own over time. The tin protects the unsoldered portion of the traces from corrosion.
I suppose an additional “silkscreen” layer could also be done, using a vinyl stencil and epoxy paint, if I really wanted a professional 1970s-looking board.
The one concern I have is getting all of the layers registered. His built-up solder stencil looks absolutely perfect, and I’m not sure how to register vinyl that perfectly.
And now I’m thinking that my CNC engraver could do all of the steps for making a PCB, and by mounting board guides to the machine’s table, there wouldn’t even be any problem with registration among the layers, since all would be done on the same machine, with a single setup. ‘Course, first I need a drag-knife tool for it. Any suggestions on drag-knife mods for CNC engravers?
This is just a thought but I use a swivel knife for cutting small difficult angles it is very small blade that swivells . But no idea how to connect it to CNC for use. Craft supply shops have them. Good luck.
I’ve been wanting to make my own PCBs for a long time now, but the thing that’s holding me back is….all the nasty chemicals one needs to deal with.
They’re only moderately nasty, and they don’t jump at you.
Etching in a closed container (tupperware is perfect) largely takes care of the two risks: spilling and fumes. If you etch in a sink full of water with an open window, you’re doubly safe.
If you use a renewable etchant, the disposal problem disappears as well. You’ll need a funnel to get it back into the bottle, and this is a good “don’t spill” moment so do it in the sink.
But that’s really it. No heat, no fire, no poison, no explosions. The necessary procedures to keep it safe are well within reach.
Wees egter versigtig met die ets vloeistof, dit kan baddens, was bakke en opwas bakke ( Vlekvryestaal ) vlek en beskadig. Maak alles deeglik skoon na gebruik.
Reading Dutch is awesome fun if you speak a little German! Still, I had to run it through a translator:
“However, be careful with the etching fluid, it can bathe, wash dishes and wash dishes (Stainless steel) and damage it. Clean everything thoroughly after use.”
The etchant (and fumes!) eat metal. That’s the deal. So rinse, yeah. Much water.
And a good seal on the (plastic/glass) container that you store the acid in. Ask me about the not-very-good seal on some Ikea tupperware, and the resulting batch of rusted USB cables that were sitting next to it in a closed closet.
Wow! Het amper gedink my kop smokkel met my toe ek Afrikaans hier lees…
(Sorry if it wasn’t Dutch and I said something insensitive.)
Don’t even bother. Just send your files to Osh Park, etc. It will probably even be cheaper.
You can still say that with a straight face with all the carnage going on with supply lines right now?
Not sure your point. They (OSHPark) are doing fine. I got a board back yesterday (Apr 1, no jokes) and have 2 more in the pipeline.
And your point is “My single point of failure hasn’t failed yet, so everything will continue to be fine forever.” ???
im still ordering pcbs from oshpark and JLCPCB (china based for those who dont know)
believe it or not I ordered a part from JLCPCB 2oz no less and received it 3 days ago, ordered something from oshpark the same day (figured it would be quicker) and they just received it back from the fab yesterday. ill probably get it early next week.
Made another order on JLCPCB yesterday Id expect it in about 10 days or so with a stencil for less than the pcb without stencil would cost stateside, and it will arrive faster.
Old overhead film is perfect for making the solder stencil, its the right thickness from the start and the Cameo can cut it.
Instead of the Kapton tejp for a solder mask, how about maskin just the pads with normal vinyl and then using high temp spray paint? like the one used for break calipers? Thats good for around 600C. Anyone with a reflow owen that can give it a go?
Kapton (or the non-brand Koptan that I always buy) is super-cheap these days and available in decent widths. Using it for soldermask is brilliant. I want to get a craft cutter now…
We had good luck with overhead transparencies cut on a laser cutter for solder masks. Helped to put a piece of paper under the transparency when cutting to make it cut better, I’m not exactly sure why, but it it did. Maybe the material was too transparent to cut well and the opaque paper got some more heat into the cut quicker.
I’ve gotten pcb etching to work with sharpees before.
I do it all the time!
I have make a number of PCBs at home but don’t anymore. Chinese outfits make them cheaper and deliver a professional board for < $30 including delivery in about a week (and they are open for business). OSH Park is in the US and for small boards are cheaper than China. Great quality. "Operating Normally" was posted on the their web page as of today. Given all the steps and materials you need to even get close to the quality of these boards, I find it hard to justify making my own.