Still waiting on your Prusa Mini to arrive? Join the club. Between the incredible amount of interest in the inexpensive 3D printer and the COVID-19 pandemic, it can take months for the machine to arrive at your doorstep. But patient makers are finally taking delivery of their new printers, and as such the hacks and modifications are starting to trickle their way in.
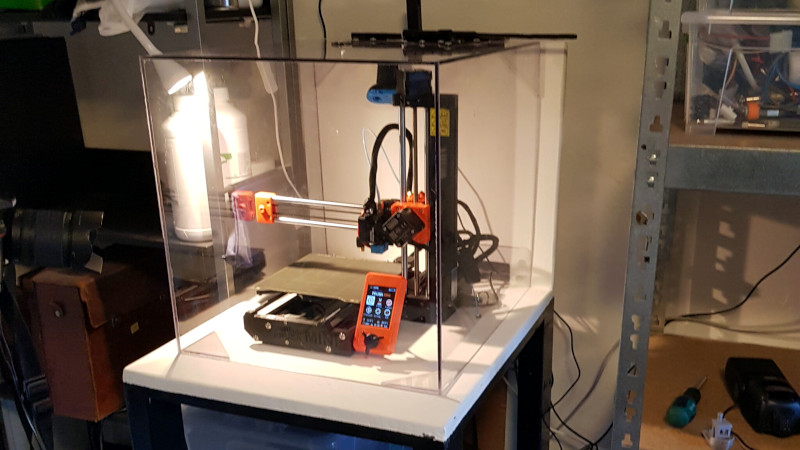
First up is this gloriously over-engineered enclosure from [Build Comics]. While PLA and PETG usually print fine with nothing more exotic than a heated bed, trickier materials like ABS work best when the printer is enclosed as it helps maintain a consistent temperature. Plus it keeps any curious hands and paws a safe distance from the hot moving bits, and if things go really pear-shaped, can help contain smoke and flames.
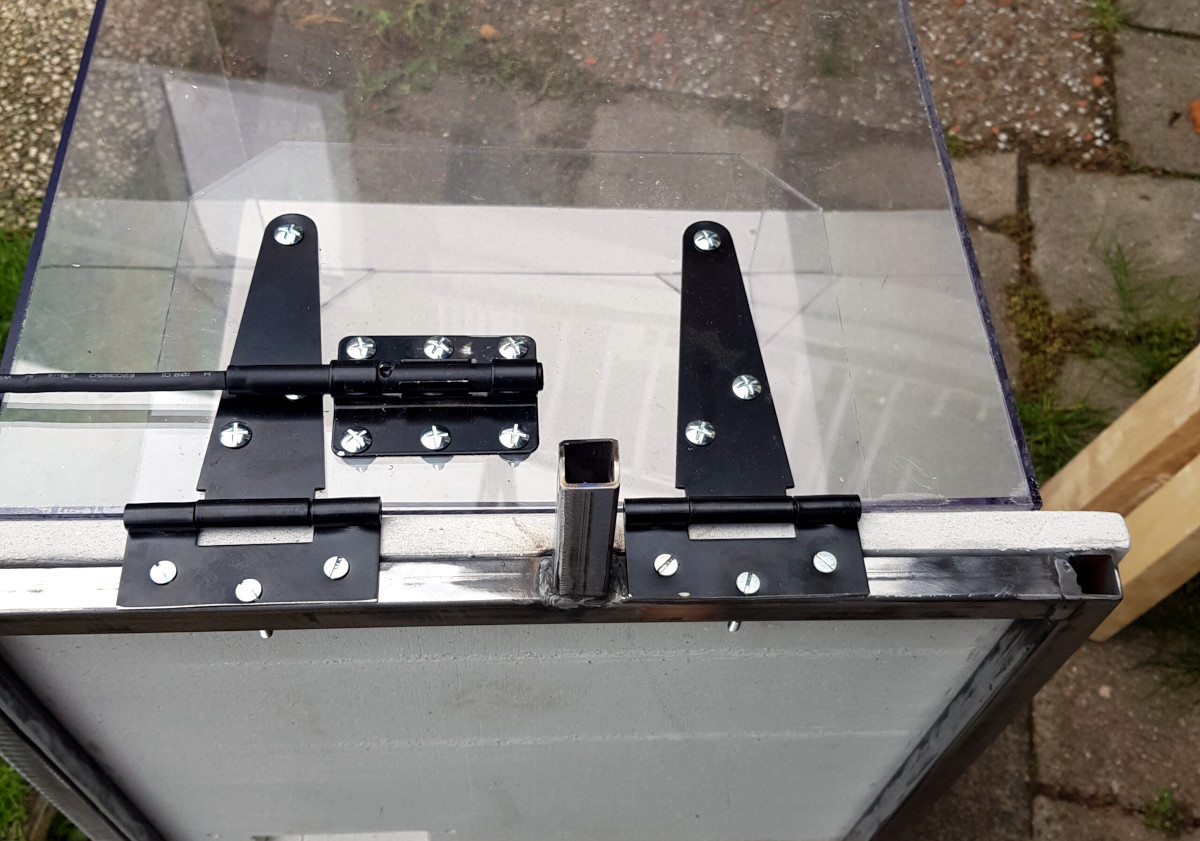 The enclosure is made from welded steel square tube, wood, and fire-retardant fiber board. A hinged polycarbonate cover, taking the form of a four-sided cube, is lowered over the printer with some heavy-duty hinges that look like they were intended for a fence. To keep the cover from slamming back down, [Build Comics] came up with a simple locking mechanism that can easily be operated from the front or side of the enclosure. With the addition of a small temperature and humidity display, the conditions inside the chamber can easily be monitored.
But [Build Comics] didn’t stop there. He also rigged up a relay box that will cut power to the printer should the smoke detector mounted above it trip. While there’s no reason to think the Prusa Mini would suffer the same fate of earlier budget desktop 3D printers, but there’s certainly no harm in taking precautions.
Will you need to build a similar enclosure whenever your Prusa Mini shows up? Maybe not. But if you felt so inclined, at least now you’ve got plenty of images and details that can help you spin up your own solution.


Speak for yourself (and other Prusa-enthusiasts), which you do. But enclosing an open-frame printer made with PETG parts (they switched from ABS) is not exactly ideal…
If your enclosure gets soft enough to soften PETG parts, you’ve got other problems. There’s a large community building enclosures for the i3 with no problems, why should mini be any different.
Of course the inside ambient itself does not get up to 80C, but the PETG parts mount to motors and such, which easily adds 40-50C in addition to the enclosure’s ambient (usually 40-50C for ABS).
IT’S 👏 JUST 👏 A 👏 PLASTIC 👏 BOX 👏 HOW 👏 DID 👏 THIS 👏 GET 👏 POSTED?
Mine is full metal black box, wonder if that means more or less chance of posting.
Comment of the year.
I’d ask if you bothered to read it, but the answer seems obvious from this comment.
Having the only opening on top seems like an *unusual* decision…
Look again. The whole box flips up.
Still odd. Takes up an awful lot of space.
And I *know* I would whack my head on those sharp corners when it’s lifted.
I did bump my head a few times, but gently. Flipping up was the only place to flip to, since I have no spaces to the side. Making the hole box flip up gives me access to all sides but bottom and back. Comes in rather handy for maintenance of 3DP :-).
And yeah, it is a box. So is your house. But I hope to inspire some readers that wonder how to bond PC for instance.
Ow and BTW, the mini’s electronics are actually designed to be usable within an enclosure. Their ambient temperature rating is pretty high, and the PSU is external.
Thanks for sharing this. I’ve solvent welded acrylic, but didn’t realize you can do the same for polycarbonate.
Also, good to see you taking fire safety seriously. I’m considering building something like this, the biggest impediment being how much fiddling I have to do with the printer making it annoying. The flip up design looks pretty good.
I’ve found an enclosure improves all materials, even PLA. My current enclosure is fireproof cementboard with a thermostatically controlled heater and circulating fan with carbon filter, running at negative pressure via a second fan to an outside exhaust.
I could not make a decent print with ABS, let alone ASA, before I built it, but ASA is a beautiful material to print with now: bed at 100C, enclosure at 50C. The motors run up to around 70C. The electronics are in a cooler zone near the air intake underneath, but still inside the fireproof enclosure.
Dead quiet too, despite eight fans in the whole thing. Lovely. Highly recommended to make the effort.
I can only second this. Similar enclosure. Its a new printing dimension. ASA, nGen – rock solid.
Pro Tip: Go cheap with a 19” wall mount rack.
Odd, how did this make it here?
“Odd, how did this make it here?”
It fits in with Covid quarantines.
This comment has more information than the OP, thanks for making it