Traditionally, a forum full of technical users trying integrate their own hardware into a game system for the purposes of gaining unfettered access to its entire software library was the kind of thing that would keep engineers at Sony and Nintendo up at night. The development and proliferation of so called “mod chips” were an existential threat to companies that made their money selling video games, and as such, sniffing out these console hackers and keeping their findings from going public for as long as possible was a top priority.
But the Arduboy is no traditional game system. Its games are distributed for free, so a chip that allows users to cram hundreds of them onto the handheld at once isn’t some shady attempt to pull a fast one on the developers, it’s a substantial usability improvement over the stock hardware. So when Arduboy creator Kevin Bates found out about the grassroots effort to expand the system’s internal storage on the official forums, he didn’t try to put a stop to it. Instead, he asked how he could help make it a reality for as many Arduboy owners as possible.
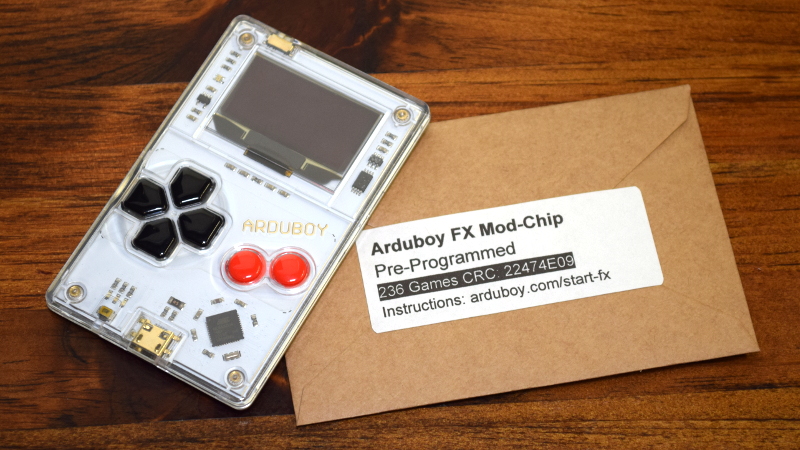
Now, a little less than three years after forum member Mr.Blinky posted his initial concept for hanging an external SPI flash chip on the system’s test pads, the official Arduboy FX Mod-Chip has arrived. Whether you go the DIY route and build your own version or buy the ready-to-go module, one thing is for sure: it’s a must-have upgrade for the Arduboy that will completely change how you use the diminutive handheld.
Freedom of Choice
Originally I was going to roll my own upgrade, which involves dead-bug soldering a SPI flash chip such as the W25Q128 to the Arduboy’s PCB with some thin wires and flashing the system’s ATmega32U4 microcontroller with a new bootloader using an ICSP like the USBasp. While it’s hardly a user-friendly operation, the procedure is well within the capabilities of the average Hackaday reader and potentially even something you can do with parts bin finds.
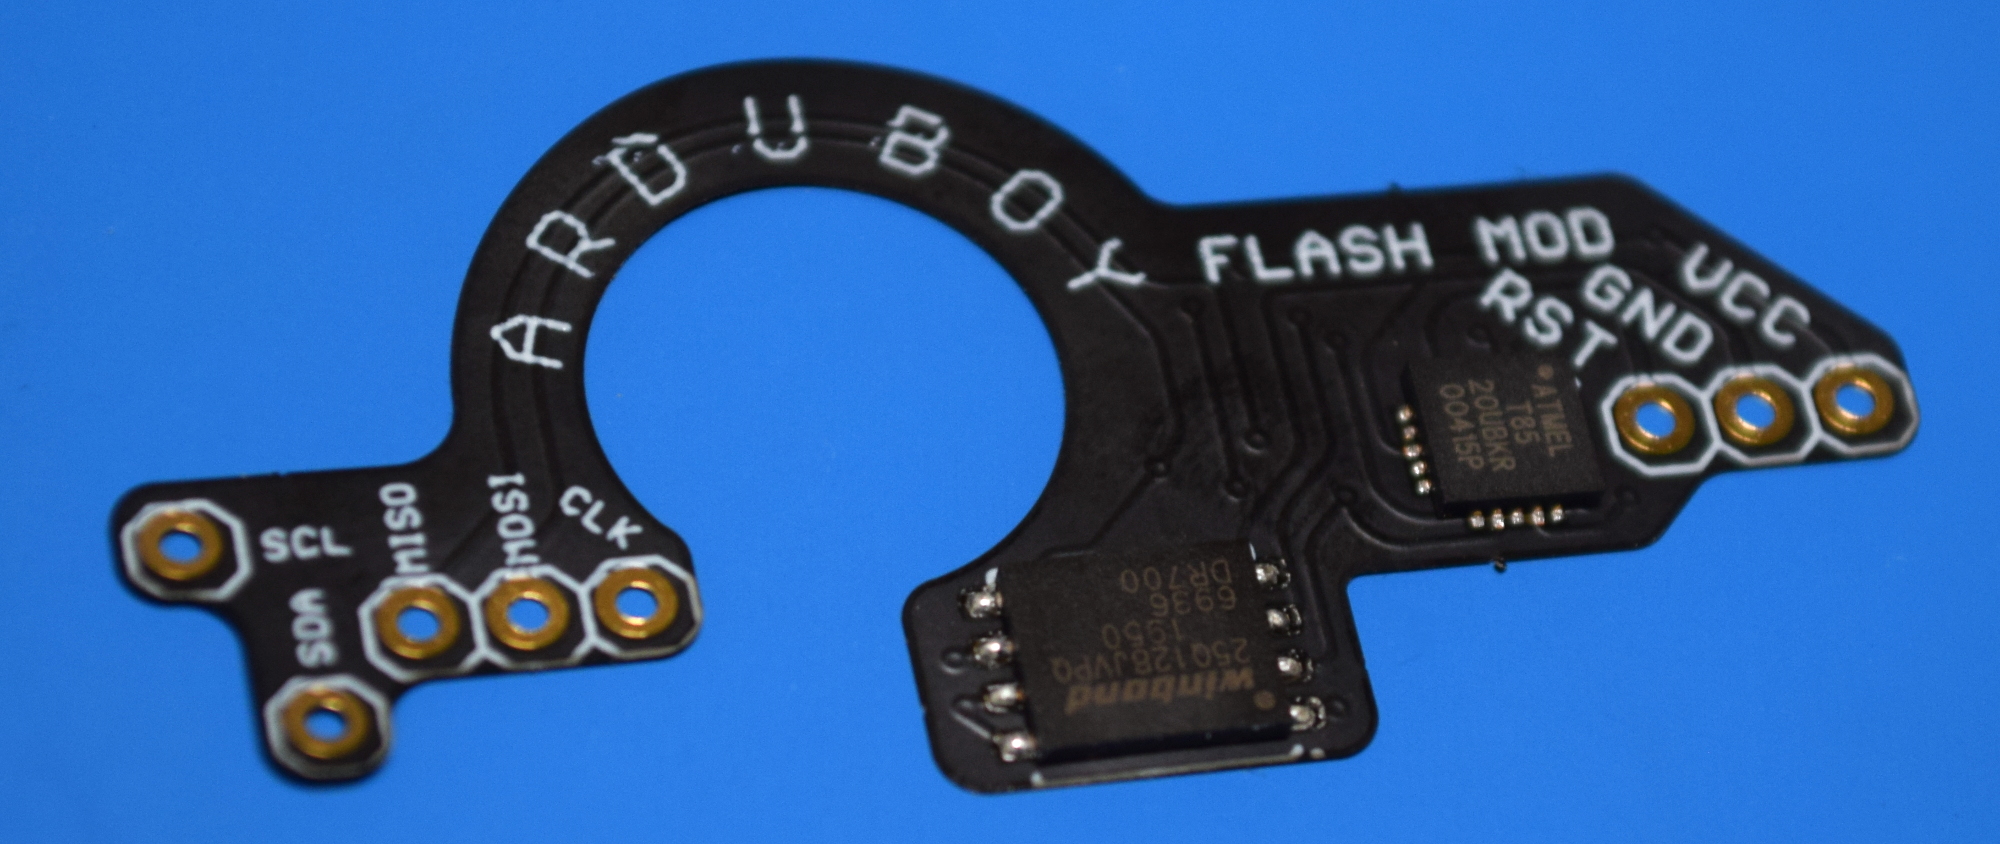 But in the end I decided to go with the pre-programmed FX Mod-Chip directly from Kevin. I’d been curious about the official upgrade since writing about it last year, and wanted to see what the top-of-the-line experience would be like. With a flexible PCB and an onboard ATtiny85 that can flash the system’s bootloader automatically, it’s a considerably more streamlined experience. Plus at just $15 USD, it’s hardly breaking the bank. Though if you want to save a few bucks, you can buy the blank version for $9 and load on your own games onto it.
In either event, the end result is the same. Rather than being stuck with a single game and having to connect your handheld up to the Arduino IDE each time you want to try out a new title, you’ll now have enough flash to store essentially the entire library of completed Arduboy games at once. You can quickly and easily navigate through them by genre using a very slick visual menu, and by holding the Up and Down keys simultaneously, you can even back out of the currently running game and select something else to play without having to power off the system.
As far as the Arduboy goes, this update is nothing short of revolutionary. Frankly, the fact that the device could only hold one game at a time always made it far more of a hassle to use than it should have been. But now that you can quickly skip around and try out all the games without being tethered to a computer, the Arduboy is far more practical for quick gaming sessions.
Installation
As mentioned before, the official upgrade kit has been designed with ease of installation in mind. If you know which way the pointy end of the soldering iron goes, you should be fine. For anyone who needs a little more guidance, there’s a written step-by-step installation guide and even a video you can watch.
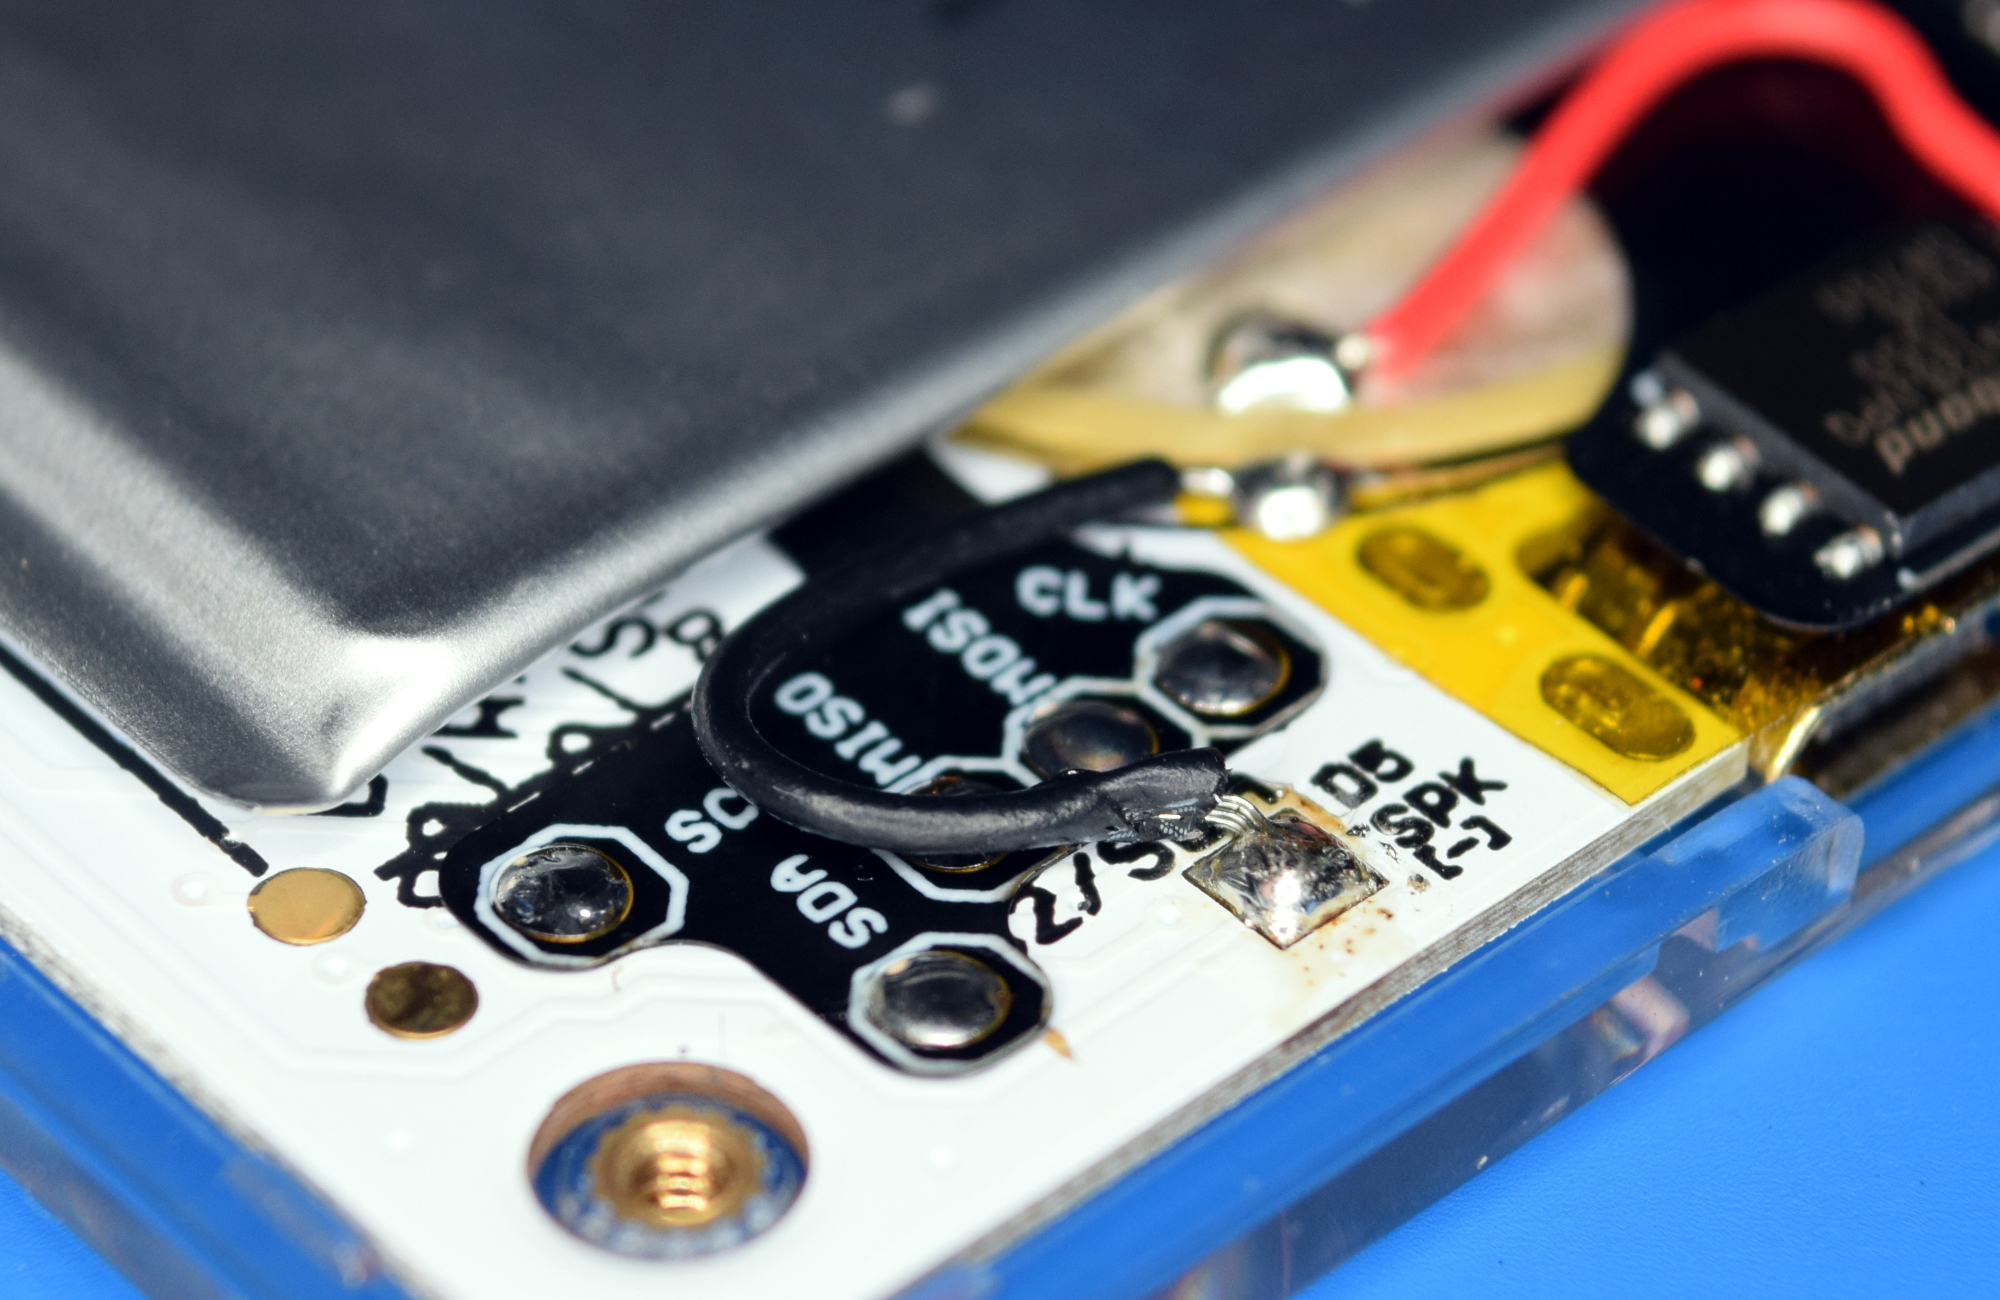
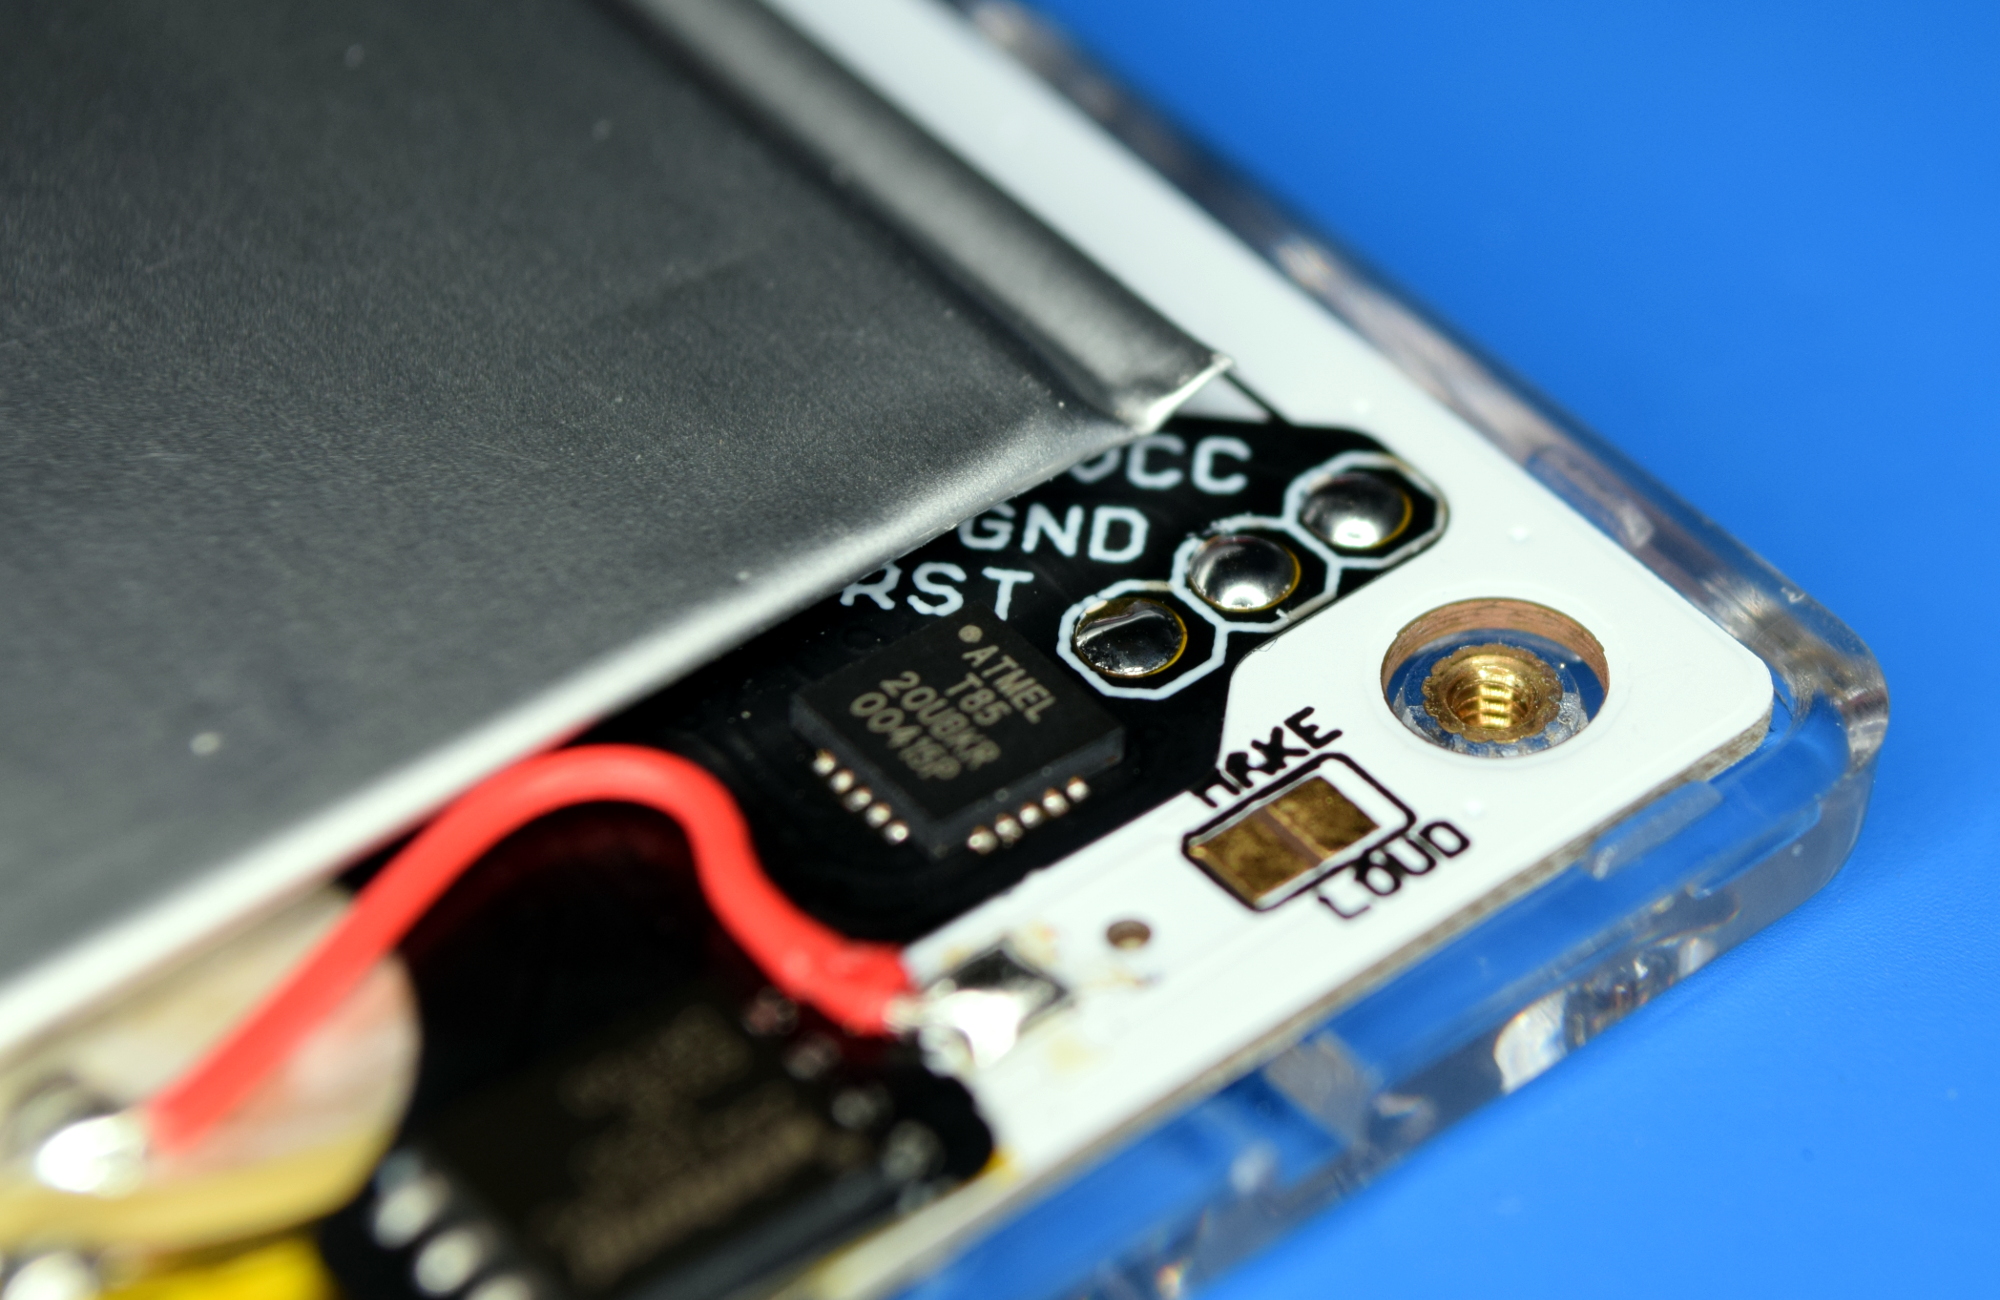
With the back cover removed, you just need to slip the flex PCB under the battery and tack down the eight points that line up with the test pads on the board. You can remove the piezo speaker temporarily to make the installation a bit easier, but it’s not strictly necessary.
Once the flex PCB is securely attached, you need to turn the Arduboy back on and then short the GND and RST pads for approximately five seconds (a pair of tweezers works well for this). This will trigger the ATtiny85 to begin the bootloader flashing process, and pretty soon you should see the new Arduboy FX startup screen. Once you’ve confirmed the bootloader has been replaced, you can button the system back up.
Library Management
If you buy the pre-programmed FX Mod-Chip, you’ll immediately have access to 233 different Arduboy games and applications which take up roughly 5 MB of the 16 MB available on the W25Q128 chip. While this doesn’t represent all of the software ever written for the platform, it’s a fairly comprehensive collection. Making this sort of prediction is usually a good way to make yourself look like a fool in the future, but in this case, it’s probably safe to say that 16 MB ought to be enough for anybody.
But what about adding future titles? After all, the Arduboy enjoys an active developer scene, and there’s always something new to check out. Well, this is where things get a little tricky. As of this writing, the official tools to actually build a new image for the chip are still in their infancy. The current method relies on a handful of Python scripts and a manually curated CSV file that links nested directories of categories to individual game binaries and banner images. It’s not exactly difficult, but it’s just as unpleasant as it sounds.
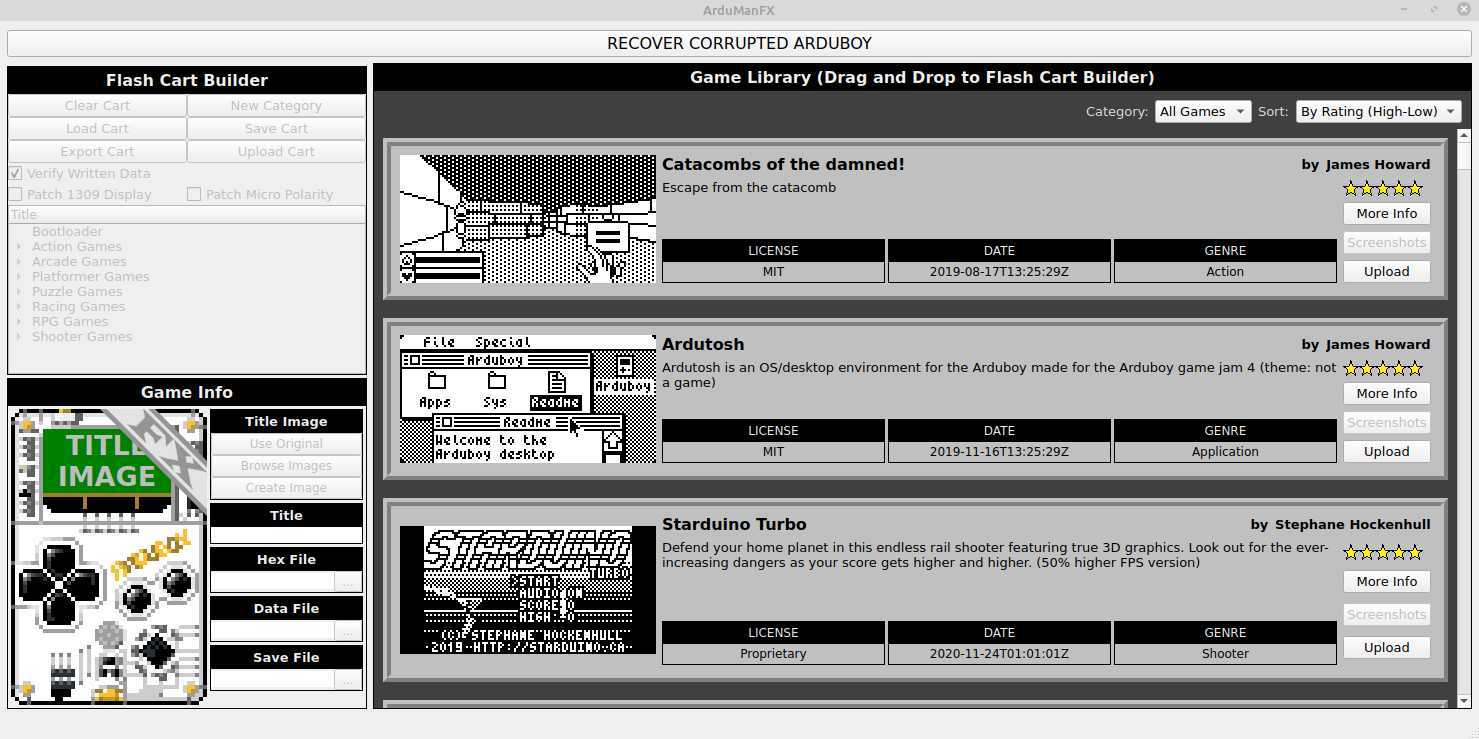
There are some promising projects in the works though, such as ArduManFX by Justin Davis. This multi-platform tool allows the user to search for, download, and ultimately install Arduboy software. As of right now it can only flash single binaries to the system, but the next release is set to include the ability to create chip images from within its drag-and-drop GUI interface.
This is the Way
It’s honestly difficult to overstate just how much this upgrade improves the Arduboy experience, and it’s no surprise that expanded flash storage is slated to be a standard feature going forward. For me personally, the ability to quickly select from between hundreds of games has given new life to a device that was starting to get a bit dustier than I’d like to admit. It’s now a gadget I’ll make sure to toss in my bag before going on a trip, once there’s somewhere to go on a trip to, anyway.
But perhaps more importantly, the Arduboy FX Mod-Chip is a shining example of what can happen when a company doesn’t treat its customers like they’re the enemy. Not only was Kevin Bates supportive of users attempting to modify the hardware they purchased, but he had the forethought to turn their experiments into an official product and even roll the improvements into the next generation of Arduboy. The tech world would be a whole lot nicer if this sort of community collaboration could become the norm and not the exception.


Arduboy is a very nice platform, but I wish there were more in the way of story driven games. I love time killers like flappybird clones or the lasers game from the video.
But its the easy-on-easy-off RPGs that actually make me look forwards to my commute
That is one potential huge benefit of the flash chip mod, if someone wanted they could offload assets, text, graphics, music, etc to the relatively large external flash to make a much more in depth, lengthy game than could be done on the atmega internal 32K flash alone.
That’s a good point. Wonder what we will see people doing with the extra space.
Having a little play around on the emulator it’s got a few fun games. But at the price I think it is edged out by the PocketSprite (as a dev platform and a console).
Of course PocketSprite is not intended for homebrew games so it’s not an apples to apples comparison.
How about the Gamebuino META then?
Seems kind of onerous to have to connect the device to the Arduino IDE to change games, or have to recreate the flash image to change the set of games loaded. Why doesn’t the Arduboy have cartridges or otherwise load its software off some removable external media?
Because the original point was just to make an Arduino-compatible game system, and that included the expected workflow of using the IDE and flashing it like any other Arduino.
But if you’re just an end user and not interested in development, that gets old fast.
When I got a round tuit, I was gonna build mine to have $2 dollar pro-mini clones plug into the back, and keep half a dozen flashed with my fave games of the moment.
“why doesnt this simple thing have more parts added to it to accomplish the same task?”
I actually find the Arduboy platform something I periodically go back to to tinker on. The games just seem to hang together well enough to retain my interest.
I was thinking an upscalar might be nice to play on a screen that isn’t the .96 OLEDs I use in my build.
I’ve built several clones on custom pcbs with larger oled screens up to 2.42″ (may require patching games depending on if the display controller is different). I even got a module utilizing an fpga from a friend on the forum that allows hooking up an arduboy to a vga monitor. I remember making a bluetooth adapter for it so I could use my bluetooth modded snes controller. It was pretty neat playing arduboy games on a projector.
pl give me details of bluetooth
How about an Arduboy with network access? So we can create 8-bit style, multiplayer, massive 8-bit-worlds games ..
wifi network would be fantastic