My son, Patrick, has observed on more than one occasion that I do not like 3D printing. That may sound odd, because I built a printer back in 2012 and since then I’ve built a lot of printers and I currently have at least three in my lab. But Patrick correctly realized that I don’t actually enjoy printing things that I need. What I do enjoy is building, fixing and even more importantly improving the printers themselves. If you are reading Hackaday, you probably know how that is. This is the story of an upgrade gone bad, although the ending is happy enough. If you’ve ever thought about moving from a traditional hot end to an all-metal hot end, you might want to hear me out and maybe I can save you some trouble.
A few years ago, I picked up an Anet A8 for a really low price. As printers go, it is adequate. Not bad, but not amazing. But it is a fun printer because you really need to do some work on it to brace the acrylic frame and fix other shortcomings. I merrily improved the printer quite a bit over a relatively short period of time and I also bought a bunch of aluminum extrusion to rebuild the frame to the AM8 plans you can find on Thingiverse.
An AM8 is Born
But life happens, and that box of extrusions sat on the shelf for a few years. Looking for a pandemic project, I decided it was time to take the plunge and the results were great. Having a solid metal frame on the printer really turned it into a world-class printer. Except for one thing.
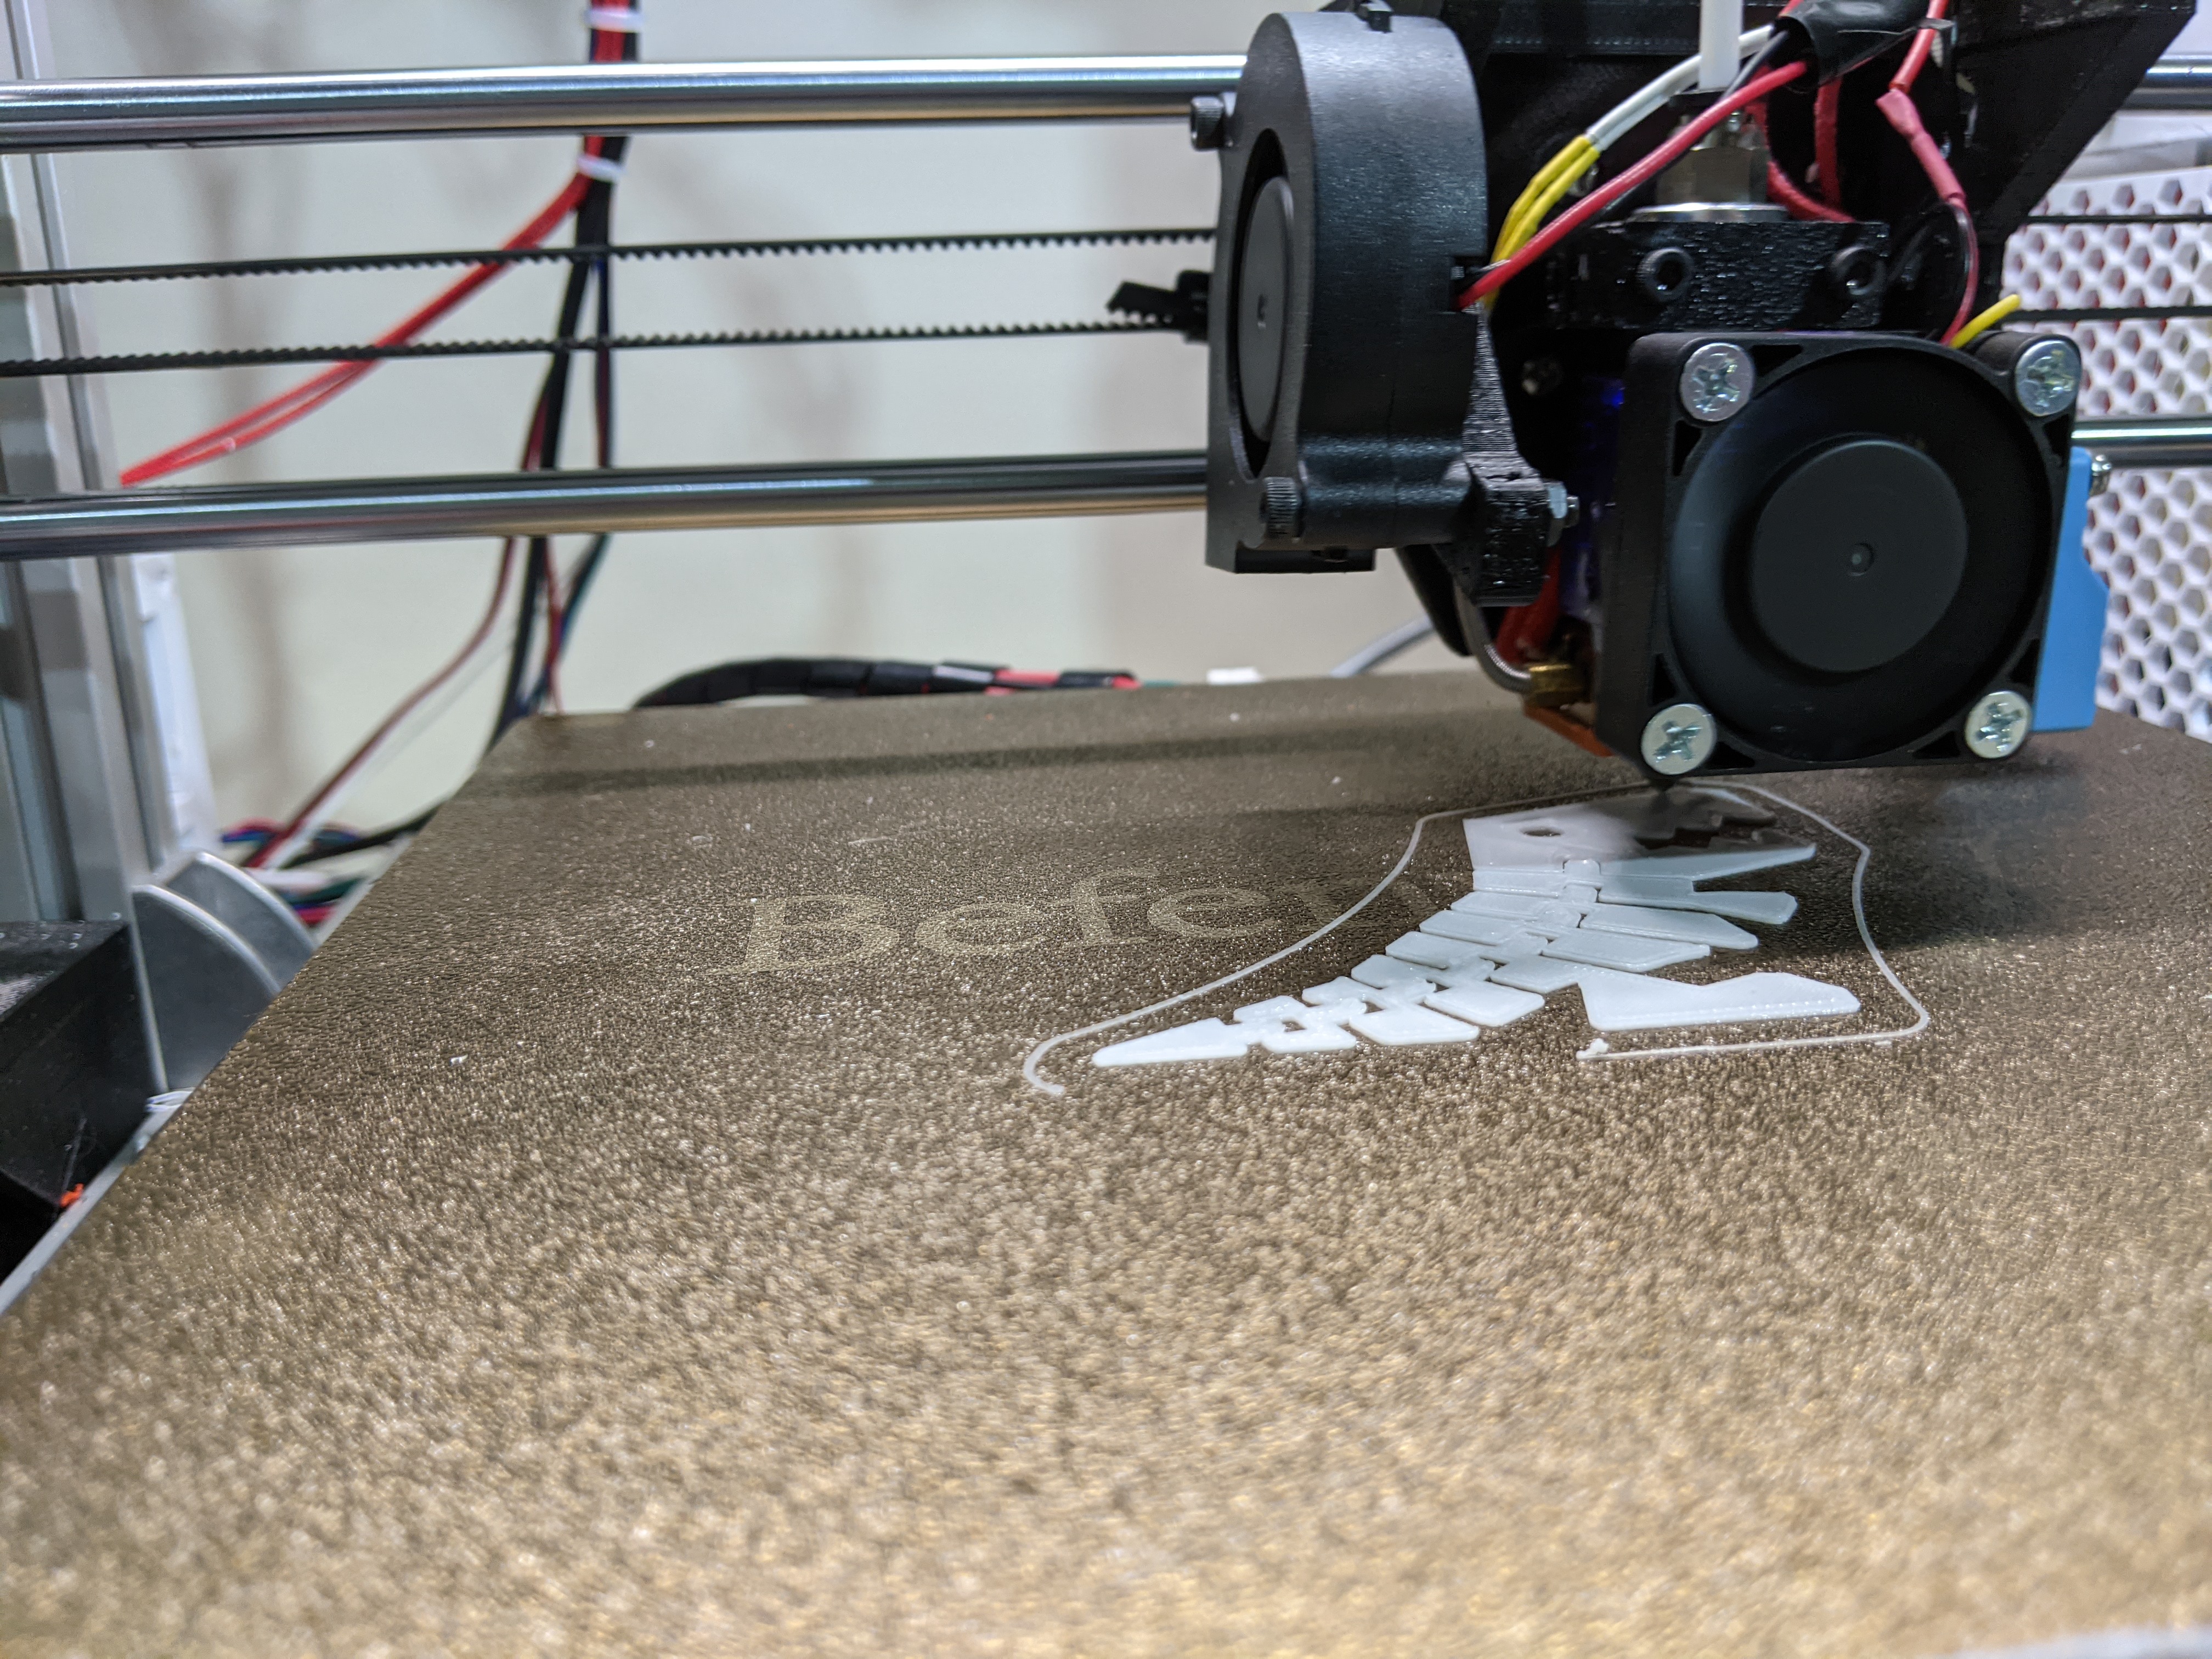
The extruder on the A8 — actually, the entire X assembly — doesn’t really change on the AM8 build. I had made some very simple changes to the extruder, but it was mostly stock and that was a pain. The extruder is a NEMA17 stepper in a U-shaped metal frame with a conventional extruder bolted to it. A fan totally covers the extruder and the heat break screws right into the bottom, followed by the heat block and the nozzle.
I’d already moved the fan for access, something most people with A8s do. However, the thing was a pain to load and with the cooling not so great on the heat break, jams were reasonably common, if not as common as you might expect. Clearing jams was quite painful though.
New Extruder
I knew for a long time I wanted to put something better in place and I had a few knock-off E3D V6 hot ends sitting around. Like the extrusions, they’ve been in storage for a few years. I printed a mount and got that working great. Once that worked, I redesigned the mount, put on a clone Titan extruder, and fed it with a Bowden tube.
It was great! Easy to load, rarely jammed and any clogs were simple to fix. Time to call it a day, right? Of course, not. I had to make just one more change.
All Metal
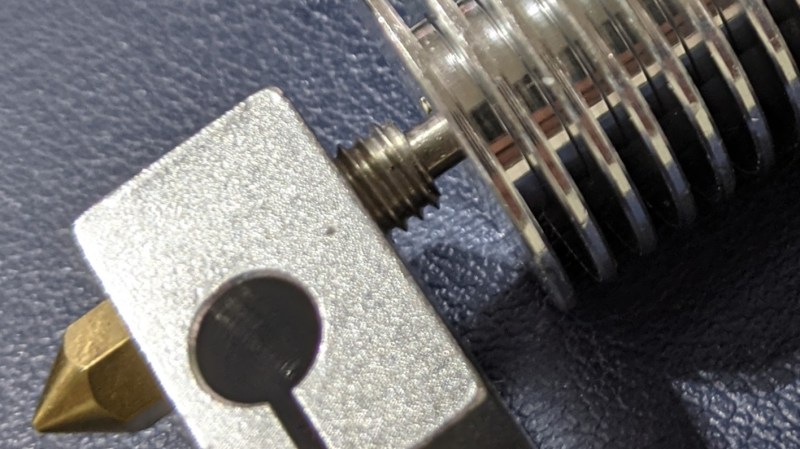
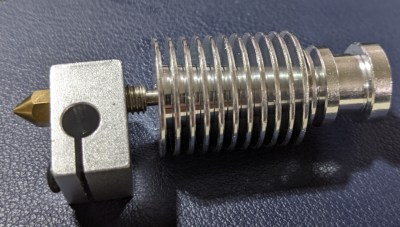
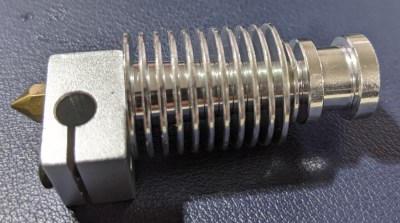
If you haven’t taken a hot end apart before, the general flow is that plastic enters into a heat sink. Then it travels through a little tube called a heat break or a throat. This tube tries to isolate the hot part of the hot end from the filament that is heading towards the nozzle. The far end of the heat break butts up against the nozzle inside the heat block which is a metal block that holds the heating element and the thermistor. Ideally, the filament melts just before it leaves the heat break and enters the nozzle.
The normal heat break has PTFE inside which keeps the filament on track even if it gets a little soft. However, at temperatures above 250C, the PTFE tube can break down, so they also make heat breaks out of only metal. A normal metal heat break will be very thin stainless steel, but you can also get some made of titanium or even some that use two different metals. The video below shows a nice assembly guide for two common types of hotends.
So, obviously, an all-metal hotend would be better, right? Maybe not. It depends on what you are trying to do. While an all-metal hotend will let you crank up the temperature, they have their own problems. First, some plastics really want to stick to the metal. This is especially problematic for doing retractions. Second, if heat creeps up the heat break, it can melt early and this can cause jamming and underextrusion, as well.
If you don’t need temperatures above 250C, you might consider not changing to all-metal. But of course, I wanted that temperature range and I did it. That led to a mystery and, like many mystery stories, the culprit will turn out to be a minor player briefly glimpsed.
At First…
At first, I put a generic stainless steel heat break in with the new nozzle. It came with a little envelope of heat compound and I used it on the cool-end of the heat break. The printer would jam almost at once. Keep in mind that with the old nozzle and heat break, all was fine.
A heat break is supposed to have as little thermal conductivity as possible, so that the filament doesn’t melt until it gets down into the heat block. Usually, the tube is very thin since this conducts less heat. For some reason, the new heat break without the PTFE in it was jamming badly.
The jams seemed to occur on retraction. Turning off retraction worked, but left me with very stringy prints. I tried reducing retraction, but no matter how low I went, the hot end would jam. When I would pull the filament back out, it would have a mushroom-like head blocking it from reentering the heat break.
Everything on a 3D printer seems to be interrelated. So I took the 30 mm cooling fan off — it was a cheap clone after all — and replaced it with a 40 mm fan that should have had more flow. I used a printed adapter to put it together. It didn’t seem to help.
I also ordered a titanium heat break. Titanium has even worse thermal conductivity so, in theory, it should keep the cold part of the hot end even colder. That didn’t seem to work very well either and I was running low on the thermal paste.
Solutions
Since I had so little of the thermal paste, I thought about using some CPU compound. However, looking up what I had, the maximum temperature was a bit low. However, upon reflection, I realized that the cold-side of the heat break shouldn’t be as hot as the nozzle anyway, so it should be workable.
The idea of only putting compound on the upper threads is that you deliberately want to stop heat transfer from the hot block to the heat break. But whatever heat does go into the break, you want to convey to the heat sink with maximum dispatch.
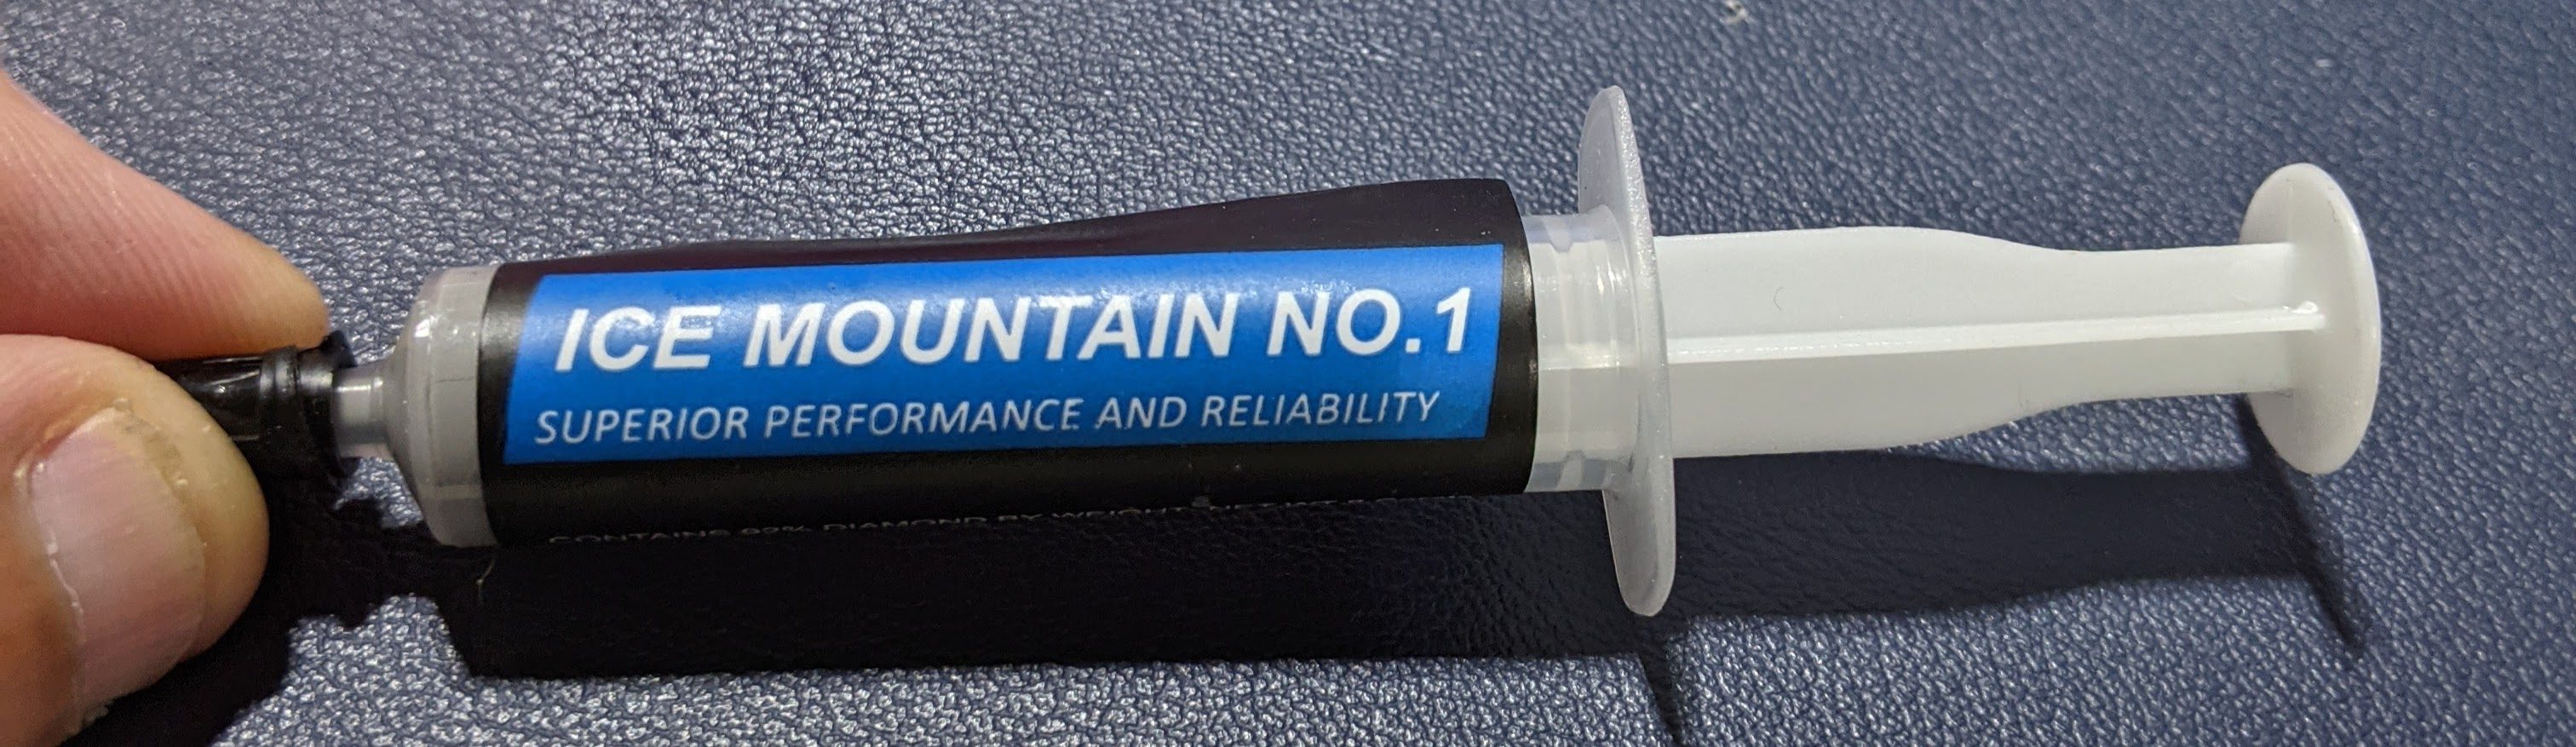
The new thermal paste — something called Ice Mountain #1 — did the trick. I don’t know if the generic white paste was old or just of poor quality. The Ice Mountain is some carbon/silicone compound and seems to work great. No more jams or heat creep.
Butterfly Effect
This is a great example of how almost every setting and component in 3D printing is interrelated. The new hot end required adjustment of the bed height, the flow temperature, and retraction settings. It also required adequate heat transfer between the hot end components.
Was it worth it in the end? Just for PLA, probably not. However, now I’m ready to experiment with different filaments and the PLA prints seem to be doing fine.
What’s next? Maybe multiextrusion? If you really want to test your hotend knowledge, try resurrecting a mistreated machine.


That heat block shouldn’t be touching the heat sink like that. This is what happens if you use a Creality type nozzle with an E3D hotend. The Creality type nozzles have shorter threads than the E3D nozzles, so you end up with a gap between the heat break and the nozzle which will cause all kinds of issues, not to mention the heat block sending all kinds of heat into the heat break.
We had the same issue and had to mill down the heat block. Otherwise just get an E3D type nozzle.
Another lesson to be learned: don’t cheap out on hotend/extruders, buy genuine. Especially for those parts, quality issues on clones seem to lead to a lot of failures or just subpar performance (which you won’t really notice unless you dig into it).
For example: I got a clone Titan extruder and could not get the extrusion rates (volume of filament per second) that should be possible for a Titan/E3D v6 combo. Solution was to swap out the gear with the wheel that grips the filament for an original E3D. On the geniune part these teeth looked indeed much better and I could get the flow rates I should.
As for the extruder, the above article shows what can happen. Another thing to mention is that for example on the genuine E3D v6 the thermistor is a cylindrical metal cartridge instead of a glass bead type on the clones.
All in all, I’d say for these parts go original though with the price differences I do get why one would take a gamble on the clone. If only E3D would have the parts made cheaper, but under their quality control…
Yeah, is this guy for real? Seems like the fail of the week is this article…
Its almost like anyone can put anything at all on the internet, whether it makes any sense or not.
I came to the comments section to say the same thing but you nailed it.
i can’t actually relate to the opener. i enjoy to use my printer.
sure, before i could even assemble it (it was a kit with some flaws), i had to invent a bracket to mount the end stop switches on. and once it was assembled, the hot end it came with jammed constantly (it was a hack, i think meant for ABS, and i was using PLA). so right away i bought a genuine Reifsnyder J-head hot end, which has not jammed even once in 7 years. of course, the first thing i printed with that hot end was a better bracket to mount it. then i printed a new geared extruder because i thought the direct drive was stalling sometimes. and i printed new carriages (delta printer) to increase build area by 75%. and i hacked together a few different mounts like to anchor the arduino+RAMPS board, to hold the filament, and to keep the wires neat. and i’ve switched out the power supply 3 different times to try to track down what turned out to be probably a ground transient problem between my laptop and my printer (solved by putting them on the same power strip). and *of course* i modified the Marlin firmware, and even fixed a bug in slic3r, and dreamed of reinventing openscad around a better CSG paradigm (no progress).
but i mean, i had to patch the kernel just to install linux in 1994 and i am definitely not into linux for kernel hacking!
mostly it’s just a really awesome tool. i’ve printed 90+ functional objects and only 4 of them were for the printer. a couple days ago, i had nylon webbing (straps) and i wanted to make a backpack-style friction buckle for it. i loaded up the openscad file from when i made such a buckle for my kid’s backpack 5 years ago, adjusted the dimensions, and an hour later i could hold the doodad in my hand. it’s just so great to have the tool, to be able to use it, for it to be reliable.
but i do have one of those all metal E3D knockoffs, because for a while i thought “wouldn’t it be neat to print in nylon”, but i haven’t installed it. and i hate the old arduino version of Marlin i’m using, so i dream of getting some sort of ARM board (smoothieboard or knockoff). but mostly, i just hope the thing doesn’t break in such a way that it isn’t able to print replacement parts for itself… the very last thing i want is to have two printers just so i can use one to repair the other.
Back with my original ultimaker, I immediately found the problem areas through experience, and printed a few backups so I wouldn’t have to rig up a temporary fix to print what I needed to fix it. Always have two extras on hand and reprint one when it gets used. That way you always have a spare in the event the first fix doesn’t take. :)
I’ve since bought the voxelabs aquila for about $200 and it’s so much better than that original $1300 ultimaker. I have nothing to keep on hand as a replacement anymore because nothing printable breaks. It’s all metal. Amazing the progress that has been made.
The hot end was assembled incorrectly – when correctly tightened the heat break is still visible.
I’ve heard that some people 3D print things that are not 3D printer parts (or Benchies).
I can’t imagine printing anything other then calibration cubes.
Isn’t there supposed to be a gap between the heater block and heat sink leaving the heat break visible? With the two very close or even touching (going by the picture), the heat sink is directly heated by the heater block, greatly negating the cooling effect on the heat break. That would definitely cause jamming.
The nozzle’s threaded portion should prevent that by butting up to the end of the heat break, so the problem was actually in the nozzle selection which isn’t an obvious part swap when making the conversion.
This site lacks an article about Vorons (and/or RatRigs)
I’m kind of the opposite of OP: I’d much rather just use the printer rather than tinker with it or the filament-settings or anything like that. I want to get things done, not to spend time on finding new ways of not getting things done.
I started out more like the author, and have ended up more like you. Eventually the printer gets boring. I’m not fascinated by ever increasing performance. I like to move from thing to thing learning new skills. Now’s it’s just another tool that gets used when needed. Some weeks I don’t print anything at all, other weeks, every day.
I got a Prusa MK3S as way to make things, not as a hobby. While I’ve made a few quality-of-life upgrades (camera and lights, RPi mount), I haven’t modded it much. I think printing is interesting, but I prioritize what I can do with them printer over the printer itself.
That said, after watching Tom and Stefan’s videos on the Voron printers, I have ordered a V0.1 kit, and am excited to build it. My impression is that this printer will be able to print up to 10 times faster (I think Tom said he can print 10 times faster at reduced quality, or 3-5 times faster at equivalent quality). That’s a game changer – it means that I can iterate much more quickly on a design. I expect that shortening that feedback loop will make a big difference.
I’m also pretty impressed with the quality of the Voron project, given that it’s all hobbyist/volunteer-driven.
I got into 3D printing mainly to learn what it’s all about. Applying my Harley-Davidson philosophy of, “If it ain’t broke, fix it til it is”, I ended up a year later with three printers — more often than not none of them working. I’ve gained a lot of knowledge (and spare parts), but I’m almost never able to “just print something”.
My fourth printer is still in it’s original, unopened box and I’m trying to decide whether to sell it and redouble my efforts to conquer my existing printers, or just pitch everything and start all over again with this new one, but this time without the improving, modifying, tinkering that got me where I am today.
Maybe if he didn’t cheap out on clone hotends he would know that he assembled it incorrectly. There is supposed to be a gap between the heatsink and heatblock portions.
I don’t like people buying clones of products in niche industries. It’s a slap in the face to the people who put a lot of time and hard work into designing the original parts.
I’d say it depends on whether or not it’s open source. It’s no slap in the face when it’s open source. I’m wrestling with the decision of whether or not to open source something right now. On the one hand I could make money, on the other I could help more people and perhaps improve the world a bit more. I’m planning on going the helpful route. Clones don’t matter. Materials and sales cost money even for the cloners, and you usually get what you pay for.
Ironically, the inventor of the PTFE based v6 in the article was pretty disappointed by some folks in the community and dropped his own work from the web (I agree producing identical clones to compete with hobbyists is pretty lame). People kind of got mad at him too after some public drama, and tend to retroactively cast shade on his character. I really wish it was possible to support his contribution today, and not feed the cloners who ultimately still profit from his work.
The VESC project is kind of the counter-argument, as the author filed trademark on the OSS licensed project a few years into the production. I understand why they had to do it, but it does kind of sour the community experience in some ways.
Our team adopted the hybrid policy of 100% open-source, but kit hardware files were requested to be voluntarily left off the internet as the design evolved. I wold say 99.999% of hobbyists are fairly community minded (acquire, improve, and release cycle), and we gifted a lot of our iterations out to people active in the community in hopes it helped them build their own projects.
As a side note, I do personally donate to University hosted projects on years the tax man shows mercy, as letting departments know certain academic work has real importance in the community has influence over internal policy. You may be surprised how difficult it is to directly support some folks work, and avoid the jerks like the “hypocrite commit” host institutions.
However, after hosting our own teams micro additive manufacturing FOSS project for awhile… I still get creepers who think they are James Bond or something.. physically showing up at my house years later. The public has a certain % of crazy people, a few % of them are potentially problematic, and these folks tend to ruin things for everybody.
One must have faith in the folks who will support you, and outwit those who show up for the wrong reasons.
;-)
“There are two mistakes one can make along the road to truth…not going all the way, and not starting.” (Prince Gautama Siddharta)
Maybe if these companies didn’t manufacture everything in China we wouldn’t have so many cheap clones to begin with.
Not necessarily, e3D and Slice Engineering products aren’t manufactured in China and they are some of the most cloned products out there.
Microswiss also isn’t made in China and it’s another cloned to death hotend.
Just a safety tip: According to DuPont’s own literature review (discussed in: https://journals.tdl.org/watchbird/index.php/watchbird/article/view/1930)
“It is known that PTFE begins to decompose in air at about 200°C (400°F) giving off a sublimate or “dust”. The principle toxic ingredient given off by PTFE up to 450°C (840°F) is this dust, which partly reacts with atmospheric oxygen to give carbonyl fluoride, a chemical relative of phosgene. If the air is moist, the carbonyl fluoride further reacts to give hydrogen fluoride (an acid) and carbon dioxide.”
200C is well within the working temperatures of a number of filament materials (working temperatures of nylon are between 240C to 260C for example). While it is unlikely that you will get a huge exposure to carbonyl fluoride gas, keep in mind that your lung tissue is “moist”, and if you breath any of it in it can convert to hydrogen fluoride acid (which is NOT good for your lungs). If you do use PTFE lined print heads, also check and make sure your printing area is well ventilated.
While breakdown at 200°C is detectable using sophisticated instruments, the levels measured are not considered harmful. PTFE’s max operating temperature is 260°C.
That’s a bit overly hysterical, since people aren’t heating up a giant block of PTFE in the middle of their shop, it’s a small tube inside a hotend which is filled with plastic when its hot, not air.
So, you incorrectly assembled a knockoff hotend and then complained about it on the internet, namedropping a reputable vendor who didnt even make the parts you used? Just making sure I have my facts straight
It’s not incorrectly assembled, it’s using an MK8 style nozzle instead of e3d style.
You do know e3d didn’t invent that hotend, theirs is a clone of the original open source J-Head.
The solution is to get a real E3D hotend and not buy cheap Chinese clones. All of your hotend issues will disappear. Every single E3D V6 I’ve purchased over the years is still going strong, chief among them my V6 Gold. I can count the jams I’ve had between them on one hand, and those were due to either filament tuning issues or extruder inconsistencies. Once I switched to quality filament and Bondtech extruders, those issues went away entirely. Throw in good nozzles (E3D’s NozzleX is my workhorse), and you’re off to the races.
The money you “save” up front by buying clones is spent time and again fixing issues that constantly crop up. Spend a little extra and get an E3D V6, or even their inexpensive Lite offering. In no time at all, it will have paid for itself. Time is money and all that.
” Titanium has even worse thermal conductivity”
Nope, titanium is 20 W/mK, stainless 304 is 14W/mK, copper is 400W/mK
But “titanium” sound high tech and sells more…
Same as folks who throw out the copper radiator from their car to fit a fancy “racing” aluminium one.
I’ve seen many brass radiators, but never an actual copper one, and brass is about half of aluminum, about a third of copper. I HAVE a brass radiator and am looking at aluminum for exactly this reason.
Copper transfers heat well within itself. Aluminum transfers heat well to other mediums, and has a higher surface area per SQ. Measurement due to the oxide layer that forms within milliseconds of manufacture. Aluminum is a better radiator, copper is a better heat sink/pipe. Granted both are pretty good at radiating/sinking/transferring heat anyways.
Exactly! And in the world of Cars when the radiator is fluid filled and that fluid is constantly cycling Aluminium is usually superior – the heat conduction isn’t important inside the radiator, the fluid is mostly doing that job.
So that ‘fancy “racing” aluminium one’ is actually very likely to work better, it is probably lighter too. Though mixing metals and corrosion concerns should then pop up – if the whole lot is Copper and its alloys throwing in the Aluminium is just asking for trouble of the galvanic kind.
I’d been curious about this before and started looking. What you really want to use for the heat break is plutonium. It’s just great for this purpose as regards thermal conductivity. I can’t imagine that sourcing and machining it would lead to any problems whatsoever.
When I was a teenager, back in the 80’s, you could buy plutonium in drugstores.
One thing that you should not miss out when you change/upgrade/modify your hotend, is to run a new PID tuning to make sure your new hotend reacts and heats up the way it’s supposed to…
Absolutelry right: Don’t use all metal for PLA!
If you go all metal, ditch it and use PETG instead.
Titanium is much harder to machine, so you will almost certainly get a smooth bore on that one – which might be more relevant.
And yes: The compound IS part of the equation, as is the fan’s static pressure (not flow rate alone).
Even the Prusa i3 MK3S at work got a titanium break and premium compound at some point (while my not-an-X5S-anymore went through all stages of upgrades – until I mounted a genuine Hemera).
Did a writeup of my experiences some time ago:
https://burningbecks.wordpress.com/2019/09/06/hot-end-anatomy-and-disscetion/
Actually I know what your problem is. I encountered the same problem when I was changing nozzles on my Anet A8. Nozzles have different length of the thread. There is difference between e3d style and mk8 style. If you put mk8 nozzle into e3d style heatblock, the heatblock will touch the cooler therefore render heartbreak useless. That will cause lot of jams.
>therefore render heartbreak useless.
Haven’t we all been here? ;)
Maybe if the author of this article didn’t buy a Chinese clone of the real product, assemble it incorrectly, use the wrong nozzle, and then blame the issue on the company that made the legit hotend, they wouldn’t have had any of these issues. This article should be taken down because someone might see it and assume any part of it is correct. Almost nothing in here is correct.
I don’t understand the point of this blog post… All the information is wrong and there’s no conclusion.
You can’t just mix and match pieces of different hotend designs using cheap clone parts. It’s the business end of the whole FDM process, buy a properly built one and stay in the manufacturers ecosystem or things are going to go horribly wrong very quickly.
What were you expecting when you screwed the heat-sink against the heater-block?
I get the feeling from this Article you were looking in the wrong places to solve a simple problem.
I have used many Full Metal hotends but never had any trouble like this.
Don’t cheap out on hotends and extruders either I learned that lesson long time ago
And mostly because of knock-off I stopped my 3D printing hobby for a few years.
There’s precisely nothing at all wrong with “cheap clone” parts. They work just as well for a fraction of the price. My clone all metal hotend and clone titan extruder work flawlessly. Never had the slightest problem with any of it.
It’s the not the hardware that’s the problem. Stop blaming clone parts. It’s 100% operator error in assembly and part matching. Get the correct part types and it matters precisely zilch, where those parts are made.