There was a time following the Second World War when TV sets for the nascent broadcast medium were still very expensive, but there was an ample supply of war-surplus electronic parts including ex-radar CRTs. Thus it wasn’t uncommon at all for electronics enthusiasts of the day to build their own TV set, and magazines would publish designs to enable them. With a burgeoning consumer electronics industry the price of a new TV quickly dropped to the point of affordability so nobody would consider building one themselves today. Perhaps that should be amended to almost nobody, because [Retro Tech or Die] has assembled a small black-and-white CRT TV from a kit he found on AliExpress.
We have to admit to having seen the same kit and despite a sincere love for analogue telly, to have balked at the price. It’s an exceptionally cheap set of the type that was available from discount stores for a laughably low price around the final few years of mainstream analogue TV broadcasting, and having a couple in the stable we can confirm that the value here lies in building the thing rather than owning it.
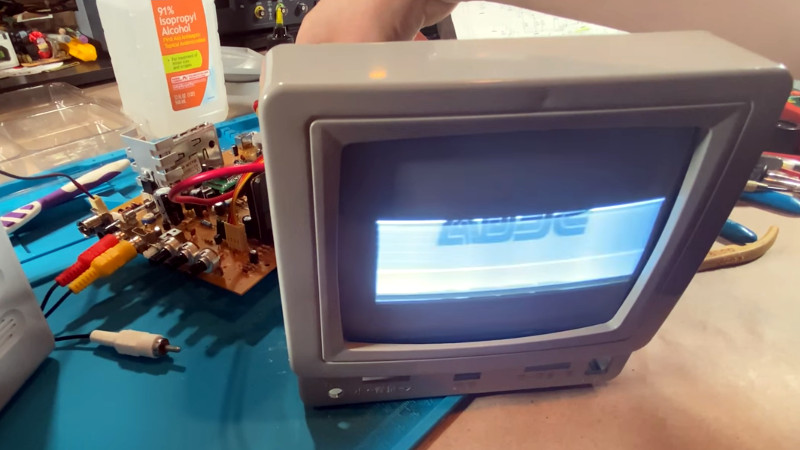
The unboxing and building proceeds as you might expect, with the addition of very poor documentation and extremely low-quality parts. Satisfyingly it works on first power-up, though some adjustment and the reversing of a deflection yoke connection is required for a stable picture. The scanned area doesn’t fill the screen and he doesn’t find the solution in the video, we hope that by his next video someone will have suggested moving the deflection yoke forwards.
Perhaps merely assembling a kit might not seem the most exciting subject for a Hackaday story, but this one is a little different here in 2022. CRT TV sets are now a long-gone anachronism, so for a younger generation there is very little chance to see them up close and thus watching one built has some value. If you want to spend the cash and build your own he’s dropped the link in the YouTube description, otherwise watch the progress in the video below the break.
Fancy learning a bit more about analogue TV? Have a dive into the video waveform. Or for a bit more CRT goodness, learn about converging a delta-gun colour set from the days when a TV weighed almost as much as you did.


I built a few Heathkit TVs back in the day; and this is no Heathkit, that’s for sure. But it’s pretty cute, and it actually works. That’s saying a lot considering the price.
Judging from the hum bar that slowly rolls up the screen, and that the audio affects the picture size, I’d say you have a power supply problem. “12v” wall warts often deliver more like 14-15v when not fully loaded; so it could be as simple as running it on 15v instead of 12v.
Thanks for posting this, and happy hacking!
Wow! And with a 4:3 aspect ratio no less, for watching pre-1953 movies and pre-2000 TV shows, all of which were shot in the 1.33:1 “Academy” aspect ratio. I use my Toshiba 32″ CRT for that content in my collection. And what will I finally be using my thousands of Sony card points for? What else but the top model year 2022 65″ Sony OLED to watch all of my widescreen content. This kind of begs the question: Why hasn’t at least one consumer or commercial display brand marketed a ~ 46″ or larger 1080p or 4K 4:3 OLED TV? While demand may not be in the millions there are loads of gamers, photographers, filmmakers-and cinephiles like me-who’ve been screaming for this kind of OLED. Search online and see for yourself. IF start up funds didn’t make it impossible, I’ve toyed with the idea of partnering with a designer to launch a dozen to test the market. But think of the advantages: Viewing all 1.33:1 content in its native aspect ratio (no black bars) in your dedicated 4:3 TV room. Thus, the widescreen OLED in your 16:9 TV room will never get hit with differential pixel aging; nor will then have you have to crop or stretch (yikes!!!) your 1.33:1 content to fill your OLED, QLED or any widescreen TV. Anyway, it’s a nice dream.
12mp 31HN713D LG look at medical monitors however medical prices.
Because most of the world doesn’t have the luxury of dedicating a room to a 4:3 TV. You can watch 1.33:1 content on a 16:9 display. I really don’t get people’s issue with ‘black bars’ – isn’t the frame of your TV also black?. If you’ve got a crappy TV where the black bars are actually bright grey then get a better TV rather than a second 4:3 TV. If you really want 4:3 then get a projector in your dedicated room and enjoy a lot more than 46″. Heck I’ve got an even better idea, make a 4:3 frame and put that on your 16:9 TV – voila a 4:3 display with bars of whatever colour or pattern your prefer! Store the frame behind the TV when you want to watch 16:9 content.
It’s the same reason (well maybe not actually) why PC & laptop displays ‘shrunk’ from 16:10 to 16:9. So people could watch 16:9 content without ‘black bars’. Or a money making idea where you can proudly advertise your 15.6″ display is ‘bigger’ than the old 15.4″ displays, despite it having less display area thus cheaper to make.
I know this sounds strange-and just about nobody sympathizes-but I’m bothered by vertical bars way more than horizontal ones. And I don’t want to have to crop off content of a 1.33:1 image displayed on a 16:9 just to fill the screen. Yeah, I tried to brainstorm how a projector would work for me; no way. I have two rooms for a TV in each but no where near big enough to make a projector at all a practical solution, plus cable lengths and other hardware issues would be ridiculous. As for the other fix; seriously?????
If you’re constrained for space, one hack for a projector is to mount it perpendicular to the screen at the back of the room, then aim a mirror between it and the screen. Some (maybe many) projectors support a mirrored image which then gives you an extra few feet ‘back’ from the screen. But yeah a projector needs good room conditions to work effectively.
Still I think my idea about making your own 4:3 frame could work, just pick your favourite border colour/design :)
Certainly for computers 4:3 is way better than 16:9. 16:10 is quite an OK compromise. The latest Macbooks are stretching vertically a little (with a notch). Just a shame they seem to be making 1 Macbook / day… Waiting 2.5 months already here hmph
It cost a pretty penny-even used-ten years ago but I still love my EIZO HD2442 16:10 monitor. Yes, 16:10 is indeed a decent compromise when I sometimes watch movies on it.
Back to the border idea, how about some fine red curtains that open and close depending on content format, just like a real (old school) cinema!
I’m pretty sure all of our “old school” stage performances were closer to 16:9
@RÖB I’m not talking about stage performances, but old-ish cinema – you know projected images. The method of revealing the screen with a big curtain, particularly noticeable on the transition from credits to the main showreel where the curtains moved further away to present a larger screen.
Not credits but trailers/pre show adverts I mean.
Ha, ha, yes I like a lot of old school content, though certainly not exclusively if I can help it (e.g. “A Simple Favor”, “Good Fight” series, “Equity”, “Bad Banks” series)-not that it’s been exactly easy to find anything reasonably palatable for years. But I’d opt for black curtains though it probably wouldn’t satisfy because the overall rectangular shape of the OLED TV would be distracting even with black curtains framing the screen in my dimly lit viewing room. Nice try though.
But seriously, IF LG wasn’t still probably the only source for OLED panels don’t you think some of the brainiacs who frequent this site could build a 1080p grade ~ 48″ 4:3 OLED monitor with a decent DVD upscaler? Who knows, if they could confirm the presence of an actual multi niche market for them in the US or globally, however small, the designers may get the funding to launch the first such TV of its kind. They may end up selling > tens of thousands. Stranger things have happened.
I’m not a TV enthusiast in general, but I do wonder how many people have two dedicated TV rooms :)
Maybe you should:
1. Buy a ~56″ 16:9 TV. This should give a height equivalent to ~46″ 4:3
2. Pretend that it’s 4:3 and the side bars don’t exist. Maybe cover them up with a curtain, frame or whatever
3. Never be bothered by pixel aging because this TV is dedicated to 4:3 content
I got 4 TV’ rooms 3 with there own 5.1 audio
a lot of people grew up with a tv in each room
I have a TV in EVERY room.
Oh. I only have one room.
I like this one…
http://danyk.cz/elmon_en.html
That one uses an electrostatic deflection CRT, like oscilloscopes used. It makes the circuitry much simpler, but seriously limits the screen size.
It also uses tubes (valves) instead of solid-state devices, which is interesting.
If one wants example TV circuits, find a Howard W. Sams Photofact folder for a product that is close. They covered just about every TV (and radio and other consumer electronic device). They provided clear schematics, parts lists, adjustment instructions, and circuit voltages and waveforms even when the manufacturer of the device didn’t!
There were construction articles in the hobby magazines if you look early enough. Especially the ones with “TV” in their name.
The RCA Tube Manual would have sample circuits, and I gather that included some sample TV schematics. Kind of intended to be built.
If you add sync circuitry, you can display B&W on an oscilloscope. An intermediate solution. I know there was a specific article in Radio Electronics, in the eighties or nineties.
“Low tech” one…
http://danyk.cz/elmon_en.html
I like it even if it is not propperly documented.
Yes, there were construction articles and people built them. But I suspect it wasn’t common.
Don’t forget, TV goes back to the thirties. Once there was broadvasting, some probably built sets.
One place it’s in fiction was in Robert Heinlein’s Have Spacesuit Will Travel, where the main character built a tv set, but then barely used it.
And on the tv series The Waltons, Jim-Bob built a tv set after WWII, thiugh someone else had started it.
Well, you can always turn it into a large analogue oscilloscope. I remember doing that with an old rubbish day scavenged crt tv in my early teens. Definitely cheaper than buying one, certainly back then, a good learning experience and you’d never see a commercial product with a screen that size.
Right on. Neat timing too with this thread titled “If you’re bored and have a 7000 series scope” regarding similar and vice versa using oscilloscope or spectrum analyzer screens: https://groups.io/g/TekScopes/message/190642
I actually have the preassembled version of one of these TVs. It’s trash. It does at least support composite in, and would be ideal as a little monitor for my ZX81, but the picture is fuzzy, smeary and blooms like mad. It’s also unable to handle the ZX81’s, um, _unique_ approach to composite signal generation.
I know just enough about CRTs to know that this is all the fault of the analogue board. The CRT itself is just a CRT. It should be completely possible to replace the analogue board with another, better one, to turn it into a B&W monitor. Of course it would need to be compatible with the CRT, but these 5.5″ CRTs are apparently completely standard. I could probably reuse parts of the existing board, too, like the flyback transformer. Being a small, DC-powered B&W model it should be relatively safe to work on, too — no hot chassis and reasonably low voltages.
Sadly, I have absolutely no idea how!
I would like to see somebody make a home made CRT, that way we could “enjoy” analogue TV far into the future.
The CRT project to watch is https://github.com/tdaede/td-crt which is an open source project attempting CRT recreation using modern parts for everything except the picture tube itself.
Interviews with creator Thomas Daede:
https://www.retrorgb.com/interview-with-open-source-crt-chassis-creator.html
https://www.youtube.com/watch?v=Lb6y3jM1k_A
Sigh. This guy. I’ve met him. Knows better than the manufacturer. Now, granted, the manufacturer definitely shouldn’t be trusted, but the things he chooses to do to improve it are .. curious. Adds a socket to a chip that will never be replaced, and has absolutely no reason to be socketed – this will only reduce its reliability. Eschews the supplied heat shrink for the transformer connections, and uses a sloppy wrap of electrical tape instead, “just to be safe”. Doesn’t trust the supplied power transformer because it’s too light, and says this three different times, even though he couldn’t use it even if he wanted to, because voltage. Buys a different power transformer “definitely the right voltage”, which may be the right voltage on the primary side, but pretty clearly the wrong secondary, based on the outcome. Pausing this in the HD version shows it rated at 12V, 10VA, which would be about 833mA, which MAY be beefy enough, but you can’t really tell without measuring what the PS output is under load. I agree with [Lee Hart] above, the fact that the audio is pinching the image size WAY down means it’s starved for power. He acknowledges this, and says that he got the same voltage when he used an external wall wart, but doesn’t mention what the output current rating on that was, nor what the measured voltage was. Possibly a backward electrolytic. Prints a label to stick on the back to make it “compliant”, with what, I don’t know – does he plan on selling this? Puts the case together without bothering to straighten out the yoke. Gotta love the “racing stripe”, though – I would have loved to see how he mashed the case together, but surprise! – it’s not in the video. Oh, wait, one more mention of the supplied transformer, which again, he did not use, being too light, and then throwing in that the (aluminum) electrolytics seemed too light. “They just felt .. bad.” Because, yeah, that’s how we test components, by judging their heft and, I guess, goodness, in the hand. And color. You can’t trust a resistor whose red bands is a different hue of red. LOL! Wants to re-cap this with quality capacitors. Yeah, that will save a bad design. Oh, and “better” resistors as well. I know a crappy red band when I see it. The schematic he links to indicates that it does have a voltage regulator, but clearly it isn’t regulating, either because it’s already running wide-open. Note that the OUTPUT of the regulator is in parallel with the 12V input, which means the DC input to the regulator needs to be higher. Possibly the transformer should have been 16V instead of 12V. Keep in mind that there is a bridge rectifier, so you lose about 1.4V there, and the regulator circuit needs some voltage headroom to work with. “I’m having a hard time verifying what the correct voltages ARE in this.” Well, maybe the 12V bus should be close to 12V, just a wild guess.
Hard to watch. And yet I watched the whole thing. There must be something WRONG with me. I DO seem a little .. light.
“Adds a socket to a chip that will never be replaced, and has absolutely no reason to be socketed – this will only reduce its reliability.”
Pfft. The contrary is the case, imho. If you use a socket, there’s less a chance (none) of overheating an IC. Quality products from the 1970s/1980s had most things socketed, if memory serves. A modular design was seen as an improvement back then. If manufacturers did invest extra money in sockets, they proved their honest interest in supporting the user and prove quality. Just look at things like the Apple II, IBM PC Model 5150, Yaesu FT-101, Robot 400 scan converter etc. These things are reliable and full of edge connectors, sockets etc.
Look at the Apple III, which had problems because the ICs were working out of the sockets. So they had to add hardware to lock the ICs in place.
It was the heating and cooling that did it.
The only value to sockets is easy replacement if the IC goes bad.
Ah yes, the machine for which Jobs insisted not to have any active cooling at all. The heating issues are basically the result of form over function.
DIY Mini TV Kit from USSR
https://www.youtube.com/watch?v=mhHqePByVG0
I cannot post a picture here, but here is the link: https://www.yaplakal.com/forum2/st/25/topic2115100.html
I personally want to see a movie played on one of these: http://www.sparkbangbuzz.com/crt/crt6.htm
Oops, I didn’t know youtube links embed. Here’s the RetroRGB link from the comment above but embedded:
https://www.youtube.com/watch?v=6l6mUYQhgSU
Oh. I’m still looking for a VCR97 socket to build the tv i wanted. I have a nice tube, just not the socket.
If you mean the WWII era 6.1″ radar tube then perhaps have someone can help have a custom socket made. From memory the original was bakelite. Perhaps Delrin but it’s only good for 120 degrees C so it may be too low for the cathode heater. Perhaps a 3D print?
I don’t know that there’s not one out there that you can find though but from that era it will be hard to find.
I have the same kit sitting in my Ali shopping cart for years now.
After seeing the video, I think it will stay there….
Last time when I used CRT-TVs not filling the entire screen with the picture was a serious defect.
In Italy there was a school by mail named “Scuola Radio Elettra” that sent kits and courses to learn to build electronics. Since the 60s they had a TV course. One of the latter in carnation was a !4 inch colour TV, that was a Mivar model. Black and white previous TV were Telefunken and CGE models.
https://www.ebay.it/itm/234360870705
Seems to me it doesn’t have enough current. He used a 10VA transformer and that is hardly enough to power a video doorbell. A 5inch B&W TV I bought from goodwill requires 12volts 1.5Amps.
I think it would make a good cyberdeck or retro terminal. Put some green or amber film over the screen to colour it and dump half the circuity and just use the composite input.
There are a number of errors on the schematic at a glance.
CRTs are far from “long gone”. There are still tonnes of them around and and they only stopped being sold in large quantities in only roughly the last decade. At least three shops in our town still have them to display the entrance CCTV camera and we are not even in a badly off area. How come in the thumbnail the image looks colour?