We love our retrocomputers here at Hackaday, and we’re always delighted to see someone rescue an historic artefact from the landfill. Sometimes, all it takes is replacing a broken power switch or leaky capacitor; other times you need to bring out the oscilloscope and dig deeper into internal circuitry. But the huge amount of work [Jerry Walker] put into bringing an HP 9830A back on its feet is something you don’t see very often.
If you’re not familiar with the HP 9830A, it’s a desktop computer from the early 1970s, fully built from discrete logic gates. The machine on [Jerry]’s desk turned out to be completely dead, with not even the fan spinning up. This was caused by a dodgy power switch, but replacing that switch was just the beginning: there were several bad components inside the power supply as well as a huge amount of moist dirt on the back of the motherboard. After a thorough cleaning and the replacement of several failed components, all four power rails were running within spec again.
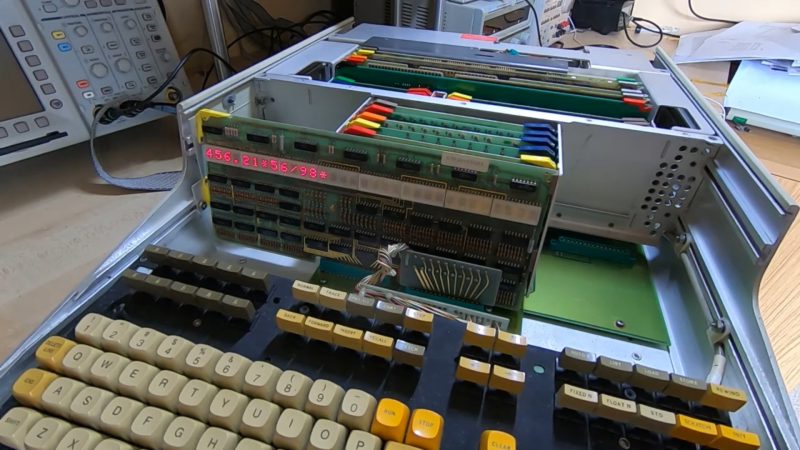
Next came the complex task of debugging the four PCBs that together make up the CPU. [Jerry] hooked up his logic analyzer to these boards to visualize the CPU’s internal state as it stepped through its microcode. Again, several TTL chips turned out to be broken and needed replacement. With the CPU working, it was time to get to the main program ROM, which ended up consuming much of [Jerry]’s repair time.
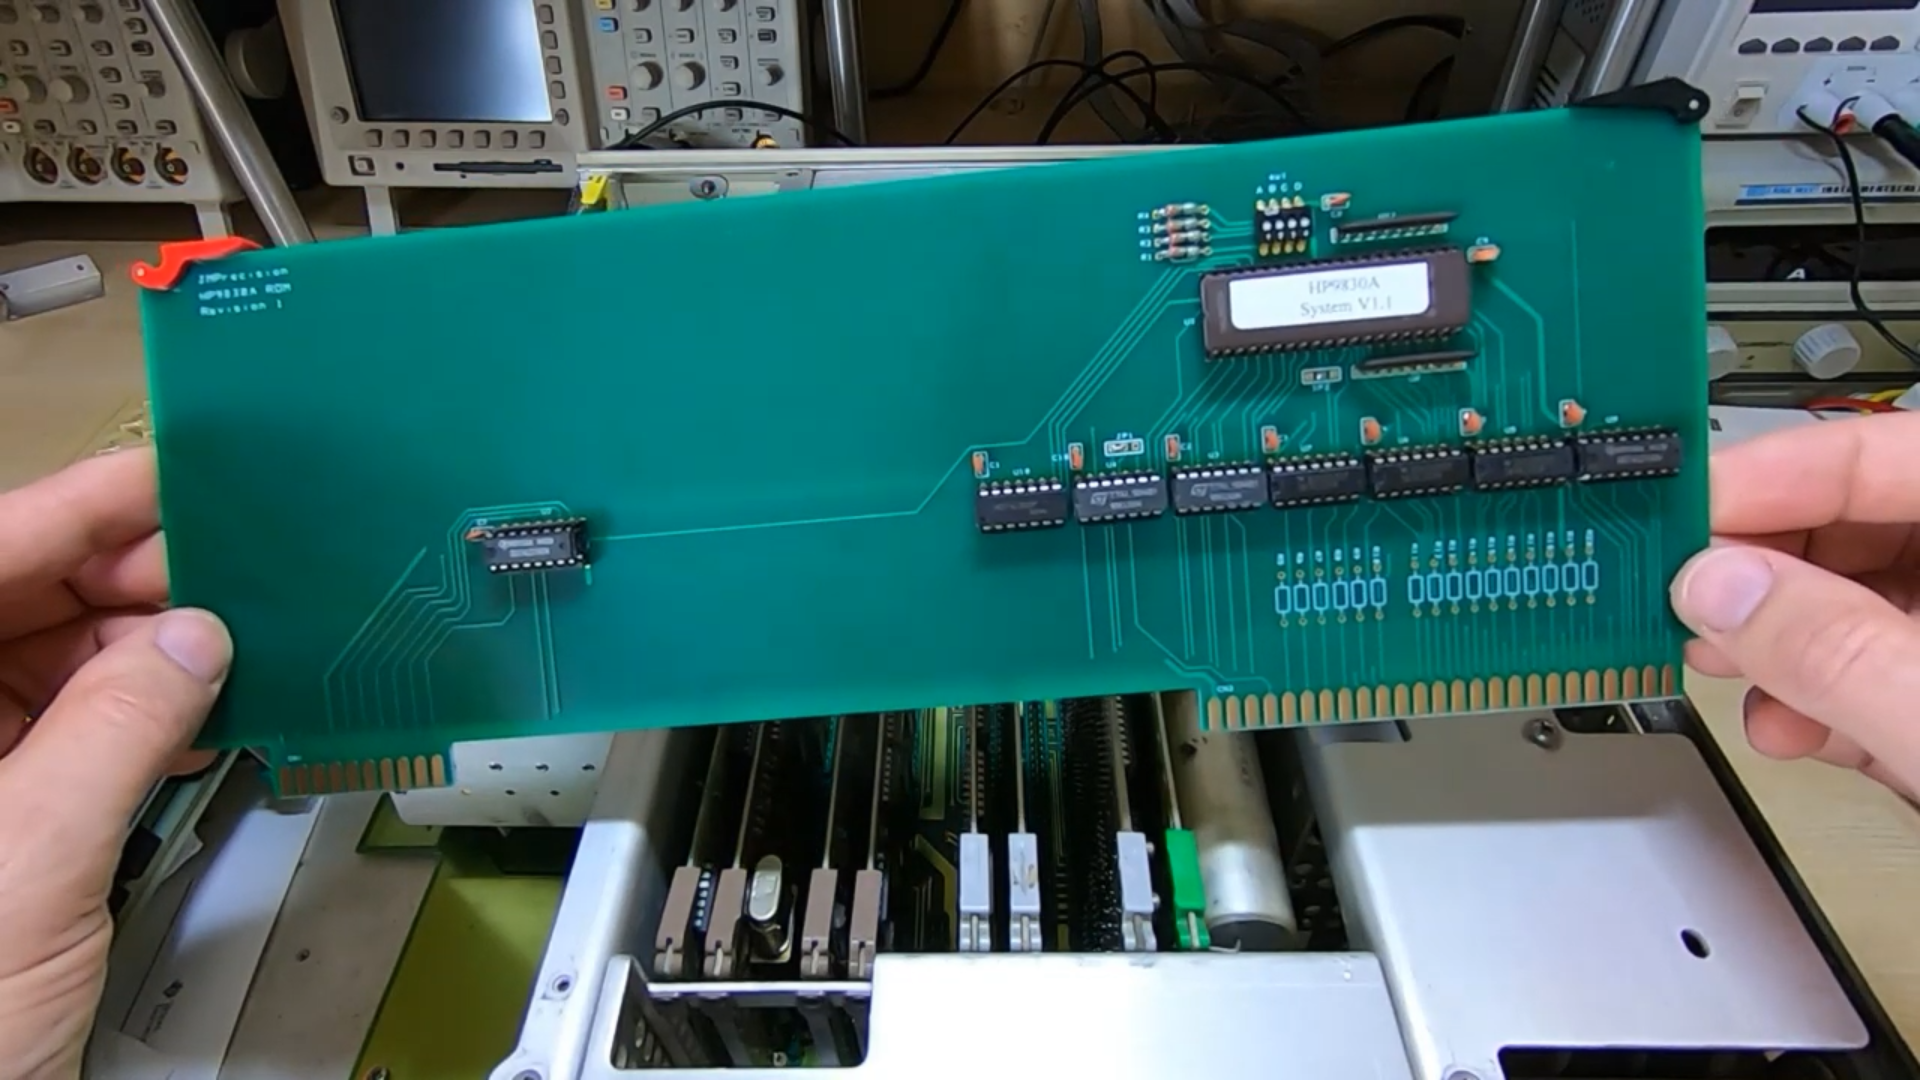
The problem with broken ROM chips is not so much finding a replacement, but getting a correct copy of their contents. Luckily, a cycle-accurate HP 9830a emulator exists which contains copies of the entire firmware. With several of the dozens of ROM chips dodgy or dead, repairing the original ROM board was not a realistic proposition, so [Jerry] designed a complete replacement board instead. With a modern, reprogrammable EPROM chip and some glue logic it was also a huge help in the rest of the repair process, as it allowed him to run custom machine code on the computer.
With a few test routines written into the EPROM [Jerry] was able to test all the RAM, ROM and registers as well as the display, and found yet more broken chips to be replaced and faulty connections to be repaired. With all the main functions now working, the HP 9830A came to life and responded to commands again. The only remaining issue was in the tape drive, which turned out to be caused by a broken sensor. Once that was replaced, the repair process was finally complete.
[Jerry]’s running commentary on his 26-part video series gives lots of great insights into the intricacies of computer architecture, so if you’re looking for something to binge watch, forget Netflix and put on [Jerry]’s videos instead. They also show the importance of a systematic troubleshooting method: start with the most bare-bones system possible, verify that it works exactly as intended, and only then start adding other components.
If you can’t get enough of vintage HP gear repairs, check out this repair of the related HP 9825. The ongoing process of restoring a Centurion Minicomputer is also definitely worth following.
Thanks for the tip, [mgsouth]!


This was my first computer, and it was interesting to use: very limited memory, weird Rocky Mountain Basic dialect of the BASIC language. The cassette drive was kinda dodgy even back then, and the thing must have weighed 40kg with the printer on top. Still, it was interesting to use and learn to program on. Dad checked it out from work to bring home for doing design work on, and if I remember correctly he said it was worth more than all three cars, and a significant proportion of what they’d paid when they built their house.
It was sure cool taking the top off and looking through all the boards, but this level of repair is heroic.
I had two broken 9810’s (cheaper versions of this machine) and my intention was to fix one of them, but I wound up fixing both of them. NOTHING makes repairs easier to nail down than substitution :) There were about 4 TTL chips and two transistors dead between the both of them. That’s pretty impressive considering that there were easily over 60 TTL chips in each machine, chips with date codes between 1969 and 1971 (the repairs took place about five years ago). The MOS chips (including the 1103 1Kx1 dynamic RAM’s) were fine, thank goodness, as were the unobtainium LED displays.
These machines were designed to last a lifetime, gold plated boards (yeah, the entire board) and sockets. The keyboard (double-shot molded key tops, of course) was read via electromagnetic sensing; no switches to wear out.
45+ years ago, I read a prediction that plastic packaged chips would all die in 30-40 years from moisture migration. Obviously, that wasn’t entirely true.
The 9810, decently loaded, was about 3200$ in 1972-3. You could get a new economy car for less. This machine described here was considerably more expensive.
PS: Early MOS took multiple weird voltages and could fail if they were even slightly wrong or noisy. I replaced all of the electrolytics in the 9810s’ power supplies to be on the safe side (the silicon was OK), and wow, larger can-type electrolytics are expensive now.
Hey Steve, do you remember what type of LED displays these machines used?
Nice rom board!!
Absolutely huge For the time. I remember some duel die EPROMS later on and they didn’t even have as many pins.
It is a very cool unit. I spent 6 years with this era of gear – using, fixing, designing – in a physics department. For what it is worth, back then I would use a little different order. First check fuses. If any are blown, DON’T’t replace and turn on. Second open PSU area and look for bulging scorched vanished in a puff parts, etc. Third, visual inspection of backplane and pull all the boards and inspect. Then connect and see if there is AC and regulated power. No? All those half-wave voltage supplies examined with a scope. In this particular case I would check for continuity on the transformer windings. And onward!
I have been watching eBay for ages for the one with the flexible paper card and mag strip reader that is programmed in HP calculator style RPN.
I have the wroking innards of a 1973 Compaq Portable Plus. I’d happily ship them to anyone that can use them.
That was the first computer I had regular access to for programming.
I was an intern at an engineering company, and they bought it to run a vector network analyzer, which I used sometimes, but I spent many an hour writing general BASIC programs. And it had a pen plotter with an unlimited supply of pens.
I used the 9826 on an automated board test system the 3060 from HP. It was a workhorse. I think it was HPL language? Then went to the 9836 computer.