C64 Finally Gets The SRAM Corporate Wouldn’t Pay For

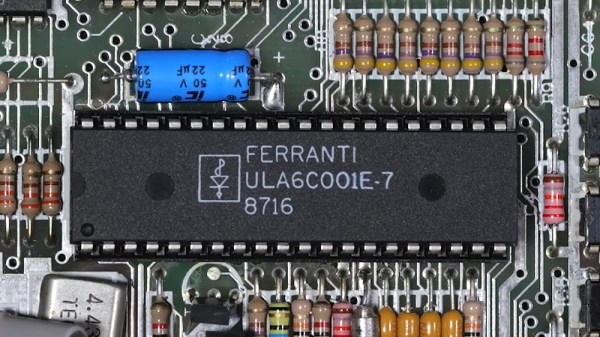
If you think RAM is expensive now, try putting yourselves in the shoes of a Commodore engineer, circa 1981. RAM was eye-wateringly expensive by modern standards, and Jack Tramiel wanted 64K of the stuff for the next computer– hence the name, Commodore 64– but he didn’t want to pay for it. The solution was to use cheaper dynamic RAM over the more expensive static RAM that later took over the market in the kilobyte range. That’s a small problem for retrocomputer hobbiests, because while we’re complaining about the price of gigabytes of the stuff, you can’t buy new DRAM chips that fit a Commodore at any price. That’s why [Fabio Battaglia] aka [hkzlab] came up with an adapter board to fit easily-available SRAM chips onto aging C64s. 

Nothing lasts forever– not cold September rain, and not DRAM chips. Heat damage? Internal corrosion? There are probably multiple failure modes, but someday the old stock of chips will run out and the retrocomputer community is going to be ready for it. [Keith Olson] sent us a tip on a video by [The Retro Shack]– embedded below, and thanks for the tip, [Keith]!–about this very problem, that serves as a good demo of what you get when you put SRAM into a C64. That said, the adapter board on offer is only good for C64s with the 250407 motherboard. If yours is different, you may have to modify the board– but hey, it’s open source, so go ye and do that thing. Let us know via the tips line if you do.

Continue reading “C64 Finally Gets The SRAM Corporate Wouldn’t Pay For”

IBM Home Director: Home Automation In 1996

Back in the 1990s IBM had a pretty sizeable presence in the PC market, including its rather spiffy Aptiva series of PCs. Naturally their PCs had to feature heavily in another consumer-related thing that was popular in the 1990s, being smart home automation in the form of IBM Home Director. Recently [Ionic1k] took a look at this blast from the past, starting with one of the original IBM commercials.

At its core it used the same X10 protocol that similar solutions from RadioShack and others used, with many modules and packages you could get to use with it. You could also get a more bespoke installation performed at your home to move beyond mere X10, which some people are still finding when they’re buying a house.

Since this uses powerline communication, it required no wires to be run, just the requisite modules to be plugged into a power outlet, with the video demonstrating the basic setup and installation. The PC itself is plugged into the control module via the serial port, from which the Home Director control software can be used to create a configuration and control the state of connected modules.

Although X10 has the same issues as any kind of powerline communication, overall it seems like a very nice system, with a wide range of modules and absolutely easy to set up even for a casual Windows user.

Continue reading “IBM Home Director: Home Automation In 1996”

The Atari Jaguar Runs Linux

Among the many forgotten might-have-beens of the games console world, the Atari Jaguar occupies a special place. It was the final gasp of Atari Corporation, the Jack Tramiel-era incarnation of the famous pioneering game console brand that brought us the ST line of computers, and like Marlon Brando’s Terry Malloy character from On the Waterfront, it coulda been a contender. But the early ’90s games business wasn’t kind to the console from Sunnyvale, and it was squeezed from behind by the SNES and Genesis/MegaDrive, and in front from the PlayStation. Thirty years later then, can it run Linux? [Cakehonolulu] is here to show us how.

With only 2 megabytes of RAM and space for 8 megabytes of ROM, this is hardly a powerhouse. But its 16-bit 68000 processor is a supported Linux architecture, albeit with the -nommu flag on compilation. The “Jerry” DSP chip has the required serial port and timer to boot a first Linux kernel, and after a bit of hackery to make it jump to the ROM location, something boots. There’s no init process until the flat executable file for a -nommu kernel is navigated, but with that past a BusyBox userspace and a graphics driver for the “Tom” graphics chip gives it a chunky on-screen console. The code can be found in a GitHub repository, for the curious.

It seems to be the moment for 68k consoles to receive the Linux treatment, as it’s only a few weeks since we saw it on a MegaDrive. Other ’90s consoles aren’t far behind though, with the Nintendo 64 falling to the penguin a few years ago. Meanwhile, the Dreamcast had Linux running decades ago.


Jaguar image: Evan-Amos, Public domain.

It’s Now Imperative That You Copy That Floppy

In the early 1990s, Don’t Copy That Floppy was an anti-piracy campaign that attempted to connect with computer-savvy youth through the power of hip-hop. While somewhat difficult to imagine given our current draconian Digital Rights Management (DRM) hellscape, warning kids about the potential legal ramifications of duplicating floppy disks containing copyrighted software was seen as necessary since at the time there was usually nothing preventing users from simply copying the contents of one disk to another.

Unfortunately 30+ years down the road, we’re now finding that somebody really should have been backing up some of those disks. Which is why the University of Cambridge of launched the Future Nostalgia project and produced Copy That Floppy! — a phenomenal guide on preserving the contents of floppy disks while we still can.

Visualizing a disk’s flux stream can identify debris and damage.

There’s no telling how much data could potentially be lost to time because its stuck on such an antiquated and fragile storage media, and the situation only gets worse with the passage of time. The problem isn’t just that modern computers don’t have floppy drives. The disks themselves degrade with age, a process which is accelerated if they aren’t stored properly.

As such, Copy That Floppy! only briefly touches on the most ideal situation — that is, buying a USB floppy drive and making copies of the bog standard 3.5 inch disks you might come across. It then moves right on into more advanced topics, such as interfacing with less common drive types, how to safely clean floppies, and the use of advanced tools such as Greaseweazle to analyze captured disk images.

We’ve seen demonstrations of some of these techniques before, and a few years back Adafruit got interested in floppy preservation with modern hardware. But in-depth guides like these that pull all that information together into one place are valuable resources.

SB Mini II Is A Homebrew Apple II Clone

On the one hand, the original Apple II has been copied over and over again since at least the early 80s, so maybe this hack is old hat to the greybeards around here. On the other hand, this is the year 2026. When Apple released it back in 1977, who could have predicted people would still be building these things nearly five decades later?

In that sense, a homebrew Apple II in the current year is pretty remarkable. It’s a really well done project by [simonboak], nicely open sourced with a case to match, so is worth looking at on its own merits.

It doesn’t run DOOM, but neither did the original. Oregon Trail is more this unit’s speed.

Unlike the later models, the original Apple II only used commercially available ICs, making it an easy target for recreation. No FPGAs required, just good old-fashioned DIPs. OK, these are modern CMOS versions of the chips, but other than that, the biggest concession to modernity is space on the board for a Raspberry Pi Pico to allow for connecting a USB keyboard.

The accompanying blog post lists some other differences from 1977’s favorite home computer: SRAM vs DRAM — because you know the Woz would have used it if he could — and omitting the composite video circuitry in favor a late-model VGA card. There’s no need for the composite output since he’s eschewing the period-appropriate CRT for a retro-styled LCD monitor, which is also 3D printed and available on Printables. It’s crazy to think that the Apple II family lived long enough not only to see the dawn of VGA but also well into its sunset.

If a homebuilt Apple ][ doesn’t impress, what about a PC-compatible circa 1995?

Why The NES Put Out A Wobbly Picture

The NTSC television standard is a masterpiece of mid-century engineering, to pack a color image into the transmission bandwidth of a monochrome one, and to do so while maintaining backward compatibility with earlier monochrome TV sets. In terms of its timings and choice of sync and carrier frequencies it’s elegantly thought out for maximum quality on a 1950s round-CRT color TV set.

The trouble is, that while the standards are exacting, the receivers are quite forgiving, and will display adequately even with substantially off-spec video. [Nicole Express] is here with an in-depth examination of a time when that was pushed just a little bit too far, explaining why the Nintendo Entertainment System (NES) displayed wobbly color images.

We’re treated to a run-through of the NTSC standard itself, and a look at how some of the other consoles and home computers of that era either had similar problems, or managed to avoid them. The key lies in the exacting timing required to achieve perfect interlacing, and the NES’s use of a single crystal to provide all the clocks. The dot clock on adjacent frames was almost right, but not quite, leading to a side-to-side wobble that while barely perceptible, was exacerbated by some graphics. It’s a fascinating read.

We’ve looked at composite video in detail in the past.


NES image: JCD1981NL, CC BY 3.0.

Performance Improvements For Open-Source 80386

The Intel 80386 is a rather fascinating slice of computer history. It marked the first 32 bit X86 processor, and was a staple of early desktop computing. Like all chips, it has a number of quirks, one of which being the fact that all commands are executed in microcode. By this nature, it was a rather excellent prospect to be re-implemented in an FPGA core called the z386. However, it was lacking a feature native to the original 386, early start memory access. So to bring some performance to the z386 project, [nand2mario] went forth to fully implement this feature for FPGA 80386s.  

Instead of taking a cycle to find and allocate the memory required for executing the next instruction, the 386 would start this in the previous cycle. This is achieved in hardware by nature of having a separate memory management unit. In the FPGA, the key difficulty proved to be in getting the computation fast enough to execute within a single cycle. This change netted an approximate 9% performance benefit. However, for [nand2mario] this was too small a performance uplift. 

Some rewrites of the store cue allowed for cutting a cycle out of the process further improving the performance. However, more performance required slight deviations from the design of the original 386. Because code-branches are performance critical, the z386 project now computes the branch memory jump several cycles earlier than the 386, reducing the cycle time for the jumps from 9.25 to a mere 6. Some final changes to the microcode decode frontend rounded out the optimizations covered in this latest blog post.

The net result is an approximate 39% increase in performance in the all important DOOM benchmark. The z386 still not a complete project, the performance is still lacking compared to the 386, and it remains unable to boot Windows. X86 is complicated, which will take time, so make sure to stay tuned for more coverage! While you wait, make sure to check out our original writeup of the z386 project. 

Pauli Rautakorpi, CC BY 3.0.