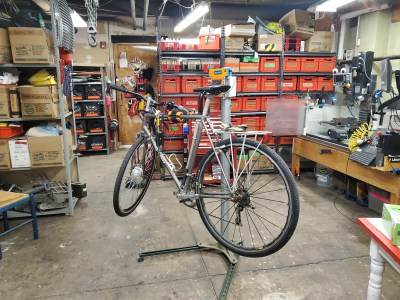
If you’ve ever done maintenance or repair work on your bicycle, you’ll know that positioning a bike in your workshop isn’t trivial. You can use your bike’s kickstand, or lean it against a wall, but then you can’t work on the wheels. You can place it upside-down, but then the shifters and brake levers are hard to reach. You can hang it from the ceiling, but then you first need to install hooks and cables in hard-to-reach places. Ideally you’d want to have one of those standing clamp systems that the pros use, but their price is typically beyond a hobbyist’s budget.
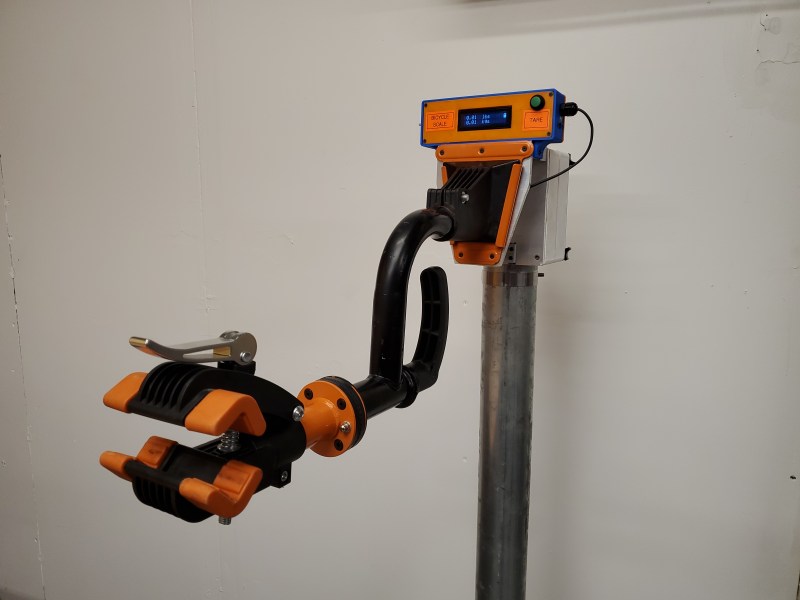
Or at least, that’s how it used to be. As [Dane Kouttron] discovered, a simple wall-mounted bike clamp can be had for as little as $35 on eBay, and can easily be converted into a smart mobile repair stand. [Dane] fashioned an adjustable stand from some steel pipes he had lying around, and 3D-printed an adapter bracket to mount the bike clamp on it. This worked fine, but why stop at a simple clamp when you can expand it with, say, an integrated scale to weigh your bikes while you work on them?
 [Dane] thought this a useful addition and went searching for load cells. After finding a suitable model he designed a new bracket that could accurately translate the downward force exerted by the clamp into a compressive force on the load cell: a few blocks of aluminium and a hinge did the trick nicely. He then connected the load cell to an HX711 strain gauge amplifier, whose output was digitized by an Arduino and displayed on an LCD. Finally, he made a sleek 3D-printed enclosure for the whole system that neatly fit on top of the bike clamp.
The resulting system is sturdy enough to hold even a fully loaded electric bike but flexible enough to position it in various orientations. If, like us, you now realized you also need to have this in your workshop, then you can simply download the STL files and the Arduino sketch and build your own. If you’re trying to solve the inverse problem of mounting your workshop onto your bike, there’s solutions for that too.


This writeup is ludicrously detailed, i really like the short video clips.
Thanks for the kind words! Spent way too long getting video clips to respond correctly on mobile
That is an incredibly detailed build log
This is practical and good looking! :-)
^______^ Thanks! Glad you enjoyed the writeup
“…and 3D-printed an adapter bracket to mount the bike clamp on it.”
That doesn’t seem wise.
3d prints can be very strong, print in the right orientation for the load and its comparable to the injection molded part, wrong orientation rather more varied by material and printer calibration but always weaker.
Also this design appears to keep the prints in compression between two metal plates – the print is effectively just providing the right shape for the clamping action to work well, can’t split apart easily under these conditions as all the load is shared across a huge surface area of print, and shared very evenly with the metal plates distributing the load and the way prints most want to fail is well being pulled apart.
The plastic might creep over time, but just tighten the bolts down some more and it should be good for a long time.
FDM can produce mechanically sound parts. I built a homemade force feedback steering wheel with a 40:1 gear reduction using 3D printed PLA gears. Unlike most force feedback wheels, it’s a full size “truck” wheel. I limit the motor torque to about 40% in software because 100% could easily hurt someone.
At work we design and build UAVs for medical deliveries. One of our mechanical testers is a “pogo” cycler that violently shakes the vehicle repeatedly at several g’s for hours. It uses plenty of 3D printed parts.
I really like the design, its simple and looks great. Also this build log is absurdly detailed, but also straightforward
Why is my bike’s diet important?
I think every bike should have a “spare tire”.
B^)
I had a habit of ‘adding one more thing’ to an electric bike build and it somehow became 30kilos, this was somewhat of a ‘work on making a lightweight ebike’ workstand.
Waaat, how you gonna get all the gadgets from Street Hawk in under 40kg anyway?
https://www.youtube.com/watch?v=5zQ9mu7Evoc
It has an impact on efficiency if you’re going fast. If you’re pootling around below 10mph then you likely won’t notice, but if you’re getting 20mph on road then weight affects you. Yes, stuff adds weight, but any unnecessary weight you can shed means you can carry another spare tube or whatever.
For off-road, heavy bikes are a massive pain to carry over stiles or to push up steep bits. And panniers can be taken off so it’s weight of the bike kit stuff you carry that counts.
Incredibly thorough writeup. The gifs are excellent and really add to the project. Sparkfun should use this as an example of the Qwiic system’s ease of deployment.
Also, no youtube hype-train buy-my-merch nonsense.
Much appreciated. :D
The addition of weighing is interesting, but if the goal is a cheap workshop stand, Amazon has them for like £35.
Lidl has some for 40eur, the reviews are suite good, and it is way more stable as a quadripod then my old Decathlon tripod:
https://www.lidl.be/p/fr-BE/crivit-pied-d-atelier-pour-velo/p100350464
I have the same model and it’s perfect – at least for a home/hobby user.
Some like as little weight on as possible. Others load on convenience and safety accessories. Track vs. city streets.
Unfortunately this clamp design don’t work well on today’s plethora of frame shapes. I am looking for something to hold the bottom bracket and seat post on top end, the two things that stay in place unless it’s a recumbent. Then you will need a small rack lift!
Interestingly, the clampy arm thing rotates and locks in place!
You should be able to grab from the seatpost, it will probably be a bit more wiggly but should work.
example:
https://transistor-man.com/PhotoSet/bike_repair_stand/rotated.jpg
This writeup is the perfect middle ground between a video writeup and blog post. It is like watching a video but with scroling. Incredible.
The bike stand is pretty cool too if you are into bikes I guess.
If I ever weighed my bike, which I never do, I would be unsurprised to find it weighs the same every time.
Are you gonna patent and license those wear free tires and brake pads or just leave us hanging?
Did I even hint that I actually rode it?