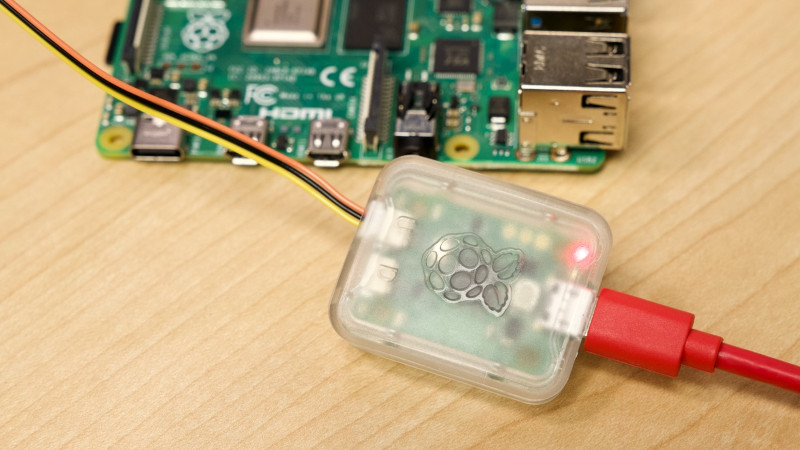
We mentioned the Raspberry Pi Debug Probe when it was launched, a little RP2040-based board that provides both a USB-to-UART and an ARM SWD debug interface. [Jeff Geerling] was lucky enough to snag one, and he’s put it through its paces in a handy blog post.
The first question he poses is: why buy the Pi offering when cheaper boards can be found on AliExpress and the like? It’s easily answered by pointing to the ease of setting up, good documentation and support, as well as the device’s reasonable price compared to other commercial probes. It also answered a personal question here as he hooked it up to a Pico, why it has three jumpers and not the more usual multi-way header we’ve seen on other ARM platforms. We should have looked at a Pico more closely of course, because it matched neatly to the Pi product. On the Pico they’re at the edge, while on the Pico W they’re in the center.
No doubt if the latest addition to the Pi stable has any further revelations we’ll bring them to you. But it’s worth a quick look at this piece to see a real experience with their latest. Meanwhile, take a quick look at our launch coverage.


I always wondered why they didn’t release this alongside the Pi Pico. It’s such an obvious gizmo!
Yes yes i know, just flash a picoprobe, it takes 2 seconds. but the *aesthetics* aren’t there. I want my debug probe to be visually a debug probe, its own entity. otherwise my adhd kicks in and i get irrationally angry.
a) Initially probably to justify huge quantities of the Pico for getting the cost down.
b) Probably not a consideration at first.
c) Dedicated unit for future RP* variants
I like it that cables are included. Didn’t realize that. Nice touch. As for the micro USB port, I think is a plus. I have lots of those around working with other pi’s and Arduino boards. Not a big deal and the cable is included anyway. So not annoying at all (reference blog) :) . I’ll have to pick up one of these probes. Looks useful. Oh, and … I’ve never bought anything from China’s AliExpress.
Does anyone know whether this debug probe offers better (or any) ESD protection versus just using a picoprobe? I use a picoprobe fairly regularly to program boards with RP2040 processors via SWD. I’ve probably programmed 300-400 over the past few months, but I’ve found that any static shock to the picoprobe will kill it. (Even customizing the image and switching to other GPIO pins doesn’t help.) My “workaround” has been to keep a few extra picoprobes pre-programmed and wired and ready to go, which is fine, but generally speaking the picoprobe does not have the same protection as an ICE programmer. (Which, considering they’re $5 versus $150, I’m not complaining.)
But, a picoprobe with more protection would be great. Is that what this device is?
If you check their connector specification doc it says they use resistors for short circuit and ESD current limitation. I wouldn’t know how effective that would be.
https://datasheets.raspberrypi.com/debug/debug-connector-specification.pdf
Maybe put some optocouplers between your flasher and the device?
70cents for 4 channels for a Toshiba TLP281:
https://www.aliexpress.com/item/32917926202.html
I use those on a bluepill based JTAG finder .
“why buy the Pi offering when cheaper boards can be found on AliExpress and the like?”
Because you can get 10 items for the same price with free shipping:
https://m.nl.aliexpress.com/item/1005004500525618.html
It has SWD and UART for 1.2 EUR.
The rest is marketing from the Rpi “foundation”.
Thankfully, sticking scare quotes in doesn’t magically invalidate a legal entity.
Oh no! They’re making a product to fill a niche at a reasonable price point that isn’t a clone board with a fake chip and zero QA! How dare they!
Another SWD+UART flasher with a 30cents CH552:
https://github.com/ElectronicCats/DAP-Cat-Programmer
Cool, now go get a board made, buy all the other components, populate the board, buy/build the wires, and don’t forget to track your time. It’s $12 for all that, not too bad honestly.
Can a standard pico be flashed and put into service as a probe?
Yes. This is just a convenience, with a bit of extra input protection, a nice case, and no temptation to stick it in some other project when you run out of spares.
For an review testing a debug probe I think it would have been appropriate to spend more time on the debug aspects rather than the UART aspects. As discussed in the article there are already a number of UART to USB solutions out there, for the debug side previously this would have needed a second Pico or development on a Raspberry Pi. On the debug side of things there are two main uses, obviously the debugging of a running process but also the flashing of new firmware.
I am not sure if there would have been low demand but one item I would have found useful would have been the option to power the target Pico from the debug probe, for early development / debugging cycles this would mean they can all be powered from a single USB port but in it’s current form I believe the second Pico will always need it’s own power source.
In case it helps, this is for blinky.c example. I use VSCode and have the following add-ins:
C/C++ (Microsoft)
C/C++ Extension Pack (Microsoft)
C/C++ Themes (Microsoft)
CMake (Microsoft)
CMake Tools (Microsoft)
Cortex Debug (marus25)
I cloned the following with git into the specified directories
https://github.com/raspberrypi/pico-sdk is in /etc/embedded/pico-sdk
https://github.com/raspberrypi/pico-extras is in /etc/embedded/pico-extras
https://github.com/raspberrypi/pico-examples is in /etc/embedded/pico-examples
Latest ARM (none-eabi) compiler is in /etc/embedded/arm-none-eabi
To debug blinky.c with VSCode, I need the following files:
1) pi-pico.sh in /etc/profile.d
PICO_SDK_PATH=/opt/embedded/pico-sdk
PICO_EXTRAS_PATH=/opt/embedded/pico-extras
ARM_NONE_EABI=/opt/embedded/gcc-arm-none-eabi
PATH=$PATH:$ARM_NONE_EABI/bin:$ARM_NONE_EABI/arm-none-eabi/bin
export PATH PICO_SDK_PATH PICO_EXTRAS_PATH ARM_NONE_EABI
2) 60-openocd.rules in /etc/udev/rules.d
# /etc/udev/rules.d/60-openocd.rules
# Raspberry Pi Debug Probe
ATTRS{idVendor}==”2e8a”, ATTRS{idProduct}==”000c”, TAG+=”uaccess”
3) launch.json (in project .vscode) – you need the Cortex debugging add-in for VSCode
{
“version”: “0.2.0”,
“configurations”: [
{
“name”: “Pico Debug”,
“type”: “cortex-debug”,
“cwd”: “${workspaceRoot}”,
“armToolchainPath”: “${env:ARM_NONE_EABI}/bin”,
“executable”: “${command:cmake.launchTargetPath}”,
“request”: “launch”,
“servertype”: “openocd”,
“openOCDLaunchCommands”: [ “adapter speed 5000” ],
“configFiles”: [
“interface/cmsis-dap.cfg”,
“target/rp2040.cfg”
],
“gdbPath”: “gdb-multiarch”,
“device”: “RP2040”,
“svdFile”: “${env:PICO_SDK_PATH}/src/rp2040/hardware_regs/rp2040.svd”,
// “showDevDebugOutput”: “raw”,
“postRestartCommands”: [
“break main”,
“continue”
],
}
]
}
4) CMakeLists.txt in project directory
cmake_minimum_required(VERSION 3.12)
# Pull in SDK (must be before project)
include(pico_sdk_import.cmake)
project(pico_examples C CXX ASM)
set(CMAKE_C_STANDARD 11)
set(CMAKE_CXX_STANDARD 17)
if (PICO_SDK_VERSION_STRING VERSION_LESS “1.3.0”)
message(FATAL_ERROR “Raspberry Pi Pico SDK version 1.3.0 (or later) required. Your version is ${PICO_SDK_VERSION_STRING}”)
endif()
# Initialize the SDK
pico_sdk_init()
add_compile_options(-Wall
-Wno-format # int != int32_t as far as the compiler is concerned because gcc has int32_t as long int
-Wno-unused-function # we have some for the docs that aren’t called
-Wno-maybe-uninitialized
)
add_executable(blinky blinky.c)
# pull in common dependencies
target_link_libraries(blinky pico_stdlib)
# create map/bin/hex file etc.
pico_add_extra_outputs(blinky)
6) Extra files copied into to project directory
/opt/embedded/pico-sdk/pico_sdk_init.cmake
/opt/embedded/pico-sdk/external/pico_sdk_import.cmake
/opt/embedded/pico-extras/external/pico_extras_import.cmake
/opt/embedded//pico-extras/post_init.cmake
7) blinky.c source file (generates morse)
/opt/embedded/pico-examples/picoboard/blinky/blinky.c
Pi Pico is connected as per this article. Don’t forget you still need to power the Pico from external power or from the USB lead!
blinky.c will auto-compile and you can single step through using F10 (step-into) or F11 (step over).
Works for me. These instruction (or similar ones) should be on the Raspberry Pi site I think.
Next step is getting W5500-EVB-Pico (Pi Pico with Ethernet) working with FreeRTOS and the debug probe!