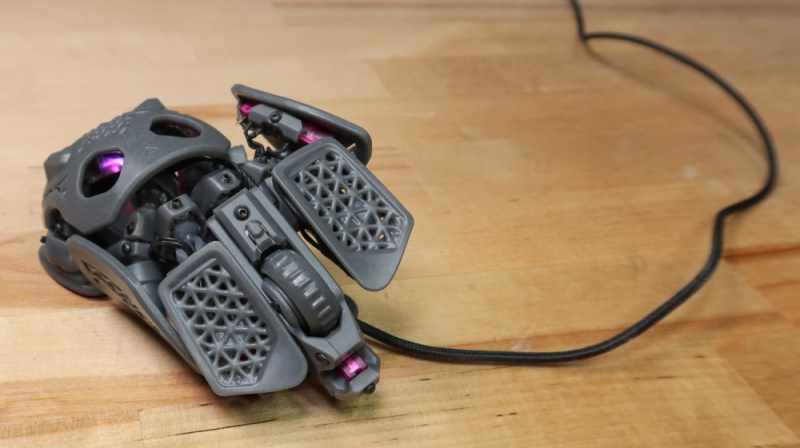
Many of us are very heavy computer users, and two items that can affect our comfort and, by extension, our health are the keyboard and the mouse. We’ve covered many ergonomic and customisable keyboards over the years, but we are not sure we’ve covered a fully adjustable mouse until now. Here’s [Charlie Pyott] with their second take on an adjustable mouse, the open source, statial-b.
[Charlie] goes into an extensive discussion of the design process in the video after the break, which is a fascinating glimpse into the methods used by a professional industrial designer. The statial concept breaks the contact surfaces of the mouse into fixed and moveable sections. The moveable sections are attached to the mouse core via a pair of ball joints connected with extendible arms, allowing the surfaces to be adjusted for both position and orientation. The design process starts with 3D scanning their ‘workhorse mouse,’ a Razer Deathadder Elite. This creates a reference volume within which the statial body should fit in its minimal configuration.

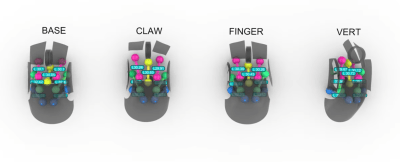
The design has a fixed central core, with each button (including the central scroller) separately adjustable. The side panel with a pair of thumb buttons is also moveable. Creating a model in Rhino 3D working with the grasshopper visual programming environment [Charlies] explored the surface constraints for the base, claw, finger and vertical grip styles common among mouse users. This model was then fed into Fusion 360 for the detailed design. After completing the design, it was passed back into Rhino 3D to add lattice effects to the panel. This helps reduce weight and lets the internal LEDs shine through. The design is intended for resin printing, so you could go wild with the visuals by missing custom resins if you were so inclined.
For the electronics, [Charlie] based the design around an Arduino Pro Micro, taking input from a PWM3389 laser direction sensor module. These are soldered to a simple base PCB, which also houses PH series connectors for the moveable switches to hook into. Check out the GitHub project page for all the files and an excellent build guide! As mentioned earlier, we don’t see many custom mouse hacks, but here’s a nice DIY gaming mouse to look into. If desk space is tight, perhaps a DIY trackball is in order? And while thinking about input devices, what about a neat DIY PCB-coil 3D mouse?
Thanks to [Keith] for the tip!


The Title Photo made me think of the flying toy little Princess Leia had in the Obi-Wan Kenobi TV series. More like a ladybug.
The only thing missing is the monthly subscription fee (for software updates of course).
This project is sponsored by the Syndicate of Pathogenic Bacteria… ;-)
However, very impressive achievement !
Everytime I see mice with textures cut into them I cringe. Its hard at times to keep regular mice clean after near full all day use at times when you have sweaty hands.
This one would be way worse.
A lot easier to take it apart. I use Corsair Elite mouse and once a year I have to take mine apart to remove dust bunnies, built up grease from my hand along the seam lines, and relube the scroll wheel, Corsair using crap quality lube that makes the wheel squeaky and stuttery.
Taking it apart isn’t much fun, putting it back together gets a few colorful curse words.
I wonder if being easily disasemblable would offset the problem by allowing mechanical parts to be separated from electrical, and deep cleaned.
You’re right that skin gunk accumulates in little details though on mice
This is the answer. Remove electrocal part and put it in the dishwasher.
Or just be able to put it all in the dishwasher.
Mouse alternatives.
“missing custom resins” mixing?
where the hell is the middle button
why can’t any of these have a middle button
give me back my middle button
Do you mean scroll wheel click or a third button like some really old designs?
Losing scroll wheel click would be like hell to me. So many new tabs would go unopened.
It has a middle button/scroll wheel. Perhaps, like me, you were initially confused by the photo being oriented with the front of the mouse towards you.
Give me back my Microsoft Explorer Touch mouse. This old simple touch mouse with the little shaker motor!
I didn’t take it!
Not so sure that 3D printer resin is a good thing to be touching all day. Even if fully cured, usually there is some uncured resin in the centers of each part where the light cannot reach. Parts can crack and it can leak out.
I am biased though, I had a very unpleasant allergic reaction to the stuff a couple years back. Have not touched it since.
How do you get uncured resin in the centres of solid parts when the resin is built up layer by layer?
Because the printer doesn’t fully cure the resin. It just cures it enough to hold a shape and stick to the bed/other layers. Straight off the printer, it’s still soft enough to take fingerprint imprints. You have to wash the uncured resin off, and then throw it into a UV curing box for a while, or out in the sun for a few hours before it’s fully cured. Though, this concern seems a bit overblown, as most resins are at least slightly transparent, so something this thing very likely is fully cured all the way through. But bigger models, especially if there end up being voids trapped inside, can have a fair bit of uncured resin in them.
Well if the stuff in the middle is in the more gel like semi-cured state it shouldn’t be a worry anyway I’d think – when it is cured enough that the only way to get any contact with the uncured and so still risky bits would be to break the part open, and if you did that you’d be throwing it away and washing the sticky off your hands anyway… As I don’t think (but can’t claim to know) that it can leech out of the uncured through the cured to get to the surface.
Now if they were foolish enough to have big bubbles of never exposed resin trapped inside with no way to drain it the OP has a point, but using the resin printer correctly you shouldn’t have anything to leak out by the time you have washed and cured it properly, at worst you have some not quite fully cured kicking around.
“This helps reduce weight and lets the internal LEDs shine through.”
I’m glad this is open source so that i can increase the weight to 5lbs and remove rgb. Goodbye cable drag and blinding rainbow effects.