[Kelly Coffield] makes intake manifolds for old Ford throttle bodies for fun, demonstrating an excellent technique for making such things in the small shop. The mould patterns are CNC machined from a solid polystyrene block, with all the necessary gates to feed the aluminium into the mould. The principle is to introduce aluminium from a large central runner into the mould structure, which feeds the gates into the mould parts. The various foam mould components are then glued with an extra brace bar at the bottom to strengthen it.
The complete structure is then sprayed with surfactant (just plain old soapy water) and dip-coated in a refractory slurry. The surfactant adjusts the coating’s surface tension, preventing bubbles from forming and ruining the surface quality produced by this critical coating step.
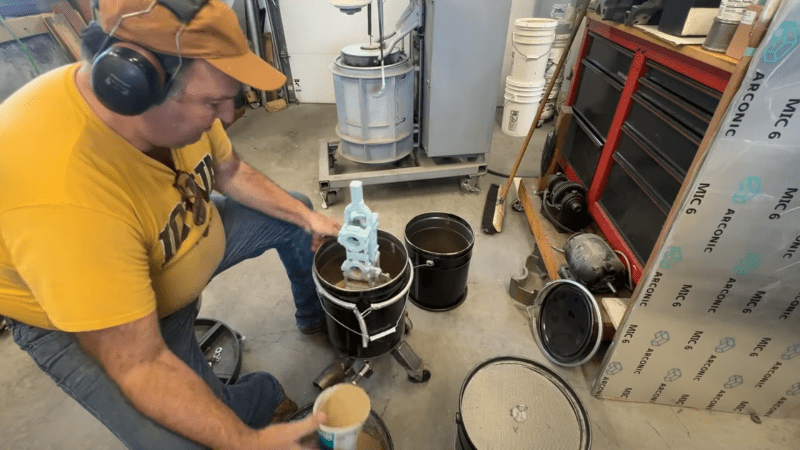
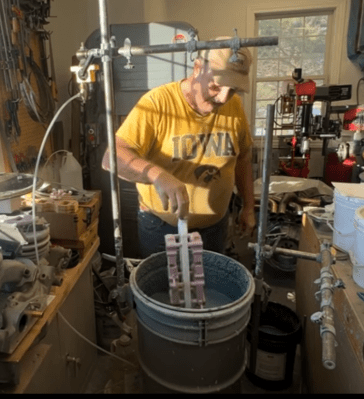
Once a satisfactory coating has been applied and hardened, the structure is placed inside a moulding pan fitted with a pneumatic turbine vibrator, to allow sand to be introduced. The vibrations ease the flow of sand into all the nooks and crannies, fully supporting the delicate mould structure against the weight of the metal, and gases produced as the foam burns away. A neat offset pouring cup is then added to the top of the structure and packed in with more sand to stabilise it. It’s a simple setup that can easily be replicated in any hackerspace or backyard for those motivated enough. [Kelly] is using A356 aluminium alloy, but there’s no reason this technique won’t work for other metals.
It was amusing to see [Kelly] demould by just dumping out the whole stack onto the drive and throwing the extracted casting into a snow bank after quenching. We might as well use all that free Midwest winter cooling capacity! After returning to the shop, [Kelly] would typically perform any needed adjustments, such as improving flatness in the press, while the part was in the ‘as cast temper’ condition. We’ll gloss over the admission of cutting the gates off on the table saw! After these adjustments, the part is artificially aged to a T5-like specification, to give it its final strength and machinability properties. There are plenty more videos on this process on the channel, which is well worth a look.
Aluminium casting is nothing new here, here’s a simple way to cast using a 3D printed pattern. But beware, casting aluminum can be hazardous, it does like to burn.
Thanks to [Chuck] for the tip!


Kelly’s videos are amazing. He’s built up a very impressive toolchain. In a lot of his earlier videos he used handheld woodworking equipment like pin routers and wooden templates to cut all his foam, so having a CNC is definitely not necessary. He has whole videos just on the pluses and minuses of different adhesives used for attaching foam subassemblies. Likewise, he has a lot of information on different materials used for coating the foam, from commercial formulations to things like drywall mud, and how they work. Plus, his results are absolutely spectacular. I love watching his work.
When he already has a CNC, why not CNC the aluminium part directly? I would have assumed that this casting process will produce a part which will have some shrinking and deformation as compared to the dimensions of the polystyrene model, and the shrinking won’t be entirely predictable, whereas a CNC’d aluminium part will be dimensionally correct throughout? Thanks
Theres a pretty big difference between a cnc capable of machining foam and one capable of machining aluminum.
A large block of billet aluminum being machined into a manifold results in a large portion of the aluminum being converted to swarf. Casting a part can repurpose scrap material.
As for shrink, sure thats an issue. Your first casting might be suitable (assuming you dont have access to casting simulation software). so you tweak the design, cut foam, remelt, recast, and repeat, until you get it right.
Once youve got it dialed in you can make as many as you ever need just by running the same file again.
The original part was sand- or investment-casted like he’s doing here. Plus scrap for melting is cheaper than billet for machining and foam is easier to cut than aluminum.
My assumption was that critical surfaces and dimensions of the molded part will get machined later but non-critical parts can be left as is.
I’m guessing the main reason for not machining the whole thing from a rectangular billet of aluminum is that the wear on the machining cutter to remove so many layers of unneeded material would be too high given the value of the part. That is, I think molding gets you 98% of the way to a finished part for fairly cheap, at least in dollar terms (after amortizing the cost of the whole casting apparatuses over many parts).
Time and waste are huge factors as well it just doesn’t make sense to pay for expensive large billets and turn them into mostly chips and air if there is a better way that can leave you only doing finishing touches on parts.
There is also an issue with trying to machine things like manifolds with curved runners that might be imposiible to reach.
Most auto makers use cast engine blocks—often via lost foam casting today— rather than machining from a solid billet. I assume (perhaps incorrectly) that the cast part has better properties. And is less expensive.
castings are less expensive but do not possess better properties as they have porosity, inclusions and inferior grain structure compared to a part machined from wrought billet stock.
You can often introduce lots of distortion when machining giant billets of metal and some features of engine blocks like internal galleries might be really hard to machine.
Just because he has a cnc capable of carving foam doesnt mean its capable of practically machining aluminum.
If you dont have access to casting simulation software you just take your best shot and if the first go doesnt work out, tweak your design, cut new foam, remelt, and cast again until you get it right. Then youve got an easily reproducible pattern and the ability to produce as many as demand requires.
Casting dramatically simplifies part production. Many parts require 4 or 5 axis machining and refixturing several times to hit all the sides. That can add up to a lot of tool wear, time, and labor, beyond the obvious material savings.
Mold makers have been compensating for shrinkage way before computer were a thing. There are shrinkage rulers and scaling factors you can build into any mold. However very few cast products are useable without at least some machining of mating surfaces.
I can think of a few reasons, but I think only the guy in question can give you the actual answer. The kind of CNC you need to cut foam is a lot cheaper and easier to run than something that can cut 2-2.5″ thick aluminium billets. The cost of the raw materials is lower (2.5″ thick Al plate vs loose Al pieces that can be melted down) and you don’t throw about half of it away in swarf. The scrap from casting (gates, runners, sprues, etc) is reusable. He’s already developed a set of skills and workflow with casting that he might not want to discard and might not have the inclination to completely into metal CNC process. Probably other, more salient things that I can’t even think of…
As mentioned in the replies below, a hobby grade cnc router is quite adequate for cutting foam but not aluminum. The reason for a using casting is 90% of the aluminum cost would end up as wasted chips, whereas a casting can be near net shape. Also for parts like intake manifolds the hollow features that cannot be machined and would require machining in pieces and welded together. This can be done at the pattern construction allowing hollow features to be cast net shape. A foam casting can be very accurately cnc machined and shrinkage is very predictable and easily compensated for…..I just scale the pattern 1.3% larger than the aluminum casting. Beyond that it’s just a matter of leaving modest machine stock for the finish operations. Best, Kelly
The shrinking is almost entirely predictable. It is how all casting are made.
If you don’t have a CNC machine, lost foam casting of aluminum can be done quite on the cheap. My first furnace was made from broken firebrick supplied by a potter and used plain charcoal as fuel, supplemented with a small blower. Extruded (blue or pink) styrofoam was carved into an appropriate shape, which was dipped in thinned wallboard plaster. The pattern was embedded in plain dry sand. The “flask” that held the pattern was made with extra height to provide necessary pressure. The results were not perfect. In particular, without a degassing agent there was some porosity, but for my application it was immaterial. See Dave Gingery’s “Charcoal Foundry” for information.
You can also do lost PLA casting with any 3d printer and there are resins and filaments specifically designed for investment casting processes. You can also go completely manual with foam using hot wires, rasps, and any other carving tool.
Casting with follow-up machining has a huge advantages: specifically cost, time to final product, and scalability. Many engine blocks are done with this procedure with the benefit: a bad casting is identified early and recycled, machining costs and time are minimized, and making a million of these same units can be manufactured at two or three facilities (thus minimizing transport costs).
For sure, entirely machining an engine block with a cnc machine would require a very large five axis minimum and some crazy custom tooling with the reach to get in everywhere. My guess is something in the neighborhood of a couple million dollars for the setup. It would also be pretty slow because some areas would require really long slender tooling. Run time would be several hours per unit. One machine and tooling set required for each simultaneous part plus skilled operators and setup time.
I think you’re over-estimating there – people were machining engine blocks before CNC existed using basic tools, starting with a casting mostly just gives you less waste / less machining to do and a few features “baked in”.
If you absolutely had to you can do this stuff on basic small machines but you’d spend 90% of the time messing around with setups rather than actual machining.
You can’t do water jacketed cylinders with subtractive manufacturing. You can with a lot of difficulty if you mill out the water jackets and then weld on covers (subtractive/additive) but you end up with heavy, flexible blocks that way. Cored castings are nearly perfect because they’re stiff, light, and can have extremely effective cooling with no hot spots or eddies in the coolant path.