We know you’ve seen them: the time-lapses that show a 3D print coming together layer-by-layer without the extruder taking up half the frame. It takes a little extra work compared to just pointing a camera at the build plate, but it’s worth it to see your prints materialize like magic.
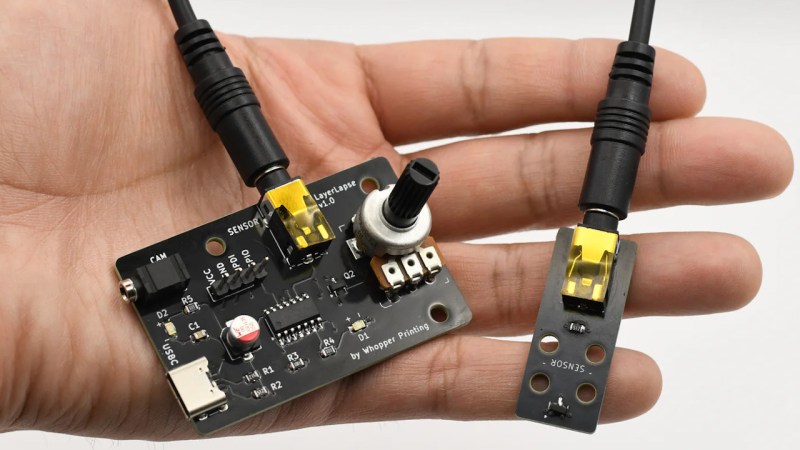
Usually these are done with a plugin for OctoPrint, but with all due respect to that phenomenal project, it’s a lot to get set up if you just want to take some pretty pictures. Which is why [Whopper Printing] put together the LayerLapse. This small PCB is designed to trigger your DSLR or mirrorless camera once its remotely-mounted hall effect sensor detects the presence of a magnet.

The idea is that you just need to stick a small magnet to your extruder, add a bit of extra G-code that will park it over the sensor at the end of each layer, and you’re good to go. There’s even a spare GPIO pin broken out should you want to trigger something else on each layer of your print. Admittedly we can’t think of anything else right now that would make sense, other than some other type of camera, but we’re sure some creative folks out there could put this feature to use.
Currently, [Whopper Printing] is selling the LayerLapse as a finished product, though it does sound like a kit version is in the works. There’s also instructions for building a DIY version of the hardware using your microcontroller of choice. Whether you buy or build the hardware, the firmware is available under the MIT license for your tinkering pleasure.
Being hardware hackers, we appreciate the stand-alone nature of this solution. But if you’re already controlling your printer through OctoPrint, you’re probably better off just setting up one of the available time-lapse plugins.


If the camera has a wifi or USB connection that streams its preview data, you could stick a marker that OpenCV can easily recognize (e.g. arUco) on the extender, and take pictures after it disappears, with no additional hardware.
Back early on in reprap (before octoprint) people just used to hook up a pin to the control board and use gcode to trigger pics.
Then you could have the head move out of the way and snap the pic.
I suppose that is a bit harder now that the majority purchase closed source printers.
Yep, imagine that. And it was easy too. Luckily a lot of standard slicers are still usable and most of the proprietary ones will let you get gcode after some interrogation, for now.
Do a lot of people actually care about recording things being 3d printed?
Wait, I can click on a checkbox in Octoprint and get this functionality for free, or I can buy something, install a magnet, fiddle with G-code, and, wait, is this an ad?
This is a workaround for proprietary printers with no camera built in. So really it’s just that 3d printing is turning tech forums into something like the apple space.
My Ender 3 does not have a camera built in. So I plugged a cheap USB webcam into my Octopi and I’m done. I don’t actually take time lapse movies, I just use the camera to keep an eye on things from the next room.
Nice project, but I’m not sure it will have a huge uptake.
so, you did EXACTLY what the article said was the alternative to this?
Someone should use the spare GPIO to ring a bell at the end of each layer, like a typewriter return ding
The true genius is always in the replies!
That’s the way still if you don’t use a proprietary printer. It’s easy to add gcode to manage the whole process.
Spare GPIO?
Why not just hang the thing on the end of one of the movement rails and get the print head to hit it instead!
Could use the same tech as an old ball mouse: 3d print an IR window pattern and attach to the Z rail (or even to the stepper/leadscrew as a disc)
Then just snap a photo every time the Z axis sees an increase.
Simple is complicated.
There’s so much more that can be done with this brilliant hack! Stick that magnet to ANYTHING with cyclical motion… Sky’s the limit!
Aren’t most DSLR’s triggerable by a simple switch/button press on a remote? Why not just have the extruder head physically press the button if you’re already needing to move it via gCode anyway?