One of the most frustrating things to me is looking at a freshly-flashed and just powered up single board computer. My goal with them is always getting to a shell – installing packages, driving GPIOs, testing my proof of concept code, adjusting the device tree to load peripheral drivers. Before I can do any of that, I need shell access, and getting there can be a real hassle.
Time after time, I’ve struggled trying to get to a shell on an SBC. For best results, you’d want to get yourself a keyboard, monitor, and an Ethernet cable. Don’t have those, or there’s no space to place them? Maybe a UART connection will work for you – unless it’s broken or misconfigured. Check your pinouts twice. Sure, nowadays you can put WiFi credentials into a text file in /boot/ – but good luck figuring out the IP address, or debugging any mistakes you might make formatting the file. Nowadays, Pi 4 and 5 expose a USB gadget connection on the USB-C port, and that helps… unless you’re already powering the Pi from that port. There’s really no shortage of failure modes here.
If you put a Pi on your network and it goes offline, you generally just don’t know what happened unless you reboot it, which can make debugging into a living hell. I’ve dealt with single-board computers mounted above fiberglass lifted ceilings, fleets of Pi boards at workshops I organized, pocket-carried Pi boards, and at some point, I got tired of it all. A hacker-aimed computer is meant to be accessible, not painful.
Server-Grade Interfaces For All
That’s why, for years now, I’ve been working on a cheap and accessible embedded UI, called ZPUI (Zippy UI) – with its help, a cheap I2C screen and a few buttons is all it takes to keep track of your Pi or other Linux device.
A separate lightweight control interface isn’t a new concept. Back in the glorious era of character LCDs and non-standard mounting boxy cute servers, you could get a 16×2 display and five arrow keys on a Sun machine, and with help of a little bespoke software, you could do basic management actions on your server without having to break out a KVM.
One of my first semi-serious projects, way back in 2014, was a HD44780 library for Raspberry Pi use, universal and lightweight, supporting both direct GPIO access and I2C backpacks with ease. People have had used those for IP address display for a while by then, but it wasn’t enough for me. I wanted to easily power off my boards to avoid SD card corruption (which was way worse back in the day), figure out my boards’ IP addresses without Nmap scans, and connect to WiFi networks without SD card machinations. All throughout, it felt like a piece of software someone should’ve had written years ago. It’s a simple concept – if I have physical access to my SBC, I should be able to take control of it.
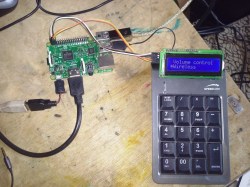
So, with a HD44780, a USB numpad, and a heap of Python code, I’ve built the first version of the software I called pyLCI – for Linux Control Interface. I gave it app loading support, then wrote code to parse commands like ip addr, wpa_cli for WiFi connection management, tvservice for HDMI monitor connection debug, reboot and poweroff, as well as an ability to run arbitrary pre-defined scripts from a menu. I made sure it’d only require 5 buttons at all times – up, down, left, right, and enter, and that it’d work with character LCDs from as small as 16×2 to as big as 20×4.
pyLCI quickly became a useful tool in my SBC forays, and I’ve built it into a number of my portable devices, most of them Pi-powered. I’ve added it to a portable hardware hacking workbench I built for SPI flash and general hardware tinkering, home automation Pi boards I’d run, and even a desktop/pocket Pi 2 that served as only computer for almost half a year. When I ran Raspberry Pi workshops in our hackerspace, I bought a few character-LCD-and-button HATs and used them to determine IP addresses of student-issued Pi boards, so that I wouldn’t need to drag a monitor around or do USB-UART interventions.
Entering WiFi passwords with arrow keys wasn’t ideal, but it was miles ahead of the frustration I used to routinely experience before it, every time I brought a Pi somewhere for a project – only to get effectively locked out of a computer I own.
Bigger Screens, Bigger Ambitions
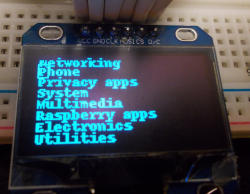
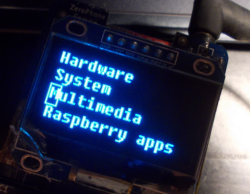
When I worked on ZeroPhone, an open-source Raspberry Pi Zero-based numpad phone, naturally, I forked pyLCI into a base for the UI, called it ZPUI (for ZeroPhone UI), and decided to target the super common 128×64 screens. Initially, I made the color screen imitate a character screen – it worked kind of well as a stopgap but resulted in tiny text. It took a good while to make the screen readable, make apps work passably well and write new better-working ones, implement numpad input in addition to arrow keys input, and I’ve ended up learning a ton from building an UI framework where none was intended to be.
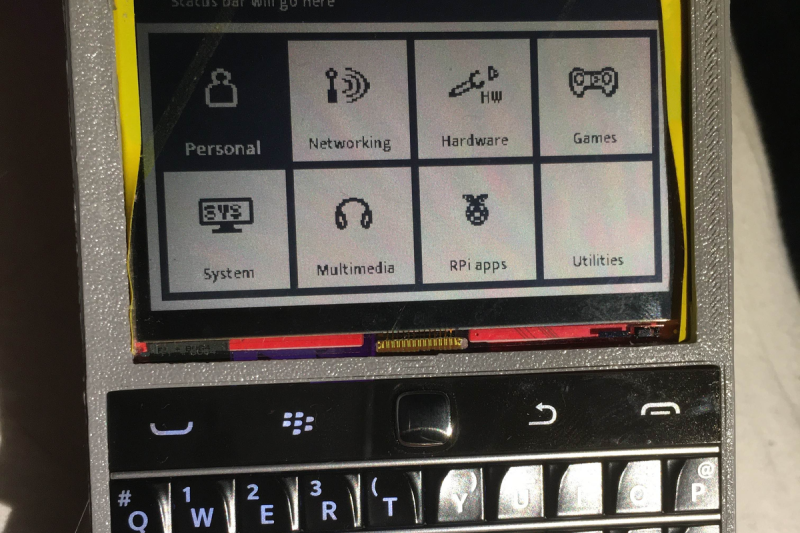
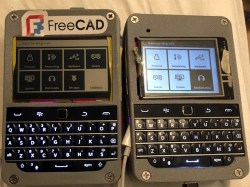
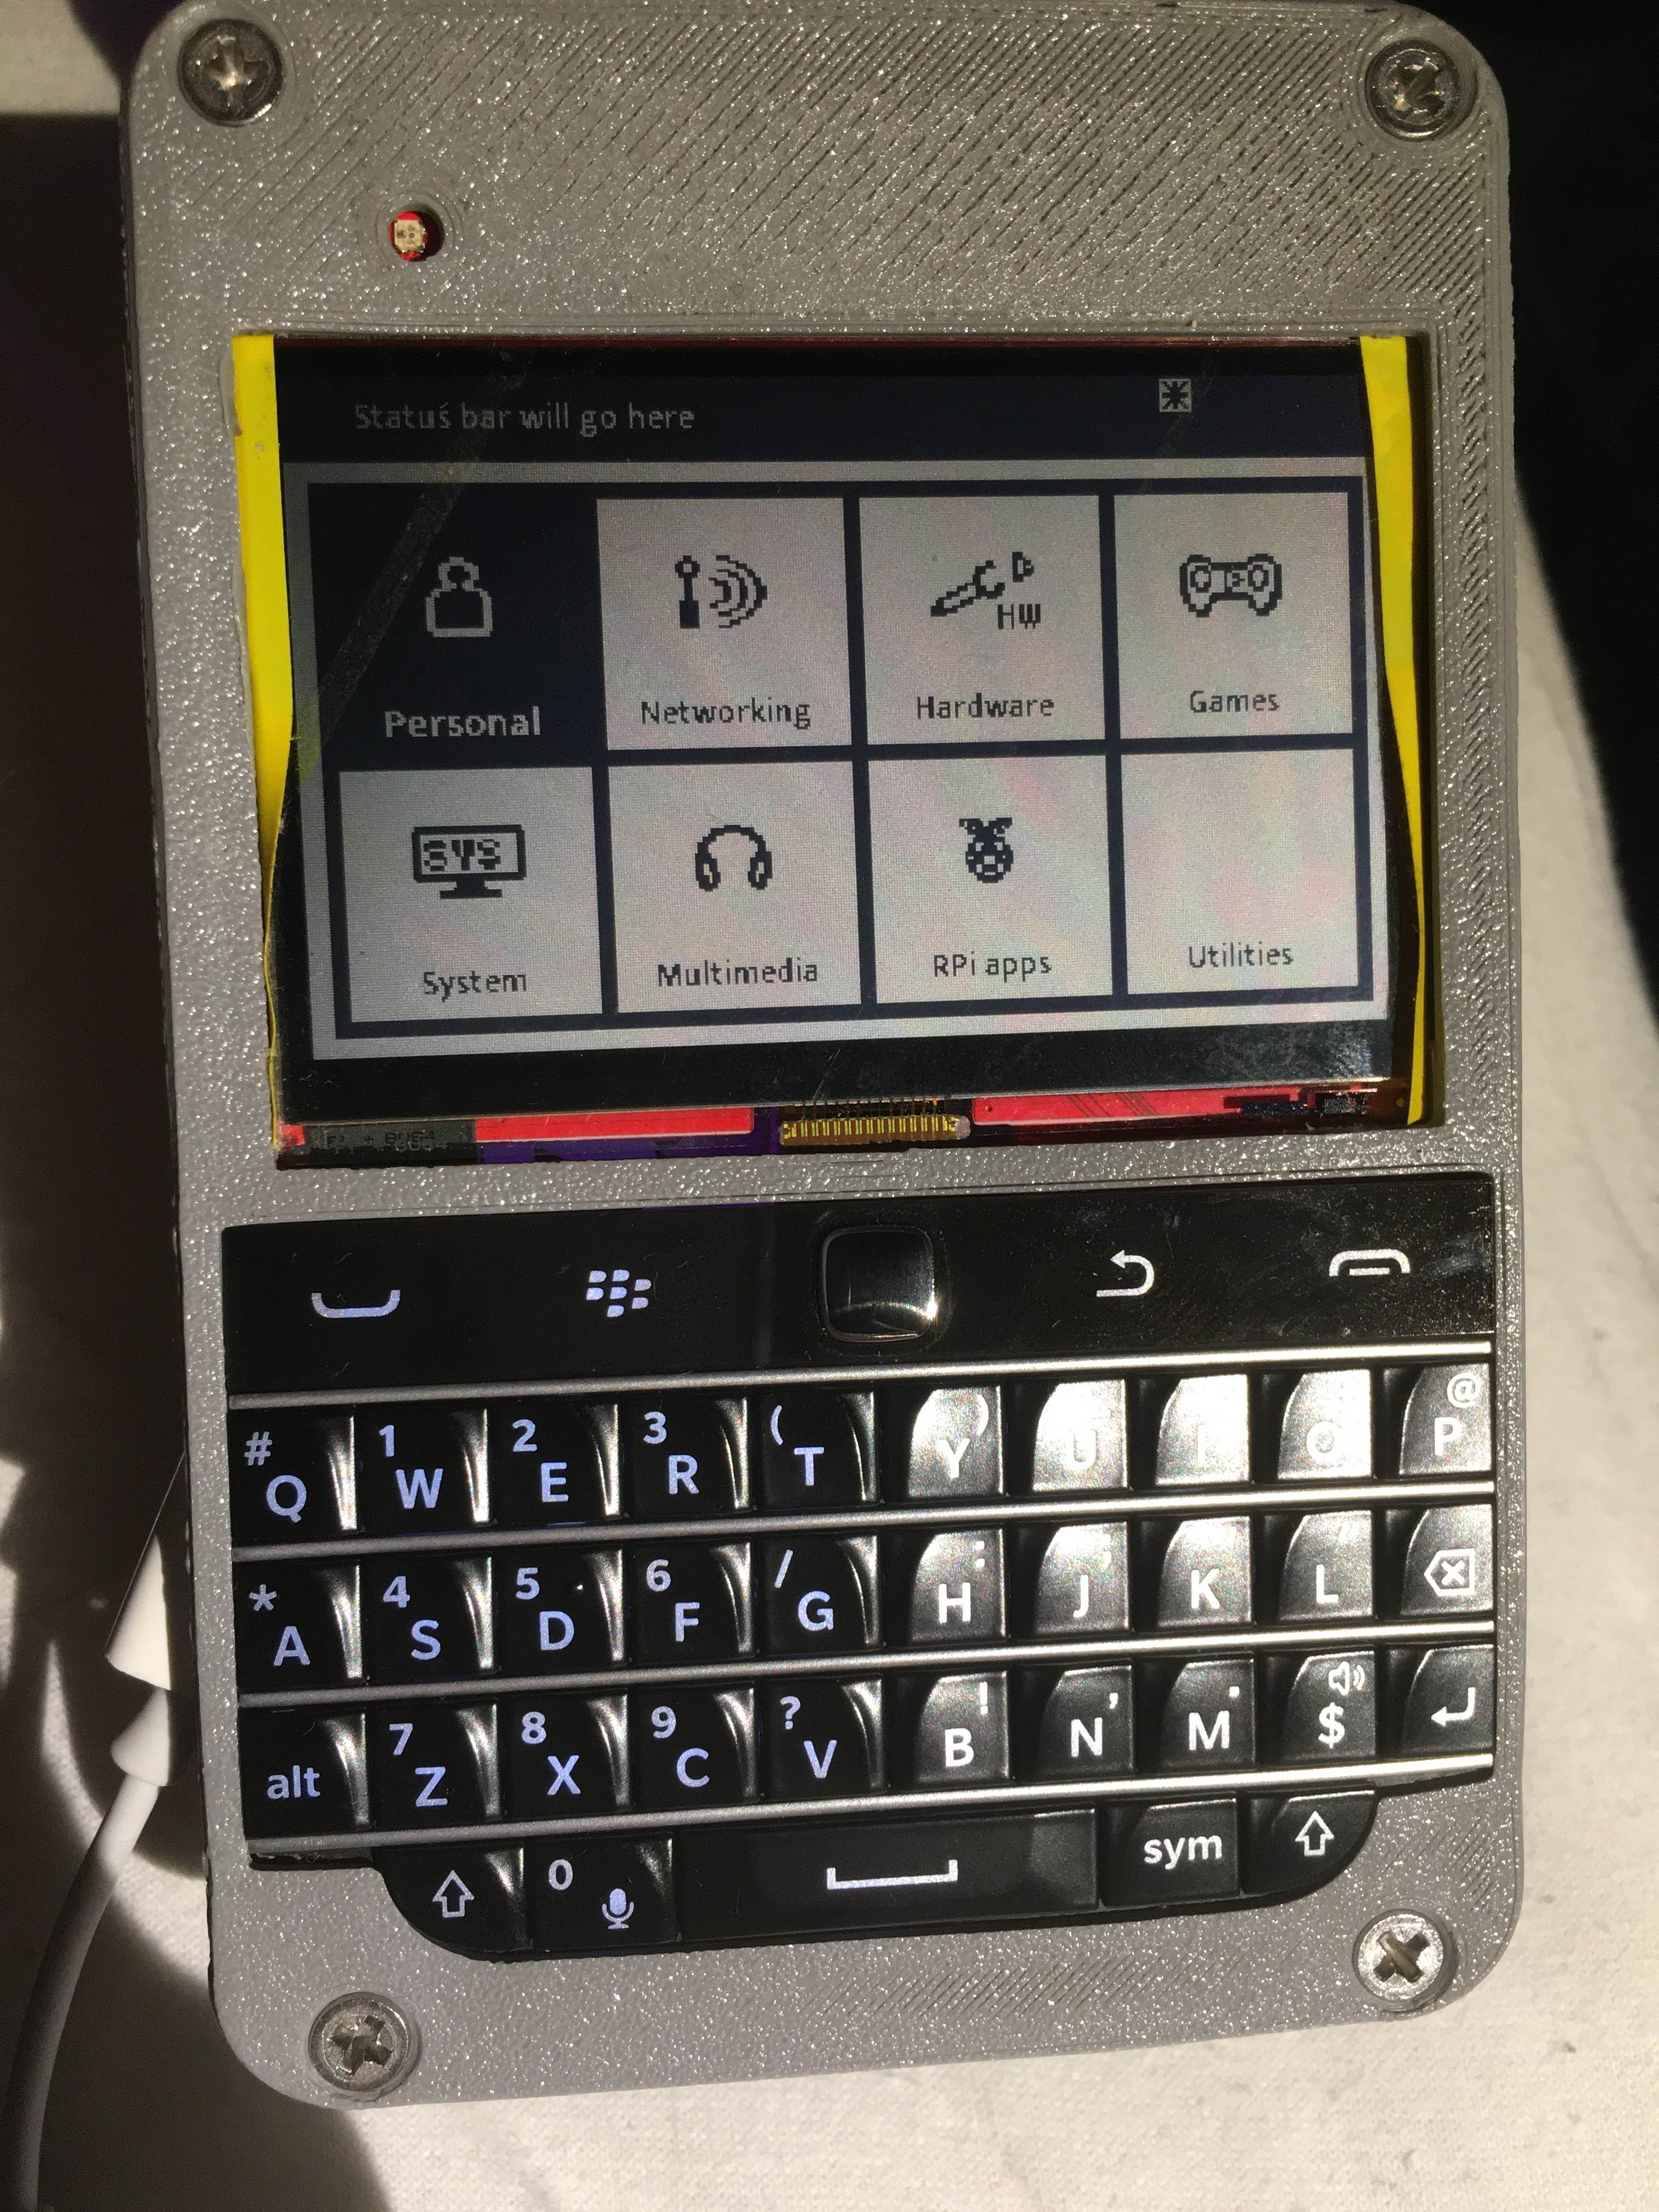 Recently, I’ve reignited my portable platform building ambitions, and as part of a hacker collective, I’ve been working on a Beepy derivative device – a QWERTY PDA-like Pi Zero-based pocket Linux terminal. Just like many portable Linux devices in this form-factor, it’s badly missing a low-frills graphical UI, with three or four people having attempted to write one, and one in particular getting pretty far. I ported ZPUI to a larger screen, borrowed a UI layout mockup from one of the more successful Beepy UI projects, and I’m now porting ZPUI to larger screens. My goal with ZPUI is making your Linux devices accessible and friendly, and the Beepy community could definitely benefit from a software boost like that.
My goal is creating a UI that you can use to make any of your Linux devices accessible – no matter if you’re building a home automation panel with a Pi at its heart, or an OpenWRT-powered pocket router, putting together an overpowered Meshtastic node you want to adjust on the fly, or a PWN4Pi device that you want to manually pick RubberDucky scripts for, designing failsafes for a robot with computer vision, or simply organizing workshops where seeing your Pi’s IP address is important, in circumstances of twenty students who all want your attention during setup. This year, I’ve started working on ZPUI again, bringing it up to speed with modern software realities, and I invite you to try it out in your projects.
How ZPUI Can Help You
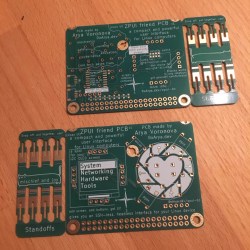
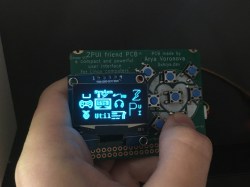
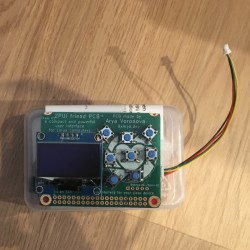
At minimum, you only need a small 128×64 OLED screen and give buttons – for instance, if you have a Waveshare Pi Zero hat, it will do just fine. In case you’re ordering PCBs anytime soon, I’ve also designed a businesscard form-factor Pi shield, which fits on any Pi and even works over QWIIC if you want – throw the board into your next JLC order, solder an OLED and a few jellybean buttons to it, follow the install instructions, and enjoy the extra point of control over your Linux install.
As-is, ZPUI can do most of the basic tasks for you – show network info, connect to WiFi networks (and even display known network passwords), manage system services with help of a systemctl API, poweroff/reboot, unmount partitions so you don’t have to SSH in to unplug that one flash drive, list USB devices so you know if your favourite device fell off the bus, and do a number of other things (there’s even an AVRDUDE app!). It will even let you input console commands through arrow keys in a pinch.
Currently, apart from UI improvements, I’m working on a heap of mechanisms to make third-party app designs easier. You already can develop ZPUI apps, and you can even distribute ZPUI apps as Python packages, but there’s still work to do. If you want to help contribute and tackle goals like, say, a raspi-config app or a Bluetooth config interface, you’re most welcome to join in and help – there’s even a ZPUI emulator for app development purposes!
ZPUI is a project aimed to make your other projects easier. I invite you to try it out, especially if you’ve faced the kind of problems I’ve told about in the article intro. If it were up to me, SBCs like Raspberry Pi would come with these kinds of interfaces out of the box, simply because of the insanely large amount of problems I’ve had it solve and figure out.
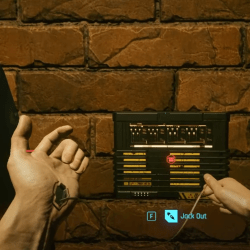
Unexpectedly Cyberpunk
Here’s a cool demo! I’ve assembled a ZPUI businesscard into a palm-sized shield, with a QWIIC cable connected to it. On my SBCs, I have QWIIC sockets exposed, with ZPUI installed and configured to expect such a shield. When I plug it in, ZPUI detects it on the I2C bus and shows up on the screen. This palm-sized shield feels surprisingly cyberpunk to use, akin to having a cable in your wrist that lets you tap into any device of your choice. For a while now, all my devices come with QWIIC connectors, because of just how much ZPUI helps me in bringup and development.
If you have any questions, ask away, and I hope ZPUI can help you. If not – let me know! This year, I’m aiming to seriously upgrade it, building it into a fully-featured UI it is meant to be, and if there’s a feature you’re looking for, it could very well get implemented alongside.


Fun fact, internally cyberpunk uses another three-letter preposition instead of “out” 😂
Because of i18n package (whatever language you pick) it’s not visible to player.
One of the ways I reduce the pain of “What IP is it?” is to grab the MAC address as soon as I can get a shell (yes, chicken and egg), and then configure my DHCP server to always issue the same IP to that MAC. It then gets recorded on the network spreadsheet, and I can later look it up there, or on the DHCP server if I’m using a terminal. From that point on, I’m using the hostname to connect 90% of the time.
That doesn’t help with any of the other benefits of your project, though.
Two suggestions to help with that: the router probably shows DHCP losses somewhere, or even better, Multicast DNS.
Yes, leases are usually very easy to look up, even in garbage soho equipment running stock firmware. If your device is set to static IP (but does not have a DHCP reservation), the arp table will give you the mapping, but this may not be available on a soho router. pfSense makes all of this much easier
Dear God I hate mDNS. It’s a stopgap for people who don’t know how to manage their own network. I do use it, but only on devices that require mDNS for operation (Chromecast is a good example). Of course, those devices are on their own subnet to allow for firewalling, and mDNS packets don’t go across subnets (the packets have a TTL of 1), so mDNS reflection must be configured – there is a pfSense package that I use for reflection, but I would much rather not use mDNS anywhere
I just use a redis server. All wifi/hardwired devices are setup to report their static IP address/mask, name, data/controls available, is-alive counter to the redis server on the home network (separate from internet network). A master application I wrote then periodically reads the information found on the redis server for all the devices and updates itself. So all I have to do is glance at the monitor and know what is where, what input/output it has, and what is working/not working (color change). Redis server is located on a RPI5 which is attached to my PiDP 11/70 front panel. It is also a PI-Hole server as well. It is connected to a UPS so never goes down (unless I want it to). I could’ve used a spreadsheet… but was more fun to write a common api for this task using a redis server as the repository :) .
That said. Neat project above. Cool beans! Gave me some ideas!
Sounds like you started your own Network Management System. Did you consider any of the existing open source NMSs?
I do i do a reverse shell i have this stalker on all my electronics and says no one will ever find him cuz he has a level 4 in address
My goto nowadays has become IPv6. It always seemed esoteric or annoying but it has some nice benefits for embedded.
Each IPv6 devices gets a link local address, generally based on the MAC address. So find the ip and you got the mac, or vice versa. Also the link local address generally doesn’t change, even on different networks. Great for accessing a device on your hotel WiFi say.
To find it plug the device into Ethernet or get its WiFi going with the /boot setup. Then do a
ping6 -I eth0 ff02::1. Modify eth0 to the right network interface to match the devices hardware media. Then just look for any new/unknown IPs. I use a sort and filter of before and after I power on the device.Generally it’s much more reliable than ARP. All IPv6 routers have to support local multicast. They’re self assigned so no waiting for mDNS to populate.
And here I was thinking Zoomable interfaces.
@Arya, I have not seen snap-off standoffs like what you have on your zpui business card PC, and cannot envision how they would be used. Are there any examples of them in use that you can post?
I solved this problem with UBO GUI that mirrors on the browser and you can control almost all of raspberry pi functions with it easily. You don’t need any additional hardware to use it. The hardware option right now only supports TFT displays over SPI but I would like to support I2C too. I made a short video to show how it works:
https://youtu.be/Rro3YLVIUx4
took me a while to understand that some people can’t just look at syslog on their dhcp server.
for slightly increasing my convenience for this sort of operation, i bought a tiny hdmi monitor for $50 on temu, and a regrettable tiny usb keyboard for almost nothing. it is nice having a monitor to hook up to someting that isn’t part of the livingroom cable mess.
So you used ‘AI’ to produce a couple of sentences that provides nothing that someone with rudimentary reading comprehension could have gleaned from the beginning of the article.
Bravo… 🙄
My approach to solving the “my device is inaccessible, and I don’t know why” problem has been to put a Bluetooth Serial Port Profile device on the UART. These are available for less than $1 each (https://www.aliexpress.com/item/32961565740.html), and run from 3.3V sourced from the target device. Configure it in advance, before attaching to the target, add a pairing PIN, configure the baud rate, and give it a suitable name to broadcast. Then hook it up to the console UART. Make sure the target device is actually logging to that UART, and has a login/shell available as needed.
Then, when you need it, you can pair with that device, and use a serial terminal to do whatever is required. This solves the “I can’t open it to put a serial terminal on, without powering it off in the process” problem, the “it’s in the ceiling and don’t want to get in there” problem, etc, etc.
In RaspberyPi OS you can also place userconfig.txt in boot containing username and hashed password. After that you don’t need to know the IP,as long as you have dhcp. You can SSH into the machine by SSH username@raspberrypi.local
Very nice toolset. Will take a close look to learn from your experience.
My current solution is to add devices to one of my self-hosted Nebula Defined networks. By now the config is so stable that even UDP port randomization by Ubiquiti devices is not a problem.
And work in progress is a logging to UART device based on the CYD because most often I don’t need immediate access but feedback on what’s going on inside the box.
Sorry, this isn’t really a comment on ZPUI (which looks v. useful) but a request for an updated ZeroPhone! Those of us without 2G/3G would love a hackable little phone. Waveshare even make a 4G modem board in the Zero form factor: https://www.waveshare.com/sim7600g-h-4g-hat-b.htm
I’m working on something similar myself, but it’s gonna take a while. And mine will probably have a rotary dial, which is not to everyone’s taste :-)