If you want to save a little money on a thermal camera, or if you just enjoy making your own, you should have a look at [Evan Yu’s] GitHub repository, which has a well thought out project built around the MLX90640 and an ESP32. The cost is well under $100. You can watch it do its thing in the video below.
There’s a PCB layout, a 3D-printed case, and — of course — all the firmware files. The code uses the Arduino IDE and libraries. It leverages off-the-shelf libraries for the display and the image sensor.
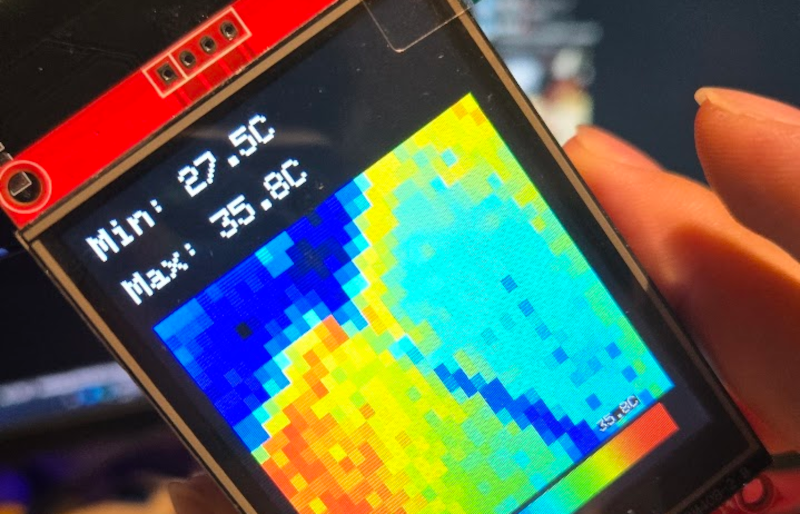
The image sensor isn’t going to wow you. It has a resolution of 24 x 32, although that’s better than some cheap cameras, and it can still honestly be good for “what part is heating up” explorations. There is probably room for some clever smoothing in software as well. For only three or four times the price, you can find cameras with resolutions around 256×192, which is good for a thermal camera, even though it isn’t the megapixels we expect from our optical cameras or our phones.
The bill of materials is relatively short. The bulk of the circuit and effort is in the circuit to charge the battery, regulate it, and protect it against bad behavior.
Can’t decide if you need a camera at all? You aren’t alone. Or you can cheap out, but you might get what you pay for.


Current crop of Chinese thermal cam have a way higher resolution than that (256×192 or more) for a lower or similar price. But for sure it´s closed source, and the sensor they use have no marking. I´d really like to find what exact sensor they used, and a leaked datasheet even in Chinese. The problem with the firmware used with those sensors is that recalibration occurs way too often, resulting i a frame freeze of almost one second. Not THAT terrible, but i´m sure with some software optimization and frame caching it´s possible to do better than that…
Cheaper than a $35 sensor element? Share links!
I’m guessing that Ono is referring to complete, built, ready to go thermal imaging cameras, and not just a sensor.
The article suggests ~$100 all-in for this project and that’s not much less than a (closed source) off the shelf solution that has a higher resolution.
USB thermal cameras at 96×96 can be had for around that price…
Mind you, where’s the fun in buying a ready-made solution compared to building it yourself? 😀
I think he refers to “The cost is well under $100”.
Tiny1C is one common sensor model. Datasheet https://liberaltek.com/wp-content/uploads/2024/07/TINY1-C-256%C3%97192-160%C3%97120-Uncooled-Infrared-Thermal-Module-Product-Manual.pdf
Thanks!
Spot on, thank you !
Thermal camera sensor resolution and frame rates are restricted by the US government as they can be used to build a heat seeking weapon.
Doesn’t matter when the sensors are designed and manufactured in China.
Those restrictions are way higher than what’s posted here though.
Whatever FLIR will sell you for a reassuringly high price tells you what the current restrictions are, not some $100 module from Aliexpress.
A lot of those cheap cameras are just upscaling the image. Watch out for any mention of TISR, X3 or super resolution. That means the IR sensor is only half of the advertised resolution.
“CUT IN CASE OF F–K UP” :-D
The board could use a revision of the layout, though. The point of GND vias is not to allow for GND pour on all of the surface, but to facilitate return path when you switch layers.
Watch this for instance (yeah, its long, but it covers all you need): https://www.youtube.com/watch?v=ySuUZEjARPY
lol no need that github… MLX90640ESF on Ali with display assembled >> £59
AliExpress for pre-made be like ChatGPT for school day homework. It’s so good it will rot your brain.
This DIY project looks pretty good too: https://hackaday.io/project/189728-diy-pocket-thermal-imager