DIY Spectrophotometer

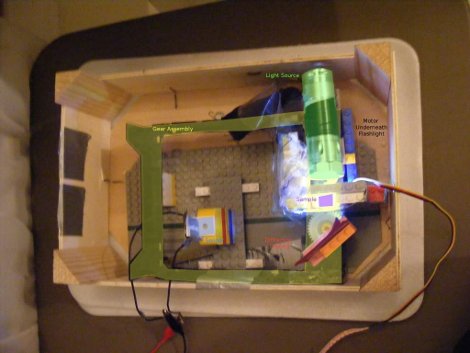
[Charlie] has been making a DIY Spectrophotometer, and while it is a “shambling mess of information-age technology!” it is still much better than ours. Focused around an arduino, bits of lego, and a flashlight, this creative device rotates a diffraction grating (flake of compact disc) aimed at a photo resistor. As the light spectrum is passed over the sample, the photo resistor measures how much light is reflected and that data is passed back to a pc.

As nothing is as ever easy as it should be, a big problem popped up with using a servo. It was way too course, meaning the entire spectrum would be jumped over in 6 steps. A quick robbery of a gear assembly from a floppy disk drive and the motor movement was smoothed out. A little too well because 120 degrees of the servo is not quite enough to cover the entire spectrum. Oh well there is always room for improvement.

Arduino Arcade Rom Dumper

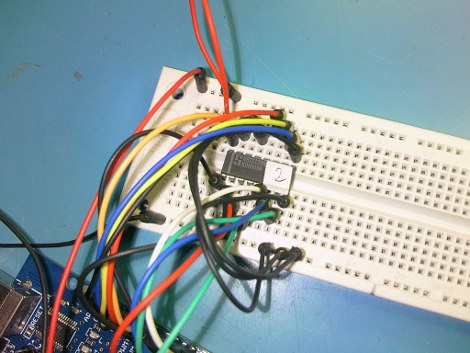
[Vincenzo] wanted to read some 82S129 bipolar proms, and why not, they were very common in the 1980’s arcade scene. The problem is that its kind of an odd ball part now, and typically only (even) more expensive EPROM programmers can read them. An Arduino, breadboard and some quick scripting quickly takes care of that problem with this Arcade Rom Reader.

You stick the prom in your breadboard, and wire it up to the appropriate ports and pins of the Arduino, which bit bangs the prom and returns the results though the serial connection of the Arduino. Using a terminal program on the pc side you capture the text and use a script to convert the ascii values into a binary nibble format and save as hex.

This makes it much easier for us to dump roms from old arcade boards, because you never know when you might run across an old Polybius arcade board on your next outing to the salvage or scrap yard.

Join us after the break for all the details and as always comments!

Continue reading “Arduino Arcade Rom Dumper”

Hardware Handshaking For AVR

Serial communication is still an important part of our embedded world. Typically we use a 3 wire setup (RX TX and GROUND) and hope that everything goes according to plan. Though this works for most experimenters, sometimes its not the most ideal situation.  This is where [simmonmt’s] handiwork comes in adding hardware handshaking to a AVR.

The hardware setup is pretty typical, an Atmega644 sits on one end of the connection, passes through a SP3232EB level shifter and out to a PC. 5 lines are used, again one for RX, TX and GROUND, but also RTS and CTS. When the PC is ready to transmit data it inverts the line (normally held high), the micro controller notices this it pulls CTS low and transmission can commence whenever it darn well feels like it. Handy!

Plastic Plate Capacitors

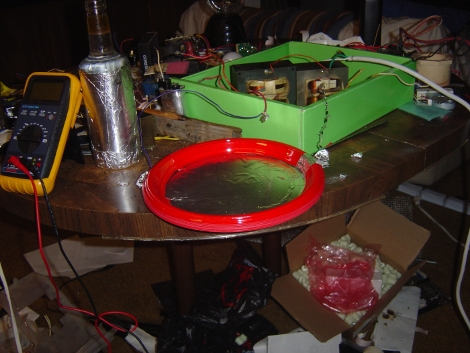
We have been featuring some home made capacitors this week, and [Mike] wrote in to share his with us. While rolled capacitors are nice, they can be somewhat difficult to construct and grow to unwieldy sizes as capacitance and voltages increase. His solution is to stack the layers up using plastic plates.

In this forum post he explains that using disposable plastic plates and tinfoil you’re able to quickly make a capacitor, that for him was valued at around 12.2nF, using eleven layers . Applying pressure to the stack capacitance grew to about 14nF, though he is having a bit of trouble holding it with just glue.

Testing was conducted with high voltages charging the capacitor up, then its leads were shorted for a nice spark and a good pop. Definitely fun for the next family cook out, though we don’t know how some left over potato salad goo would effect the end results.

I2C 101

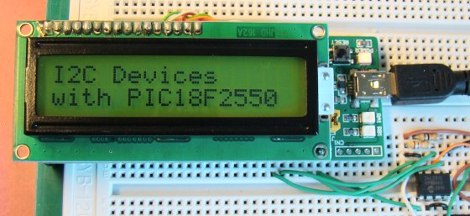
Embedded Labs has come out with a very detailed I2C 101  tutorial, that you should check out if you have any questions on the system. I2C is a short distance serial interface that only requires 2 bus lines. Keep in mind that as wires go down complexity goes up. While there are more than a few I2C devices out there in the wild, and the 2 wire system does make wiring a breeze sometimes, the information required to make use of it often seems confusing to someone who is just starting with it.

The tutorial covers basic theory, stop / start conditions, addressing, data transfer, and acknowledgment plus illustrations. A couple of specific examples are given in the form of a 24LC512 serial eeprom, and a DS1631 digital thermometer complete with code.

Machining Replacement Parts With Hand Tools

Jeff is a huge music fan, and like many of us likes old technology, so it seemed a bit silly (to him) that he did not have a turn table. His dad had a spare in the basement. A neat old Braun model from the 1970’s that was broken.

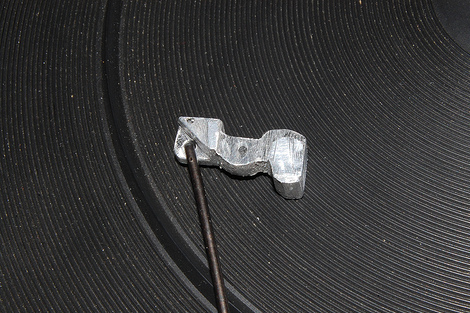
Opening the unit up he found that part of the arm mechanism was broken, and thanks to the age of the turntable and the wonders of mass production chances of finding a replacement were slim to none. Not being discouraged he busted out the hand tools and fabricated the replacement out of some aluminum. The end result is a perfectly functioning turntable that will serve many more hours pushing out warm jams.

Check out the fourm post above to get details and pictures, and we just wanted to tell [Jeff], awesome job!

AVR Gameboy Dumper

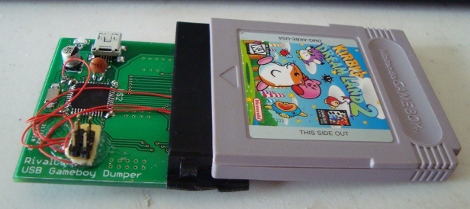
[Kevan] has been hard at work latley developing a Gameboy cart dumper, and while there are a few loose ends to tie up, the device is functioning fine to build up his collection. Running an AVR (mega 16?) and a FTDI chip for the usb connection, the device reads the game’s ROM and SRAM, and can also write the SRAM if you want to load your save games on to the real cart.

On the pc side of things, the device is communicated with using a generic HID protocol and can hit speeds from 16Kbps (currently) to around 64Kbps (soon). A python script currently handles the data stream, but for the rest of us there is a GUI version in the works for both *x and windows.

Also in the works is a redesigned PCB. There were a couple issues and you can see the jumpers, and though we think it adds a little character, it would be good to have fixed in the future.