Illustrated Kristina with an IBM Model M keyboard floating between her hands.

Keebin’ With Kristina: The One With The Key Cap Map

So, [zyumbik]’s trademark seems to be sexing things up, and the Artsey layout did not escape their gaze. This is the Sexy Artsey. Let’s back up a bit.
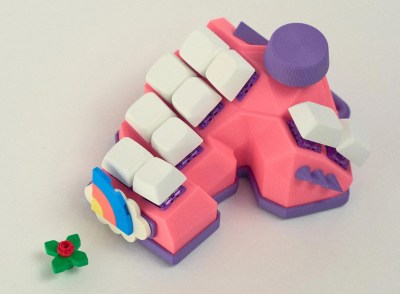
A pink and purple 10-key keyboard with a rotary encoder, spikes, and a custom area with LEGO attached.
Image by [zyumbik] via reddit
Artsey is a keyboard layout for chording, and this keyboard is built for it. It’s a one-handed keyboard meant for pressing multiple keys at a time to produce each character. With some use, [zyumbik] discovered that the Taipo layout might be a better fit, so there are currently some elements of both.

If you’d like to make this adorable keyboard, everything is waiting for you to download, including files for various thingamabobs you can stick on the side there where the rainbow is now. There’s also a groovy flower version of the knob.

Controller-wise, you can use a Seeed Studio Xiao in either BLE or RP2040 format, or the Waveshare RP2040 Zero. The firmware is written in ZMK.

Remember the death metal macropad? (Who could forget that tentacled nightmare?) This is the same creator. Kind of hard to believe, innit? Well, except for the spikes. Apparently they’re for thumb discipline.

Via reddit

Continue reading “Keebin’ With Kristina: The One With The Key Cap Map”

Easter’s Over, But You Can Still Dye Keycaps

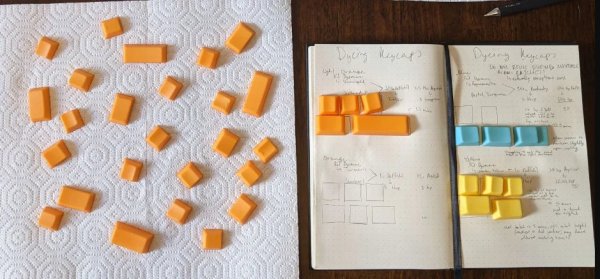
While it’s true that keycap colorways abound these days, one can’t always find exactly what one is looking for. And once found, the set is often either prohibitively expensive, or it doesn’t come in the desired layout, or both. So, why not color your own keycaps?

That’s exactly what [amphiboi] did, while standing on the shoulders of [CrowningKnight]’s imgur post on the subject. Essentially, you use Rit dye and PBT keycaps for best results. Rit has a comprehensive guide to mixing their dyes to achieve pretty much whatever colors you want. Once that’s all squared away, it’s time to gather your cooking supplies.

Starting with a pot you don’t care about and four cups of boiling water. Add about a teaspoon of dish soap, which helps the dye settle evenly across the keycaps. Then you just add the dye(s) and stir with an expendable spoon, then add your keycaps. 5-10 minutes later, depending on your desired outcome, the ‘caps are ready to be rinsed, dried, and pushed on to your switches.

Satisfied with the color of your keycaps, but wish they had cool legends? Check out this waterslide decal tutorial.