Illustrated Kristina with an IBM Model M keyboard floating between her hands.

Keebin’ With Kristina: The One With The 24-Hour Macro Pad

They say Rome wasn’t built in a day, but this great little music-controlling macro pad by [nibbler] actually was. Why? Because as Hackaday’s own [Donald Papp] reminded us, we all need a win sometimes, especially as projects drag on and on without any end in sight.

A small macro pad with six buttons.
Image by [nibbler] via Toxic Antidote
As [nibbler] points out, what really constitutes a win? Set the bar too low and it won’t feel like one at all. Too high, and you may become too discouraged to cross the finish line. With that in mind, [nibbler] set the bar differently, limiting themselves to what could be done in the one day per week they have to devote time to electronic matters.

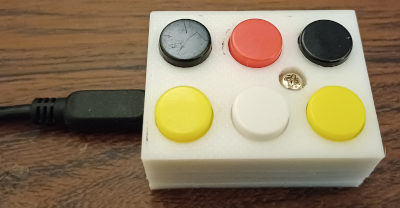
One-day turnaround usually means using parts on hand and limiting oneself to already-learned skills and techniques. No problem for [nibbler], who, armed with an Arduino Leonardo Tiny and a some colorful push buttons, set about designing a suitable enclosure, and then putting it all together. Was this a win? [nibbler] says yes, and so do I.

Continue reading “Keebin’ With Kristina: The One With The 24-Hour Macro Pad”

Easter’s Over, But You Can Still Dye Keycaps

While it’s true that keycap colorways abound these days, one can’t always find exactly what one is looking for. And once found, the set is often either prohibitively expensive, or it doesn’t come in the desired layout, or both. So, why not color your own keycaps?

That’s exactly what [amphiboi] did, while standing on the shoulders of [CrowningKnight]’s imgur post on the subject. Essentially, you use Rit dye and PBT keycaps for best results. Rit has a comprehensive guide to mixing their dyes to achieve pretty much whatever colors you want. Once that’s all squared away, it’s time to gather your cooking supplies.

Starting with a pot you don’t care about and four cups of boiling water. Add about a teaspoon of dish soap, which helps the dye settle evenly across the keycaps. Then you just add the dye(s) and stir with an expendable spoon, then add your keycaps. 5-10 minutes later, depending on your desired outcome, the ‘caps are ready to be rinsed, dried, and pushed on to your switches.

Satisfied with the color of your keycaps, but wish they had cool legends? Check out this waterslide decal tutorial.