Reflow Oven Courtesy Of Hurricane Sandy

2013-01-23-00.51.57

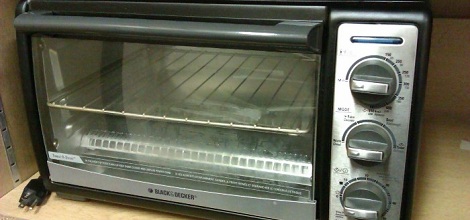
The Makerbar, Hoboken’s Hackerspace, was in desperate need of a reflow oven. Hurricane Sandy did a number on a whole bunch of household appliances, so when [Kush] saw a neighbor throw out a broken toaster oven, the Makerbar crew sprung into action.

The storm waters shorted the electronics board, fried the existing controls, and basically turned the oven into a metal shell with heating elements. It was the perfect platform for a toaster oven – every part that was going to be thrown out was already destroyed.

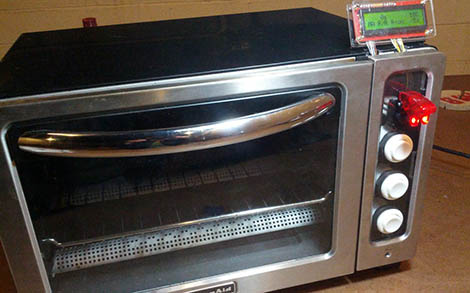
[Zach] over at the Makerbar ordered the Sparkfun reflow toaster conversion kit along with a few arcade buttons and set to work. After plugging the heating elements into the mains power to make sure they still worked, [Zach] attached these elements to the relay on board the controller. Three arcade buttons were wired up to the controller, and a whole bunch of code was written.

With the included thermocouple, [Zach], [Kush], and the rest of the Makerbar gang now have a very accurate and reliable reflow oven. There’s also settings for Sculpey clay and shrinky dinks, just in case anyone at Makerbar is feeling a bit creative.

Toaster Oven Reflow Soldering Roundup

SMD components have a lot of advantages over the through-hole parts our fathers and grandfathers soldered. Working with these tiny surface mount components requires a larger investment than a soldering iron and a wire-wrap gun, though. Here’s a few reflow ovens that were sent in over the past week or two.

[ramsay] bought a 110 V toaster oven off of eBay. Even though [ramsay] is in England and has 230 V mains, everything in the oven is mechanical and works just fine with a higher voltage. His first test didn’t go quite as planned; the solder paste wasn’t melting at 120° C, so he cranked up the temperature and learned that the FR in FR-4 stands for flame retardant. Never deterred, [ramsay] decided to build a controller so the temperature ramps up and cools off at the right rates for the flux and paste to do their thing.

Solder paste has a temperature profile that requires the board to be kept at a temperature between 150° and 180° C for a minute or so before climbing up to 220° for a second so the solder will melt. [Nicolas] had the interesting idea of putting a USB port in his toaster oven and storing the heating profiles on his desktop. The build uses an MSP430 microcontroller to turn the relays powering heating elements on and off. [Nick] is working on a C# desktop app to monitor and regulate the oven temperature from his computer, so we’re fairly interested in seeing the final results.

Watching the SMD self-alignment videos on YouTube is a lot more fun than messing around with tweezers, stereo microscopes, and extremely fine soldering irons. If you’ve got a better idea for a toaster/reflow oven, send it in on our tip line and we’ll check it out.

Solder Reflow Toaster Oven

[Sebastian] needed a small solder oven so he bought himself a small toaster oven (Spanish, Google Translate). It’s not the kind of thing we’d make our breakfast in now, but for soldering it’s a very nice oven.

After a little bit of research on Google, [Sebastian] discovered that the best technique when dealing with reflow ovens and solder paste is following a specific temperature curve. Ideally, Tin/Lead solder needs to preheat from room temperature to 150 degrees C, then level off so the flux can activate. After that, a quick jaunt above 183 degrees C makes the solder flow. To get his toaster working optimally, [Sebastian] stuck a thermistor in the toaster and measured the temperature profiles of different ‘modes.’

The correct temperature curve was calculated using different heater elements and [Sebastian] was off to the races. He did have a few problems on his first few boards – solder bridging, mostly – but that’s not the fault of the oven. An LCD display (translate) was added recently so accurate real-time temperature monitoring is available.