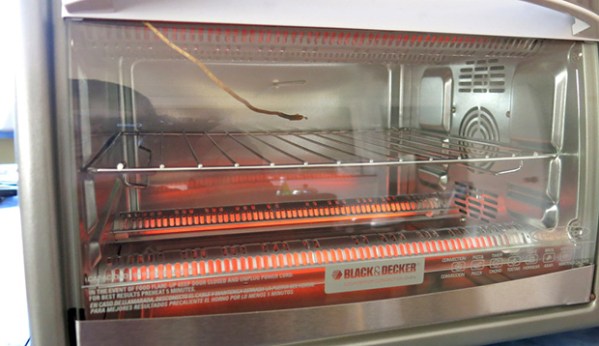
[Ed] owns a 3-zone reflow oven (which he coincidently uses to manufacture reflow oven controllers), but its performance has gotten worse and worse over time. The speed of the conveyer belt became so inconsistent that most boards run through the oven weren’t completely reflowed. [Ed] decided to rip out the guts of the oven and replace it with an Arduino, solving the belt problem and replacing the oven’s user-unfriendly interface
When [Ed] was looking into his belt speed problem, he discovered that the belt motor was controlled by an adjustable linear regulator with no feedback. Although this seems a bit sketchy by itself, the motor also had some mechanical issues and [Ed] ended up replacing it entirely. After realizing that closed-loop speed control would really help make the oven more consistent, [Ed] decided to overhaul all of the electronics in the oven.
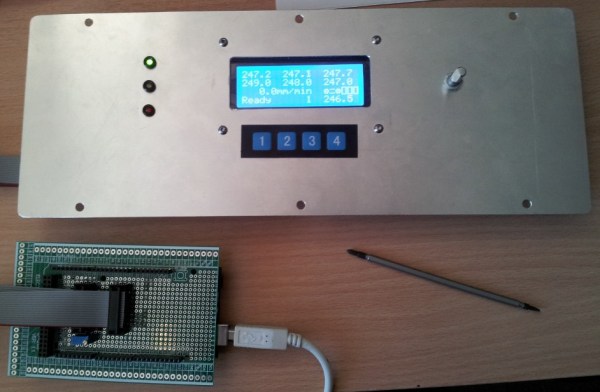
[Ed] wanted to make as little custom hardware as possible, so he started out with an Arduino Mega and some MAX31855’s that measure multiple thermocouples in the oven. The Arduino controls the belt speed and runs PID loops which control heating elements in each of the oven’s 3 zones. The Arduino can be programmed with different profiles (stored in EEPROM) which are made up of 3 zone temperatures and a conveyor speed. Don’t have a 3-zone oven of your own to hack? Check out some DIY reflow oven builds we’ve featured before.