Touch Screen Reflow Oven Pulls Out All The Stops

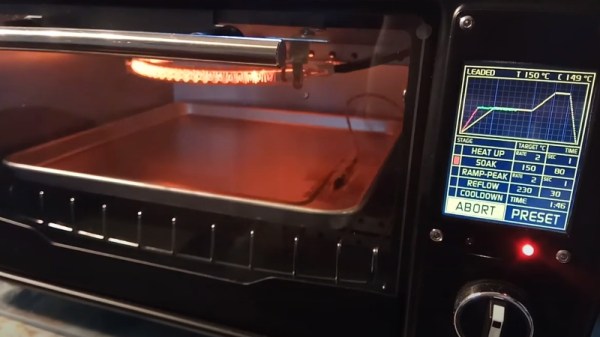
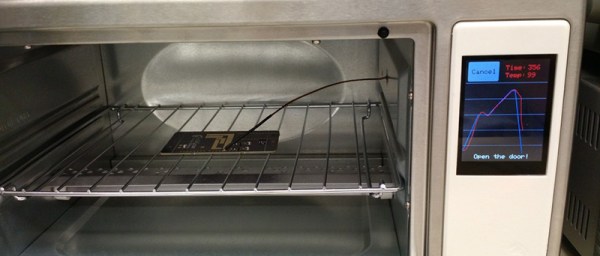
We’ve seen plenty of simple reflow ovens, and there’s an excellent chance that some of the people reading these words have even thrown their own together. A minimal example isn’t much more than a old toaster oven, a Solid State Relay (SSR), a thermocouple, and a microcontroller to get them all talking. But if you’re like [Mangy_Dog] and willing to put in a bit more effort, the final result can be a capable piece of equipment that will be the envy of the hackerspace.

This build started as most do, with a search for a used toaster oven. But in the end he actually found a German model cheap enough that he could buy it new without going over budget for the project. Though he soon found out why: when it arrived, the so-called “pizza oven” was far smaller than he’d imagined. Luckily, it ended up being the perfect size for PCBs.

Unfortunately, the heating elements weren’t quite where he wanted them. Even after wrapping the heating chamber with ceramic insulation, a feature that was likely left off the original oven to cut costs, he says the temperature would only rise about 1 degree per second. So he added an additional halogen heating element at the top of the oven which pushed that rate up to 6 degrees per second.

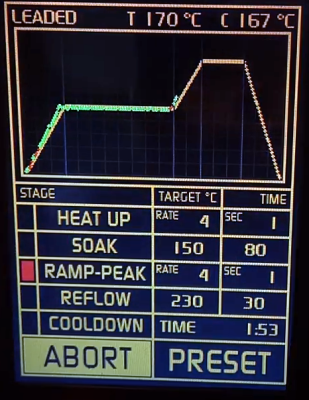
Control is provided by an Arduino Pro Mini and a touch screen display with some very slick graphics. There’s the expected thermocouple to detect the current temperature, but while the earlier versions of the electronics used the aforementioned SSR to control the heating elements, [Mangy_Dog] eventually replaced it with a dimmer module rated for 4000 watts. After coming up with a circuit that allowed him to control the dimmer with the Arduino, this module gave for much finer control over the chamber temperature. Plus it apparently kept all the lights in his house from flickering when the elements kicked in at 100%, which was a nice bonus.

This isn’t the first time we’ve seen somebody shoehorn an LCD into an off-the-shelf toaster oven, but it’s certainly one of the most polished examples to ever come our way. When even commercially available units need some hacking to reach feature parity with DIY versions, building your own reflow oven still seems like the way to go in 2020.

Continue reading “Touch Screen Reflow Oven Pulls Out All The Stops”

Hackaday Prize Entry: Reflowduino, The Open Source Reflow Oven Controller

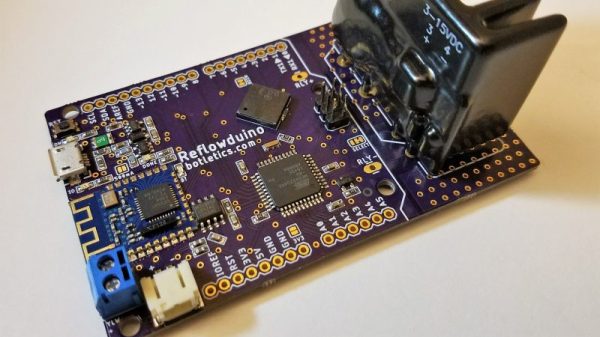
Face it — you want a reflow oven. Even the steadiest hands and best eyes only yield “meh” results with a manual iron on SMD boards, and forget about being able to scale up to production. But what controller should you use when you build your oven, and what features should it support? Don’t worry — you can have all the features with this open source reflow oven controller.

Dubbed the Reflowduino for obvious reasons, [Timothy Woo]’s Hackaday Prize entry has everything you need in a reflow oven controller, and a few things you never knew you needed. Based on an ATMega32, the Reflowduino takes care of the usual tasks of a reflow controller, namely running the PID loop needed to accurately control the oven’s temperature and control the heating profile. We thought the inclusion of a Bluetooth module was a bit strange at first, but [Timothy] explains that it’s a whole lot easier to implement the controller’s UI in software than in hardware, and it saves a bunch of IO on the microcontroller. The support for a LiPo battery is somewhat baffling, as the cases where this would be useful seem limited since the toaster oven or hot plate would still need a mains supply. But the sounder that plays Star Wars tunes when a cycle is over? That’s just for fun.

Hats off to [Timothy] for a first-rate build and excellent documentation, which delves into PID theory as well as giving detailed instructions for every step of the build. Want to try lower-end reflow? Pull out a halogen work light, or perhaps fire up that propane torch.

DIY Powder Coating

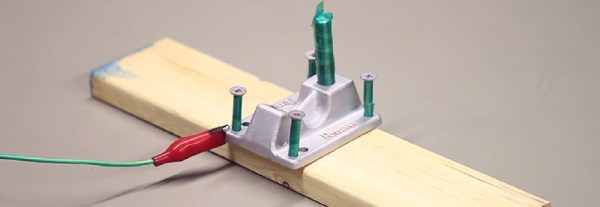
If you don’t yet have a toaster oven you can’t use with food, here’s yet another reason: DIY powder coating. Powder coating is much harder and more durable than paint – a property imbued to it by the fact that it’s baked on to a part. [Thomas] had a go at powder coating some skateboard trucks, and with the right tools, found the process downright easy.

[Thomas] only needed a few things to powder coat his parts, the first and most important being a powder coat gun. A few years ago, Craftsman produced a powder coat gun that’s still available on Amazon and eBay for about $50. Powders are plentiful and cheap in small quantities. The only other tools needed were an N95 or better respirator, some high temperature tape for masking off the part and a toaster oven. If you want to coat big parts, there are DIY oven options for that.

After the part was sandblasted down to bare metal, [Thomas] masked off all the holes and threads of the part with polyimide tape. Any tape that’s capable of withstanding high temperatures will do, and most of us have a roll of Kapton sitting next to a 3D printer, anyway.

The part is coated with powder via an electrostatic charge, and this means attaching a ground lead from the gun to the part. After that, it’s just filling the gun with powder, putting it in the oven set at 450°F, and letting the powder liquefy.

In the video below, you can see [Thomas] sandblasting, powdering, and baking a set of aluminum skateboard trucks using his method. Compared to other methods of finishing metal parts – anodizing or plating, for instance, powder coating is remarkably easy and something anyone can do in a garage.

Thanks [Tyler] for sending this one in.

Continue reading “DIY Powder Coating”

REFLOW CHÂTEAU

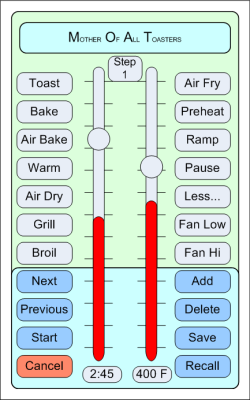
[Will] had a few reasons for turning a toaster oven into a reflow oven – he needed a project for an ECE lab, the lab’s current reflow oven was terrible, and the man is trying to keep [Will] down by not allowing toaster ovens in dorm rooms. What was born out of necessity actually turned into a great project – a reflow oven with touchscreen controls.

The toaster oven used for this build is a model [Will] picked up at Sears. It’s actually pretty unique, advertised as a ‘digital toaster’. This isn’t marketing speak – there’s actually a thermistor in there, and the stock toaster is closed loop. After disassembling the toaster and getting rid of the guts, [Will] whipped up a PCB for a Teensy 3.1 and the Adafruit capacative touch shield.

With the Teensy and touch screen, [Will] came up with an interface that looks ten times better than anything you would find on a Chinese auction site. It’s a great build, and since it’s kept in the electronics lab, will certainly see a lot of use.

Toaster Oven Reflow Controllers

With a lot of people who are suddenly too cool for through hole and of course the a few generations of components that are only available in SMD packages, it’s no surprise the humble toaster oven has become one of the mainstays of electronic prototyping. You’re gonna need a controller to ramp up those temperatures, so here are two that do the job quite nicely.

[Nathan]’s Zallus Oven Controller is a bit different than other reflow controllers we’ve seen on Kickstarter. He’s offering three versions, two with different sized touch screen displays, and one that is controlled with a PC and push buttons. The display for these is beautiful, and of course you can program your own temperature profiles.

If Kickstarter isn’t your thing, [Dirk] created his own reflow controller. Like the Zallus, this has a graphical display, but its homebrew lineage means it should be simpler to maintain. It uses a K-type thermocouple, and unlike every other reflow controller we’ve ever seen, [Dirk] is actually checking the accuracy of his temperature probe.

No, reflow oven controllers aren’t new, and they aren’t very exciting. They are, however, tools to build much cooler stuff, and a great addition to any lab.

An Amazing DIY Single Board ARM Computer With BGA

DIY Single Board Computer ARM

Typically, you buy a single board Linux computer. [Henrik] had a better idea, build his own ARM based single board computer! How did he do it? By not being scared of ball grid array (BGA) ARM processors.

Everyone loves the Raspberry Pi and Beagle Board, but what is the fun in buying something that you can build? We have a hunch that most of our readers stay clear of BGA chips, and for good reason. Arguably, one of the most important aspects of [Henrik’s] post is that you can easily solder BGAs with cheaply available tools. OSH Park provides the inexpensive high-quality PCBs, OSH Stencils provides the inexpensive stencils, and any toaster oven allows you to solder even the most difficult of components. Not only does he go over the PCB build, he also discusses the bootloader, u-boot, and how to get Linux running.

Everything worked out very well for [Henrik]. It’s a good thing too, cause we sure wouldn’t want to debug a PCB as complicated as this one. What projects have you built that use a BGA? Let us know how it went!

Hackaday Links: January 12, 2014

hackaday-links-chain

[Kyle] teaches photography and after being dismayed at the shuttering of film and darkroom programs at schools the world over decided to create a resource for film photography. There’s a lot of cool stuff on here like mixing up a batch of Rodinal developer with Tylenol, lye, and sodium sulphite, and assessing flea market film cameras. There are more tutorials coming that will include setting up a dark room, developing prints, and playing around with large format cameras.

[hifatpeople] built a binary calculator out of LEGO® bricks or toys. It started off as a series of logic gates built out of LEGO® bricks or toys in the LEGO® Digital Designer. These logic gates were combined into half adders, the half adders combined into full adders, and the full adders combined into a huge plastic calculator. Unfortunately, buying the LEGO® bricks or toys necessary to turn this digital design into a physical model would cost about $1000 using the LEGO® Pick-A-Brick service. Does anyone have a ton of LEGO® Technic® bricks or toys sitting around? We’d love to see this built.

Think you need a PID controller and fancy electronics to do reflow soldering in a toaster oven? Not so, it seems. [Sivan] is just using a meter with a thermocouple, a kitchen timer, and a little bit of patience to reflow solder very easily.

The folks at DreamSourceLabs realized a lot of electronic test equipment – from oscilloscopes and logic analyzers to protocol and RF analyzers were all included a sampling circuit. They designed the DSLogic that puts a sampler and USB plug on one board, with a whole bunch of different tools connected to a pin header. It’s a pretty cool idea for a modular approach to test equipment.

Adafruit just released an iDevice game. It’s a resistor color code game and much more educational than Candy Crush. With a $0.99 coupon for the Adafruit store, it’s effectively free if you’re buying anything at Adafruit anytime soon. Check out the video and the awesome adorable component “muppets”.