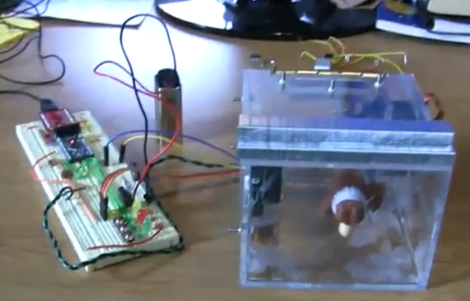
Behold the electronic Jack-in-the-box. Open the lid or enter the wrong combination and you’ll set off an alarm. But if you get the right 6 combination code entered using the three buttons you’ll be rewarded with a little ditty and the appearance of the Jack (who lives in the box). [Jeremy Blum] designed this as part of his introduction to rapid prototyping class at Cornell University. See his description of the project after the break.
When he shared the link with us he mentioned that this might be a fun project for beginners and we couldn’t agree more. The design is easy to wrap your mind around using the provided schematic. The source code package includes PDF files that contain well commented code segments along with their descriptions. You can use this to get comfortable with driving a speaker and servo motor using an Arduino, as well as to read from two different types of inputs. We are especially interested in the hardware debounce implemented for the switch that detects if the lid is closed. Software debouncing is pretty much the standard these days but because an external interrupt is used to read the switch that method won’t work here.
If you’ve got an Arduino and few of these components why not give this a try?
[youtube=http://www.youtube.com/watch?v=Z70TRaKqUbs]


Very cool.
I’d personally love to see more ‘beginner hacks’ around here.
Well designed and implemented project. Excellent job with the documentation too; I especially liked the RC circuits for the debouncing.
While I see the purpose of rapid prototyping I also hate seeing system with way overpowered processing capabilities for the job at hand. This is particularly true for much of the Arduino projects out there, but they have the ease of use and re-usability factor that makes them so popular.
Either way, good project.
You do have to wonder how many half gutted projects there are out there missing there heart of arduino as its ripped out for the next project!
thank you =)
Check out the use of the IO pins, he is just using 3IO’s for the leds and buttons.., nice!
So nobody uses those experiment stripboard PCB’s with lines or islands anymore? Breadboards are still rather big and pricey and only meant for testing/demonstration.
The ones like this I mean:
http://www.srcmbc.org.uk/ht_afb_images/engine_sound_stripboard.jpg
or
http://www.vectorcom.net/ebay/images/PCB1_400.jpg
(link from google image search)
This is really cool. I salute you for your well designed project as well as how you’ve documented it. What you’ve done is really impressive.