Looking for something to do in his downtime, [Mista Sparkle] decided that building a simple stroboscope was in order. He already had a set of six LEDs connected to his Arduino from a previous project, so he added a potentiometer to control the rate at which the LEDs flashed, and dug into the IDE.
During his build he discovered that using the Arduino millis() function at high speeds provides terrible resolution, while using the micros() function exclusively limits his low end measuring capabilities. He desired a better range of measurement, so his program was broken into main functions: One which measures the LED flashing frequency in milliseconds and another that measures the LED flashing frequency in microseconds. This allowed him to gauge rotational frequencies from 577 to 30,000 RPM.
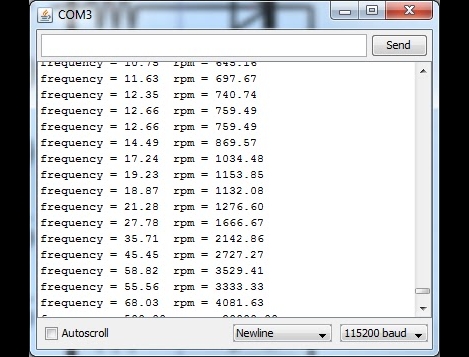
[Mista Sparkle] admits that he is not yet well-versed in driving displays with the Arduino, so he views his readings over a serial connection on his PC. Hopefully we’ll see an updated version with those features in the near future.


One expressed rate in Hertz, not in RPM.
Why bother with cycle based delays when almost any AVR has at least 2 timers ?
@bty, lol; This is Arduino, silly.
I made a very similar application, but my code was completely different and I displayed the strobe rate on an LCD. I ended up using interrupts and made a clever test case that only would update the LCD if my analog input value was significantly different than the last time it was read. Also I found that when trying to stop a fan dead in it’s tracks, an on time of 10% and off time of 90% gave the best results. So my potentiometer adjusted the frequency, but the code calculated the necessary ON and OFF time keeping everything at 10% duty cycle.
Very cool! My daughter and I made a far simpler version of this for our webshow, of course it really is just a blinking LED once you get down to it. A very good starter project (even though admittedly the use for a stroboscope at home is even more limited).
Code is tiny and hosted over at github, if you have 30 seconds to try it out.
Now I know people are going to complain about me hating stuff, but why not just ditch the Arduino library when it gets in your way? Why not learn how controllers actually work and use hardware timer/counters, external interrupts, or input capture hardware?
WTF does the summary mean anyway? I can’t make any sense of it, and I agree about knowing your platform and using hardware timers? that’s what they are for?
sooo its an Arduino, used to blink a led? …
Is there a version of the code for say.. a picaxe or one of the more basic micro controllers?
Actually… a 555 can do this right? Would lose the precision and the frequency of which the light blinks but that will allow variable frequencies.
I’m thinking in terms of something brighter like a cree LED for some simple/cheap strobe fun.
Time to google.
I built this in the spirit of taking something simple and not terribly useful in terms of just blinking a light.
Though the code is not perfect by any means (I’m not a programmer and literally have been working with the Arduino for 2 weeks, it goes on the idea that you can take something simple and cool and making it into a practical tool without much work at all.
I love the idea of using a hardware timer and pwm and varying the duty cycle and was originally looking for a way to use tone() or something with a different duty cycle to make stuff happen. I just ended up writing it that way cause that what I knew how to do.
So yeah, its a glorified blinking LED, but its a measuring device that works for my purposes.
I agree with Anon and SparkyGFX.
There are some times when the Arduino libraries/IDEs provide so many limitations that you’ll spend less time starting with one of the avr-libc examples and building up from there.
This is one of those times.
The think I dislike the most about the Arduino environment is that it seems to provide active discouragement of learning the hardware architecture, which causes very high barriers once you reach the limitations of the Arduino environment.
[i]A crutch for the mediocre to engage in mediocre projects…[/i]
very good tool for measure strobo is this tool from adasch: https://www.youtube.com/watch?v=XbtCwAEcZm4