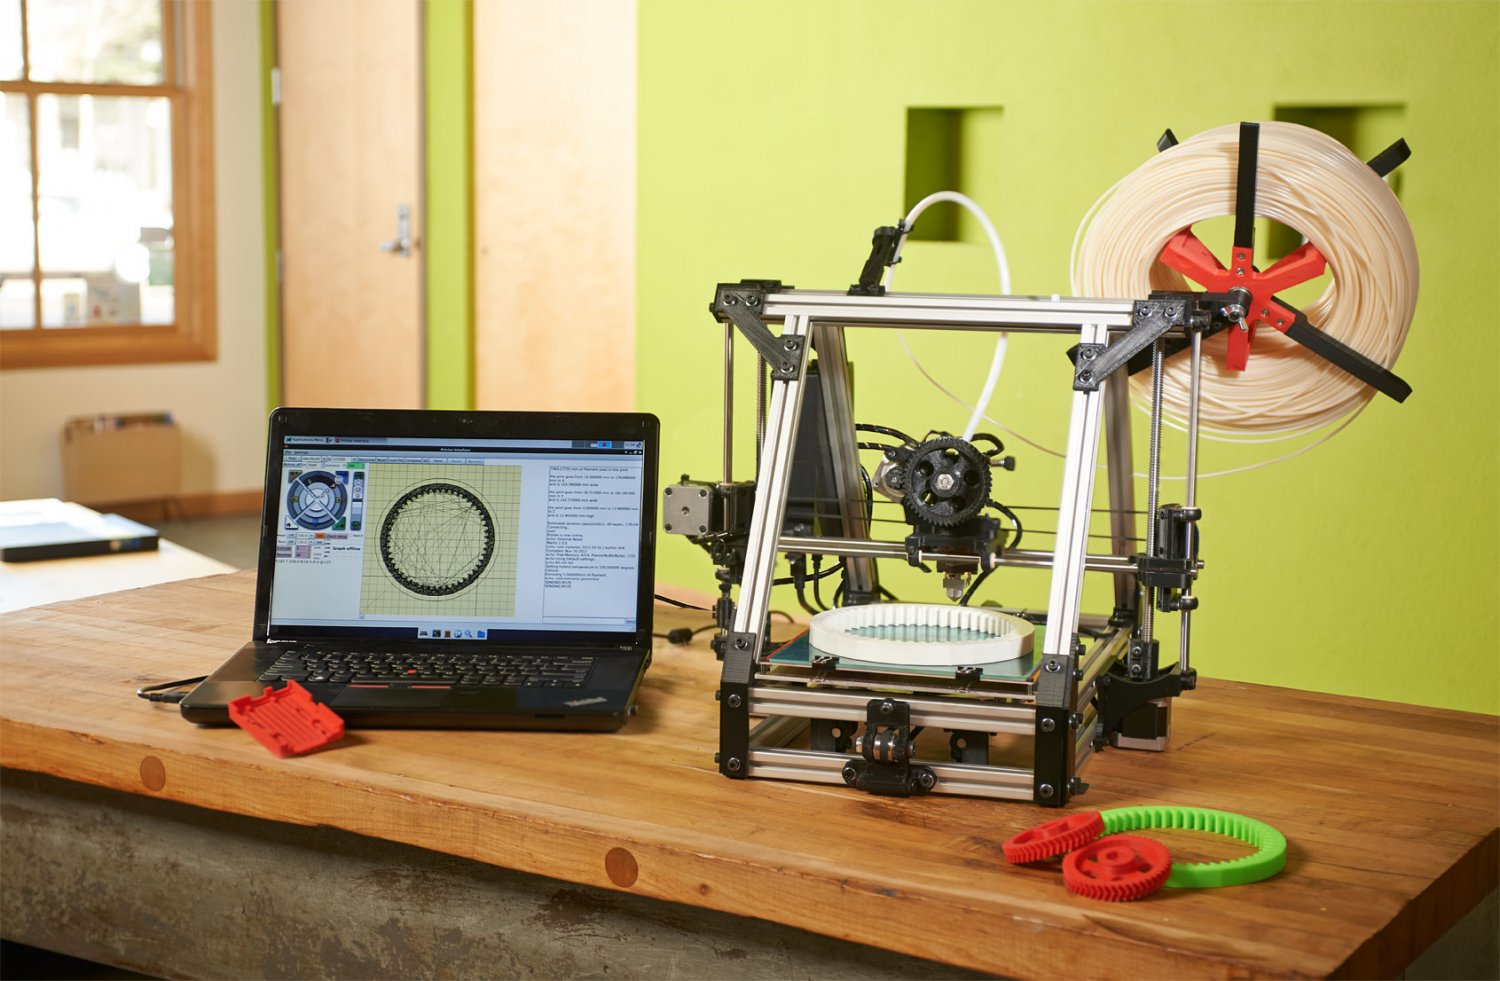
Recently, we acquired a LulzBot AO-100. It was given to us, free of charge. After having it for about a week, I’ve figured out enough that I feel I can finally share my thoughts, impressions, and experiences. I will be completely honest about the machine. It was given to us, which is insanely awesome, but hey, I have to share the real information with the readers.
When we first started looking for a printer, we decided we didn’t want to build one from scratch. While that might seem initially to be the opposite of Hack a Day, there is a reason. I simply can’t build every tool I use from scratch. I have projects in mind that could benefit from a 3d printer, and I want to work on those. This meant that I was looking for a pre-assembled unit. Many people asked for an article on getting a reprap going, so we started to consider reprap based kits as well.
When LulzBot contacted us, I was initially skeptical. I mean, the name is lulzBot. Is this an internet troll? Is this somehow connected to Lulzsec, the hacking group? Did they seriously name their printer LulzBot? Well, as it turns out, they are legitimate. Not only that, we’ve seen them before, they are also AlephObjects, who sent in the video of the wall o’ printers working. Why did they name it LulzBot? The answer was basically, for the lulz. It is worth noting that [Jeff] has been a strong proponent for free software for a long time and that Lulzbot is built from the ground up to be completely open and shareable. You can go to the website right now and download the list of parts as well as all source code and configurations.
As you read further, please remember that the model they sent me was not their newest. They don’t even sell this model any more. Technically speaking, it is roughly 2 generations behind.
The LulzBot arrived in two packages. One was the printer itself and the other was a box full of spare parts, including 15 pounds of filament for printing and a complete and fairly extensive toolset. The printer was packed very nicely. They had some kind of expanding foam that conformed to the shape of the printer and held it very tightly. It had an inspection slip, list of included parts, and a sample print that I assume was from this very machine in the box with it. That’s a nice little touch.
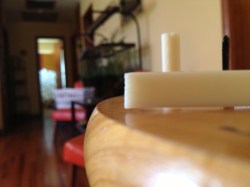
I pulled it out, set it on my kitchen counter and thumbed to the section in the manual that explained the unpacking and set up process. It really only involved removing a few bits that held things in place for shipping, and assembling the filament spool holder.
At this point, I’ve already noticed that the bulk of the parts connecting the frame are 3d printed. This isn’t new, we’ve seen this tons of times, but the 3d printed multi-piece adjustable filament holder suddenly made me very excited. Here was a complete tool, made by a machine exactly like the one in front of me. Not just a part, a complete tool with moving parts. Once assembled, I installed the prerequisite software for the Arduino, Gslicer, and PrintrFace.
After the quick assembly, all that is left is to level the bed, set the z-home, and load new filament into the extruder. Loading the filament was quite easy. All that was required was that I loosen a couple bolts, pull the temporary one out, and stuff the end of the new one in.
Setting the Z-height is simple. Hit the Z-home button and watch the nozzle drop. There is a fat thumb screw on one side of the z-axis that the z-stop switch hits when it comes down. A small twist of this can adjust the home position of the nozzle accurately. The manual had pictures showing roughly how close it should be.
Next, I had to level the bed. I load a file that was on their site available for download. The file prints a square and a big pattern on the entire build surface. This allows you to see where the bed might be a fraction of a millimeter to low or high. Adjusting is done by four small bolts on the corners.
Then I began printing things.
At this point, I could have stopped! That’s all there was. Easy as can be.
However, if you recall, this isn’t the newest model. There is a list of things I could upgrade on this to get better quality. I couldn’t just leave it alone, I had to start messing with it.
I chose to print a few items that I had previously printed on a Makerbot Replicator for comparison. It is worth noting that the LulzBot ships with a .5mm nozzle and the replicator I used had a .35mm nozzle (I think, possibly .4).
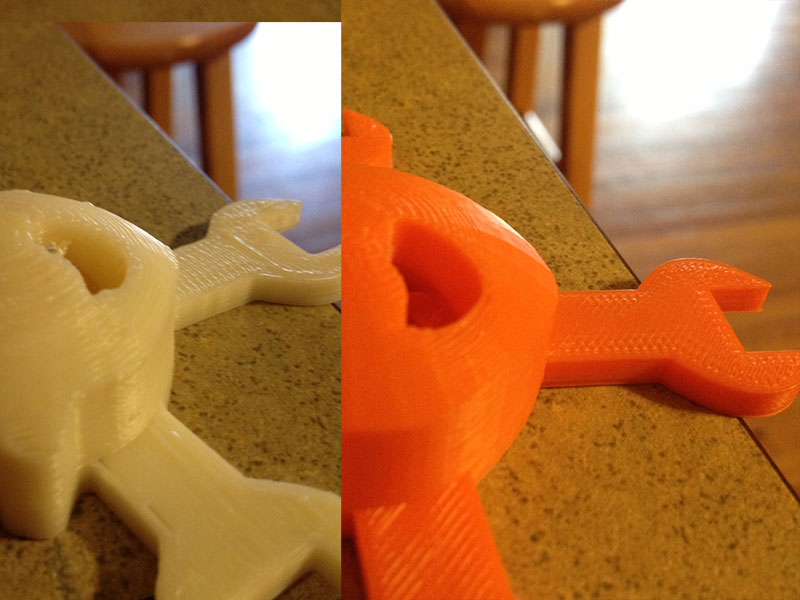
The initial prints were pretty good. Especially when I got my Z-height smashed down the way it should be. [Jeff] gave be a slightly newer config file that made a pretty big difference too.
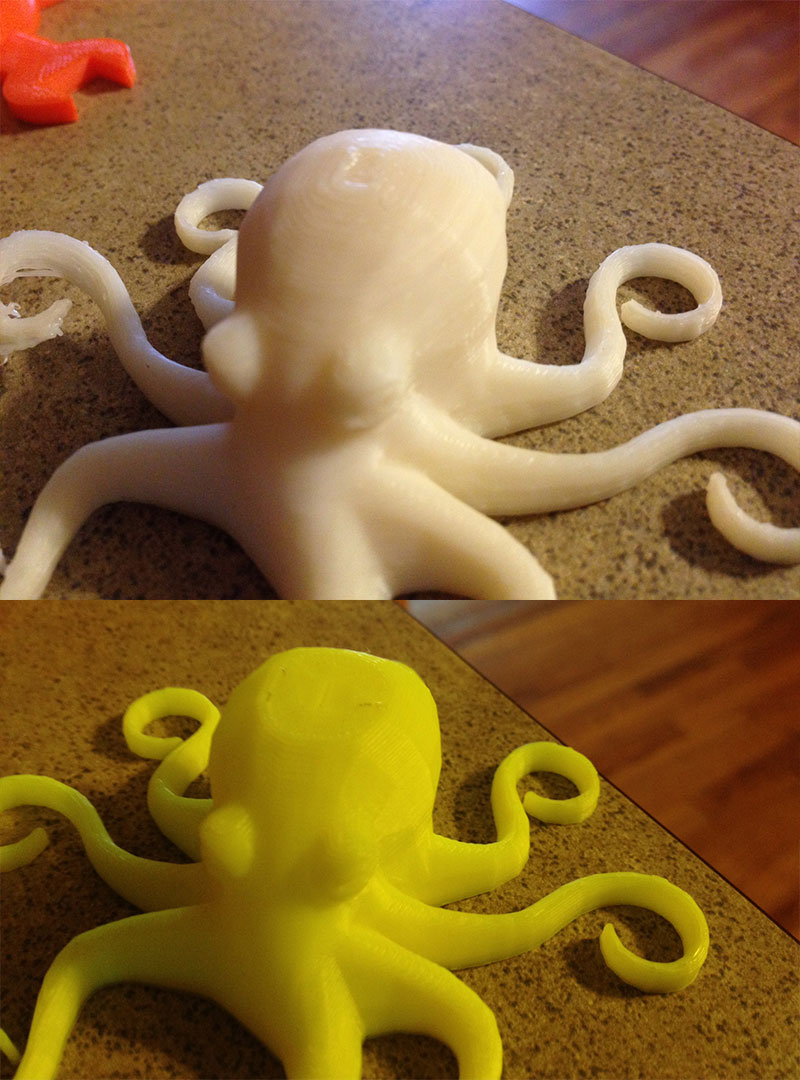
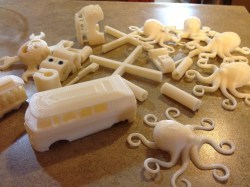
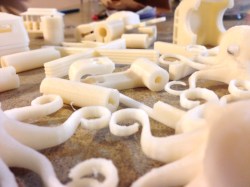
Here’s a timelapse video showing an early print. You’ll notice I didn’t set my height low enough and it caused one of the tentacles to pop up. This isn’t a huge deal, and a minor adjustment has resolved it.
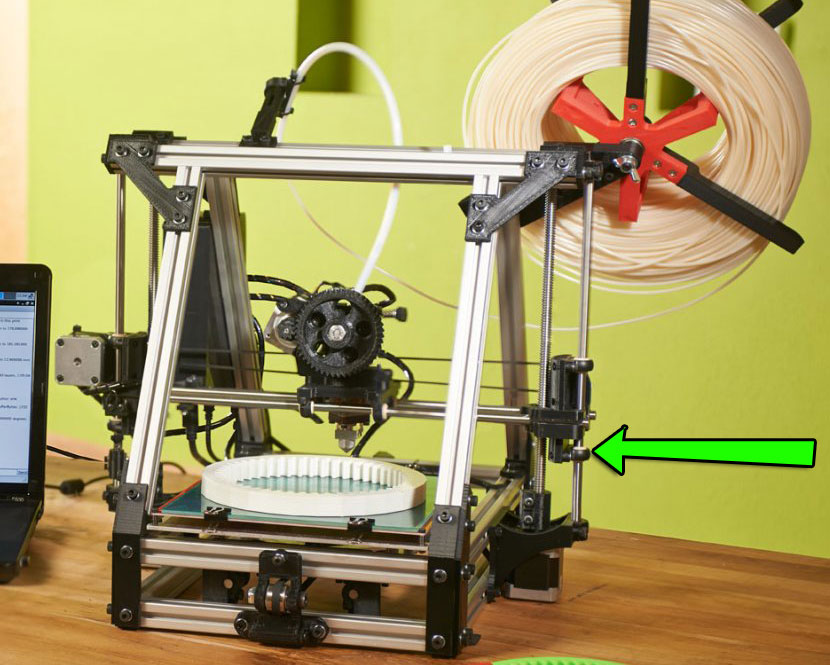
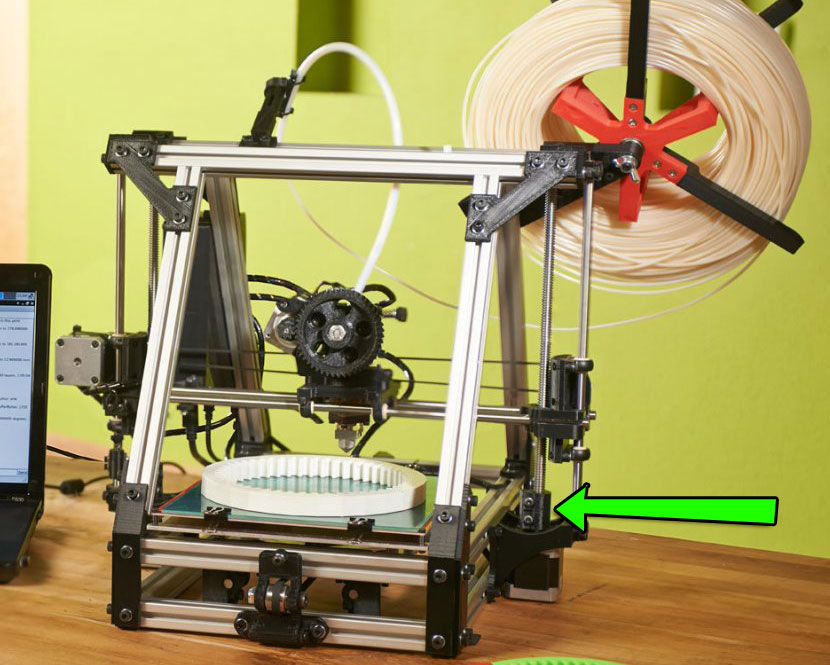
I was actually a little frustrated with some peculiar fluctuations I had found in my prints. My z-axis just seemed to need constant adjustment and wasn’t reliably returning to home each time. I ultimately found that this was just a couple loose screws on a z-axis guide rail, I problem I should have noticed on visual inspection when I took it out of the box.
x-Axis carriage mount lower piece upgrade.
[Jeff] suggested I download the lower piece of the x-axis carriage mount. This upgrade gives some more stability and should reduce wobble. I downloaded it and printed it out. To mount it, I had to disconnect the large Acme screws from the z-axis motors. This upgrade got put back to stock in the next step.
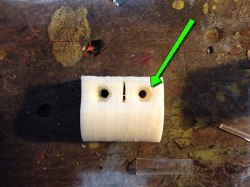
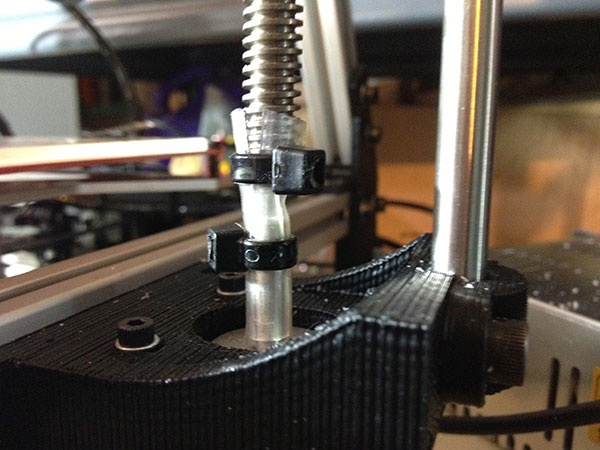
z-axis-acme-adapter upgrade.
I quickly became annoyed at the z-axis-acme-adapters. They had recessed holes for their bolts, but he holes weren’t the exact size of the bolt, so it spun freely in the indention. Since it was indented, I couldn’t put a wrench on it either. I ultimately ended up putting super glue in the hole which, once dry, gave the nut enough friction to stay still. During this process while I was explaining my frustration with [Jeff], he pointed out I could print newer better ones, like they use in the new model. I should point out that I’ve seen this used other places, not just the lulzbot. For tiny nuts, it is a bad idea. The flat surface is just too small to grip. The plastic has too much flex.
I had to fight these back on the printer, then print the new ones. Again, I was struggling with the fact that the nut would spin freely, so I couldn’t get it tight enough. The motor kept spinning in the mount because it was too loose. Not only that, but I noticed the new fancy x-carriage mounts were hanging all the way down far enough to interfere with the z-axis-acme adapter. I didn’t have the linear bearing this mount was supposed to hold, so I ended up just putting the stock ones back on.
While inspecting the new z-adapters, I noted that they had the same recessed nut area. The theory here is that the nut will fit snugly and not turn, in practice I found that they do turn if they are small enough. Larger ones do not have this issue. To resolve this, I just put the head of the bolt in that section which left the nut on the surface of the opposite side. Since the bolts have an allen socket head, this worked fine. This was a really annoying problem with a ridiculously easy solution.
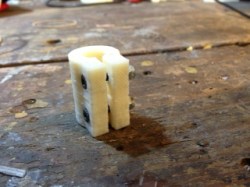
The new adapters were much nicer, having a keyed hole on the bottom that fit the motor’s rotor very snug. I put everything back together, tightened everything as tight as I dared, loaded the smaller .35mm nozzle and began to print. The corners were tighter, details finer, but I also had this new and annoying wavyness.
After some quick research I found that my lack of experience with the repraps had sent me in the wrong direction. It appears that the z-axis motors/acme screws aren’t all supposed to be as rigid and tightly mounted as possible. They’re supposed to be able to wiggle a little bit so that the slight imperfections in mounting angle, or screw straightness won’t have enough force to push the whole carriage off course by a fraction of a millimeter.
I loosened the new adapters. This was rather easy now that I had reversed the mounting of the bolts that tightened them. I backed the motor and the acme screw out so that they were barely inside the adapter and tightened it back down. This allowed for more wiggle. My print improved!
Some very nice folks on the #reprap channel in IRC suggested that I try rubber tubing as a coupler instead. It has enough squash stretch to eat up most of the inconsistencies. Sure enough, a couple pieces of rubber tube worked fine!
at this point, I have detail and quality. It is humming away right now printing some fun stuff.
a big issue with an easy fix
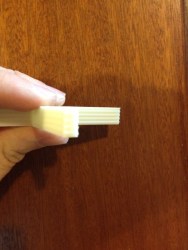
My son got really excited when he saw all the gear related files on thingiverse. Naturally, I downloaded a simple one and printed it it. I chose this simple planetary gear set. Unfortunately, even though it looked good, the gears didn’t fit in the outer ring. Everything was slightly too large. I could force it in, but the pressure was so much that it wouldn’t spin. I then tried a gear heart, which I happened to have an example of from another printer. I could assemble it, but something was wrong and the gears wouldn’t spin like they’re supposed to. I was quite frustrated, since this meant that nothing very precise I would print would work.
I contacted [Jeff], who took the same file to their machines and printed it. He said that the file worked for them. We went back and forth for quite a while before [Jeff] figured out that I had loaded the wrong configuration files. Even though I have the AO-100, I needed the configuration files for the AO-101 which were correct for the newest version of slicer.
After that update, my parts were meshing just like they are supposed to! I am quite happy.
Too scared to reprap
While talking to a few people, I’ve found that the biggest issue with repraps are, well, that you have to build them yourself. When you look at the detail they achieve, then consider that maybe you’ve never built something that is that precise, it can be daunting. One great way to overcome that trepidation would be to go to a build party. There are folks out there that throw parties where groups of people all come together and build their repraps all at once. When I spoke to [Sonny] who does these parties, he said that everyone goes home with a functional reprap for under $1k. You get help and expertise from the whole group. Hackerspaces will sometimes organize these events as well, so be sure to find your local hackerspace and ask. In fact, there’s one at the Hacker Consortium in Nashville on Feb 15th and one at LvL1 in Louisville KY, on March 9th.

Of course, you can always just get a machine that is pre-assembled like we did.


the youtube video doesnt exist?
fixed.
best name ever
Link should be:
https://www.youtube.com/watch?v=8FYitYeVyMA
My nuts are spinning!
most frustrating thing right there.
It’s almost like dealing with software, so much tweaking to get the functionality you expect.
Quick question: What do people use to smooth out the final parts? Heat? Filing? sandpaper?
Recently, we’ve been dipping parts in acetone. It gives them a lacquer look, and makes them stronger. It is a really cool effect. You can also sand them, but I haven’t done that much (at all?) except with wood filament.
I’ve seen examples of acetone wipe-downs and vapor treatments, but not a dip. What strength is the acetone, and how long do you leave it in?
ABS can be smoothed out by Acetone. Either by wiping or suspending the part in the vapor. PLA can be treated the same way with a chemical I’ve forgotten the name of which is particularly nasty and not really something you want to play around with.
Other than that wet sanding works very well and it’s what I use on my models (PLA). Follow it up with some polishing compound and you can get really glossy parts. Personally though that’s not something I really do, I’m too lazy and my Ultimaker prints come out pretty good as it is.
The stuff for PLA is called THF, and you need to be careful with it as it dissolves latex gloves, so you need different gloves.
Try nitrile gloves. The ones from Harbor Freight are inexpensive but against harsher stuff like lacquer thinner protect for a limited time. The nitrile will eventually swell up and get soft and still keeps the chemicals off your hands but the gloves get weak and easy to tear.
Sort of like those acid suits in DOOM. ;)
Good replies guys, thanks, it’s appreciated.
You can check out this amazing part finisher here http://solidoodletips.wordpress.com/2012/11/10/presto-part-finisher/
That seems the easiest I’ve found so far. I guess you could use a tumbler if you had forever to wait.
And you still haven’t understood how how lucky you are!
Let me put this in a historical context. My Grandfather was the engineer in a weaving factory that still had a working (and used) steam engine to power the belt drive system working some of the weaving looms. My mechanical engineering lecturer at uni had a Grandfather who had cut, by hand using a hammer and chisel, the keyways in the steel drive shafts of ocean liners to key the propeller to the shaft. They wouldn’t even have considered your tiny commissioning problems as anything other than normal.
Even me, a pampered baby boomer, I buy myself second hand computers (much more bang for the buck) that usually need a bit of fettling before they’re fit for use. My first new car needed more work each month than your reprap, and you are by no means the first to fit an Allen screw into a worn out nut recess – I always thought that’s what they were invented for.
Youth today ! grumble grumble !
And we are where we are today because some people found such commissioning issues to be unacceptable in some situations, and did something about them.
Grumble grumble…
Smooth out the final parts? I though the point of the printer was to print a clean design that is basically just blown off and it is ‘clean’. I have never seen a demo that needs to e ‘smoothed’. That said I do not have a 3D printer yet myself, so I will leave the answer to the experts, I am curious myself though. How much if any ‘smoothing’ is needed on the final printed products?
for the type of printers that lay down layers of plastic, you’re usually getting something with tiny ridges. You are probably thinking of the $60,000 printers that use powder that gets melted by lasers… or possibly uv cured resin.
Thanks Caleb! Thanks lulzbot!
Nice! Can’t wait to see your other 3D printing projects.
On a side note, here’s an interesting paper on layer heights defects, threaded rods ‘n such
Taxonomy of Z axis artifacts in extrusion-based 3d printing, by whosawhatsis
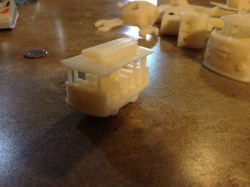
I see a tentacle of your octopus got unstuck from the bed during printing, I had similar trouble and tried a lot of stuff. cleaning the bed with acetone, using kapton tape on the surface etc. I found the best method is to adjust the bed temps, takes a bit of trial and error, but i found 60C bed temp works really well for the PLA I’m using. very impressive prints out of the lulzbot there, nice overhang on the little van model.
van model overhangs are actually a cheat. http://www.thingiverse.com/thing:48695
Please do some objects with the Laywood wood filament! I would love to see some tests versus the pla, abs, and nylon being used now. I still have another month or so til my solidoodle2 gets here, I’ll be watching close.
Oooh, I want some of that. I may have to give it a try!
I am also wondering the safety level for the wood filament too. I know abs and pla arent exactly food rated but what do you think about the wood filament? What would you suggest for a sealant for these plastics?
Be advised, some users reported clogged nozzles after using laywood, you might want to use a spare hotend. Or be prepared to clean the nozzle when you switch the extruding material !
Really? I didn’t have any issue *whatsoever* when printing Laywood. I was actually expecting problems, but nothing occurred. I even left it in there, didn’t bother to clean it out, etc. and it was always just fine. I was pleasantly surprised.
I want to try some. I may have to buy a spool when I order the upgraded pulleys!
@ Jeff Moe: did you experience any difficulties when switching back to PLA filament?
Anyway I think most clogging problems actually occured on sub 0.5mm nozzles, nothing dramatic :)
Printing with wood – garyhodgson.com
RR forum thread
RR forum thread
@spackler:
I print a lot more ABS than PLA, so the switch was probably back to ABS (it has been awhile). The wood can print at a pretty huge range of temperature, so pushing it out with another filament isn’t hard.
I only used a 0.5mm nozzle, so it may be more problematic at smaller sizes. Oh, and it does ooze a bit–kind of strangely, but nothing unworkable.
Here’s a sample print of it. It used the same gcode we have used for printing that part in ABS. It worked the first time, not fussing around with settings:
http://devel.lulzbot.com/filament/wood/toy_truck/
that looks great Jeff. Man, I think I need some of that. Also your prints are a huge degree better than mine. I think I goofed something on the printer.
Oh forgot to say: thank for your honesty Caleb, and it’s an interesting read, and I bet very helpful for people who start out with one themselves
Not having a reprap myself, I’ve often wondered: if you placed a hole punched sheet of aluminum foil between layers, would it improve structural strength? Or RF shielding?
Perforated metal as a filler has a high strength-to-weight ratio. With the right dimensions, it could hold small nuts in place that would otherwise slip.
http://en.wikipedia.org/wiki/Perforated_metal
For the TK-0 we’re using metal parts that get inserted hot into the plastic called PEMs. I wish I had a better photo right now, but you can see one used for holding an endstop in place here:
http://devel.lulzbot.com/TK-0/photos-20130108/DSC_0461-1024.html
Here’s a random photo from the ‘net of some:
http://img.directindustry.com/images_di/photo-mg/threaded-insert-for-plastic-9040-2406013.jpg
They work great. :)
How do you get them in the print? I imagine you must design the print with a hole/tube for them. At what point do you insert them? Is there an auto pause in the printing for things like this? Very interesting!
We add them when the print is done. We just have holes in the parts where they go. They come in a variety of sizes (M3, M4, etc.). We have a special tip for them on our Weller soldering irons, heat them up, and insert them. Any cheap soldering iron or similar will do.
Probably, but you then add the problem of cutting the perforated metal layers into shape. Perhaps you could just sprinkle aluminium filings onto each layer, but then you’d get problems with adhesion…
Aah, OK.
I was thinking the metal would actually support, kind of like rebar in concrete. [Or fibreglass, inside polyester resin]
Perforated for whole cases, like the Raspberry Pi. Pre-shaped for Wi-Fi antennas.
What about aluminium dust? Same thing they put in Etch-A-Sketches? No idea if it’ll work but does anyone want to try it? I know it’s conductive, highly sticky with static charge, and gets absolutely everywhere. But if you could print conductive plastic with it, antennas and the like would just be the beginning!
I have heard from a guy who says he put alu and zinc powder in ABS to make a stronger plastic with a Lyman-like Filament Extruder. I have asked for a sample of it, but haven’t gotten any. As filament extruders (machines that make filament for 3D printers) become more common, I expect to see a lot more experimenting in this area.
Check out materials like this, for instance:
http://www.coolpolymers.com/XyloyM950.asp
The same guy also mentioned printing with pine tree sap that makes a print that looks like amber. Again, I haven’t seen it myself, but it sounds great.
Another workaround for spinny nuts in plastic is to print it slightly undersized, then heat the nut with a soldering iron as you pull it into the countersink, so it melts its way in.
with an already to big hole, add some filament in there first.
inspiration to finish my reprap :)
Just checked the lulzbot and i’m pretty sure the lulz come from their pricing scheme. $1700 for a reprap based printer? What makes it so special? you can almost buy a makerbot replicator for that much!
Looks exactly like my reprap mendelmax 1.5. But I paid less than a fourth of this price. (yes, excluding the time the assembly time, but it seems like that thing needs some more tweaking too.)
Really? Your entire assembled MM1.5 was less than $450? Can I get a 1,000 please? I’ll send FedEx Freight to pick them up. Please palletize them. I assume this includes a year of support as well, plus warranty. Can you upload all the specifications for every part please, so I can see what I’m really getting? Thanks!
ha! I generally see a reprap build coming in from $700-950 if you’re actually acquiring all the parts.Include support, warranty, extra parts, the tool set, and 15lbs of filament and the price seems bout right. I could see $450 if you’re harvesting parts from junk and taking your sweet time waiting for perfect deals on materials.
I’ll bet they could get down to $1k if they dropped a lot of stuff.
Steve, lulz sells fully assembled, working machines, not kits. So, to put that in perspective, its about the same price as a replicator 1 but the difference is, lulz is still open source. And, there are hundreds of ppl on #reprap IRC that will gladly help with a lulzbot, not as smuch with a replicator :)
I too have been given a Lulzbot AO-100 to evaluate and create some content with. I will complete my first week Tuesday and will report more back then. I built my own config file and have been getting some very nice quality prints with the .50 nozzle. Here is a FB album of what I have been able to do so far. http://www.facebook.com/media/set/?set=a.4842812621208.2175712.1023629593&type=3
Best thing I’ve seen all week. This is so exciting to watch it all take off.
Once again, I’m glad I’m out of space to work in….
BTW, some please post a “sharp pointy stick” file on Thingverse, they need to whine a little more. I’d forgotten how much I disliked that site.
Thanks Caleb for a frank assessment. I don’t see it as a criticism of Lulzbot myself. If anything, Jeff’s help sound like a good endorsement of why someone might want to buy one instead of doing the complete scratch build.
For the spinning nuts, I’ve dealt with this in other situations by folding a strip of cardboard, plastic, or metal into 6 sides, to fit as a shim between the nut and the walls of the opening. Or wedging a flat-bladed screwdriver between one side of the nut and one wall, to hold until tightened. But I’m certainly loving the idea of reprinting the part with a smaller opening.
Another option would be to leave space in the model for a wing nut, instead of a hex nut.
Just a note if you ever come into warping problems. Dissolve ABS in acetone. That creates abs glue, use a q tip to do a thin sketchy layer on the heated platform (not a solid coat, that gets problematic..just kind of scribble). This will solve and help you avoid warping of any kind.
This is actually the recommended heated bed prep by Lulzbot. You can see it in this video. http://www.youtube.com/watch?v=Rl1aU2Ix_sA
It is also described on page 49 of the manual:
http://download.lulzbot.com/AO-101/documentation/current/AO-101-User_Manual.pdf
It works very well, and makes a huge difference for larger parts.
Lately we’ve been using the very strong hairspray onto glass technique. This has been working very well too, and is easier to get off the plate when it cools. We’ve tried Suave 10 and have heard Rave 4 works well. The higher the number, the stronger, but it is relative to the brand.
Why hairspray rather than a super spraymount type adhesive? Water soluble? I might be thinking contact cement also.