A few months ago, [Josh] was given an old Commodore 64. He needed to make an AV cable and find a new power supply, and even after testing these new parts out, [Josh] found it still wouldn’t boot. Not one to look a gift horse in the mouth — or perhaps he enjoys the challenge — he set out on restoring a thirty year old circuit board.
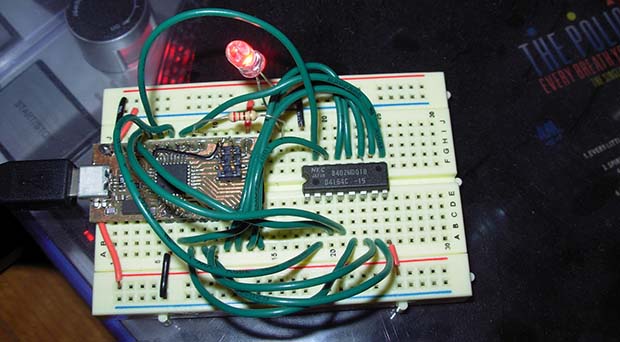
He replaced a few chips and the caps, but found he had no way to test the DRAM chips. Compared to SRAM or Static RAM used by other computers of the era, DRAM is a bit harder to interface, requiring a capacitor in each memory cell to be refreshed a few dozen times every second. With a bit of help from his good friend [CNLohr], [Josh] figured out a circuit to read and write to his chips and build a small board based on the ATmega8U2 microcontroller for testing purposes.


Interesting. But how about about probing the signals in the machine? Usually that’s how you find broken parts.
I didn’t have an oscilloscope at the time. I did make a simple frequency counter using that AVR board. So the best I could do is measure clock rates.
I used to repair C64s with a homemade logic tester – two LEDS and a 74LS00.
Does anyone know of a single sided board layout for a ATmega8U2 like shown in the picture?
If you can make your own PCBs this is the schematic. https://cnlohr.net/pubsvn/electrical/avr_32u/test2-bb.pcb
One trick we used when the DRAM is soldered into the board (without sockets) was to get a spare (known good) DRAM of the same size / type and bend the pins in a little.
This chip was then clipped onto the each of the of the other chips in turn and if the unit suddenly worked then we replaced the chip it was clipped onto.
This fixed 4 out of 5 DRAM failures and is quick and easy to do.
I have been wanting to build a new motherboard for the Commodore 64 using modern components (but original custom chips) for years. I really need to just sit down and do it.
The idea is to use an FPGA (probably a CPLD would work fine) to replace the glue logic, use SRAM and flash for the roms, and of course modern storage like SD cards. The goal being to reduce the size into a portable, but keep the authentic sound and graphics.
Didn’t Jeri Ellsworth do just this, making her first “big mark”?
Jeri made an FPGA that emulated the entire commodore 64, including the custom chips. It’s emulated, not using the actual custom ICs.
I want to keep the SID and VIC.
How is an article from May 2012 a few months ago?
1/10,000,000,000th of the months the universe has existed is quite a few.