C64 Finally Gets The SRAM Corporate Wouldn’t Pay For

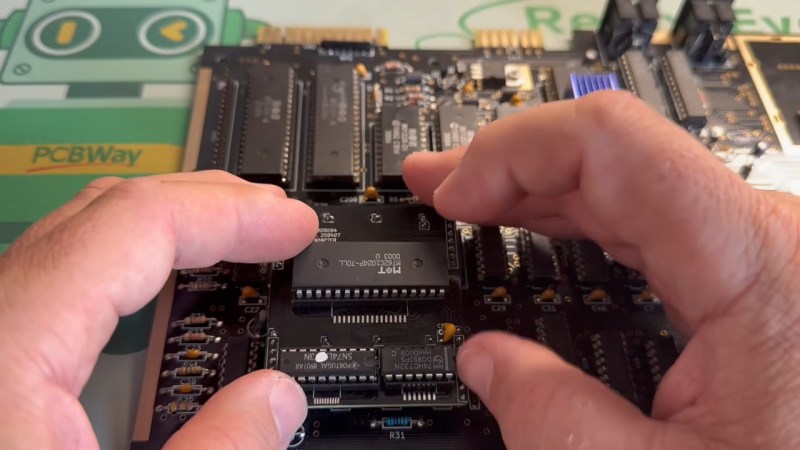
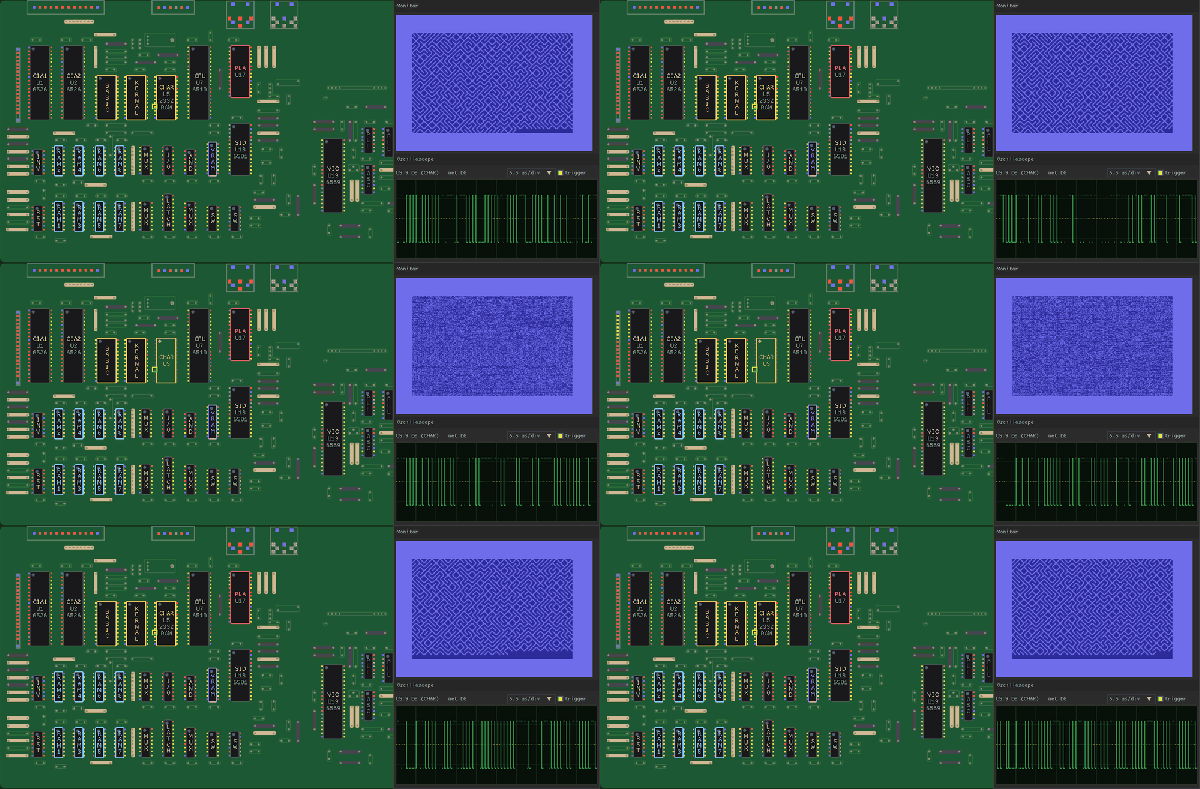
If you think RAM is expensive now, try putting yourselves in the shoes of a Commodore engineer, circa 1981. RAM was eye-wateringly expensive by modern standards, and Jack Tramiel wanted 64K of the stuff for the next computer — hence the name, Commodore 64 — but he didn’t want to pay for it. The solution was to use cheaper dynamic RAM over the more expensive static RAM that later took over the market in the kilobyte range. That’s a small problem for retrocomputer hobbyists, because while we’re complaining about the price of gigabytes of the stuff, you can’t buy new DRAM chips that fit a Commodore at any price. That’s why [Fabio Battaglia] aka [hkzlab] came up with an adapter board to fit easily-available SRAM chips onto aging C64s. 

Nothing lasts forever: not cold September rain, and not DRAM chips. Heat damage? Internal corrosion? There are probably multiple failure modes, but someday the old stock of chips will run out and the retrocomputer community is going to be ready for it. [Keith Olson] sent us a tip on a video by [The Retro Shack] about this very problem that serves as a good demo of what you get when you put SRAM into a C64. (Thanks [Keith]!) That said, the adapter board on offer is only good for C64s with the 250407 motherboard. If yours is different, you may have to modify the board. But hey, it’s open source, so go ye and do that thing. Let us know via the tips line if you do.

Continue reading “C64 Finally Gets The SRAM Corporate Wouldn’t Pay For”

Tiny C64 PSU Rejects Tradition, Embraces USB

The Commodore 64 has, by modern standards, the interesting power requirement of needing both 5 VDC and 9 VAC. Traditionally, one would use an iron-core transformer to step-down the wall current — be it 220 V or 115 V, 50 Hz or 60 Hz — to produce the low-voltage AC.

That’s how Commodore did it, and that’s how most of the aftermarket replacements do it, too. That iron-core transformer is bulky, though, and [Side Projects Lab] decided that in this day and age of switching supplies and USB-PD he could surely do better. Which he did, with the diminutive PD-64.

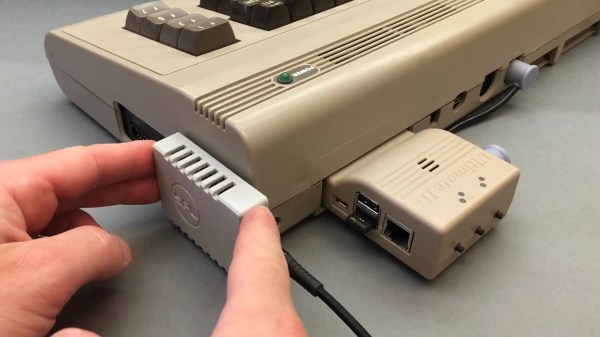
As you can see, it just covers the power port of the C64, and not much else. Partly that small size comes from offloading some of the hard work onto a USB-PD wall wart. The PD-64 requests 12 VDC, which it then steps down to 5 VDC with the usual buck converter, and inverts to 9 VAC in a circuit that is the most interesting part of the project.

There are various ways one could do this, after all, and we’re sure some of you will have different ideas than [Side Projects Lab], but his method seems sound. In order to provide galvanic isolation between the two outputs, the 12 VDC line is first chopped into a 500 kHz signal, and run through a tiny 5:6 ferrite transformer. That output gets rectified to 13.6 VDC, a voltage that is used to run a class-D audio amplifier to produce the 9 V peak-to-peak, zero-DC-offset signal the C64 needs.

[Side Projects Lab] has released both FreeCAD files for the case and STLs as BY-CC-ND 4.0, and a circuit diagram is available for the electrical side. If you don’t want to design your own PCB, [sideprojectslab] will be selling finished versions.

If you’re interested in further dragging your C64 into the modern era, check out the HDMI output that [Side Projects Lab] hacked together for the iconic computer last year.

Continue reading “Tiny C64 PSU Rejects Tradition, Embraces USB”

Is It A Pet? No, It’s A Teacher’s Pet!

Here at Hackaday we cover the world of retrocomputing, which means that we see all manner of older computers in our everyday work. We might even claim that we’ve seen them all, were it not that every now and then something comes along which surprises us. [Tynemouth Software] has done just that, with an unexpected Commodore. It’s a Commodore 4064, something that was new to us, but which is best described as a Commodore 64 in a PET case. He’s bringing this one back to life.

For those with weak early-Commodore-fu, maybe it’s worth a quick recap. The PET was Commodore’s big hit from the late 1970s, and it took the form of an all-in-one machine with a CRT display built in. They packed a 6502, BASIC, blocky monochrome graphics, and unexpectedly an IEE-488, or GPIB port. Meanwhile the 64 was the company’s smash hit early 1980s home computer in a compact console design, with high-res color graphics for the time on your TV, and a synthesizer chip that’s still legendary in 2026. Combining a 64 mainboard with the super-robust PET case appears to have been part of Commodore’s business and education offerings.

This one appears to have been in the damp, because that board is definitely more than a bit grubby. After a lot of debugging its power and video circuits, including an unexpected sync splitter board to drive the non-composite monitor, he narrows down the problem to a dodgy ROM and some memory errors.

It seems there’s some question in Commodore enthusiast circles as to whether these machines were assembled from surplus PET parts, but he puts that one to bed by pointing out the custom metalwork and the few custom Commodore 64 features on the board. All in all it’s an interesting dive into an unusual 8-bit machine.

We’ve seen [Tynemouth] a few times here, perhaps most notably with their modern take on a ZX80.

Diagnosing A Mysterious Fault With A Commodore 1541 Disk Drive

Some PCB corrosion on the bottom of the 1541 drive. (Credit: TheRetroChannel, YouTube)

Recently [TheRetroChannel] came across an interesting failure mode on a Commodore 1541 5.25″ floppy disk drive, in the form of the activity LED blinking just once after power-up with the drive motor continuously spinning. Since the Flash Codes that Commodore implemented and bothered to document start at 2 flashes (for RAM-related Zero Page), this raised the question of what fault this drive had, and whether a single flash is some kind of undocumented error code.

A cursory check showed that the heads were okay and not shorted, ruling out a common fault with the used floppy mechanism. Cleaning up the corrosion on IC sockets and similar basic operations were performed next, without making a change, nor did removing the ICs to induce it to produce the documented error codes, but this helped narrow down the potential causes. Especially after swapping in known-good ICs failed to make a difference. One possibility was that the drive was boot looping, as the activity LED is lit up once on boot.

Some probing around with an oscilloscope between the faulty and a working drive seemed to point to a faulty RAM IC, but while probing the faulty drive suddenly initialized successfully. After some more poking around it appeared that the drive was fine after it had a chance to warm up, which just deepened the mystery.

The drive did talk to a C64 with diagnostic cartridge at this point, but would often glitch out. Ultimately it appears that a dodgy IC socket and a few bad traces were to blame for the behavior, making it an ‘obvious in hindsight’ repair. The bottom of the PCB had some clear corrosion on it, but the affected traces were apparently still hanging on for dear life with the drive still initializing once warmed up.

Continue reading “Diagnosing A Mysterious Fault With A Commodore 1541 Disk Drive”

C64 Gets A Modern Interactive Disassembler

If you want to pull apart a program to see how it ticks, you’re going to need a disassembler. [Ricardo Quesada] has built Regenerator 2000 for just that purpose. It’s a new interactive disassembler for the Commodore 64 platform.

Naturally, Regenerator 2000 is built with full support for the 6502 instruction set, including undocumented op-codes as well. It’s able to automatically create labels and comments and can be paired with the VICE C64 emulator for live debugging. You can do all the usual debug stuff like inspecting registers, stepping through code, and setting breakpoints and watchpoints when you’re trying to figure out how something works. It can even show you sprites, bitmaps, and character sets right in the main window.

Files are on Github if you’re ready to dive in. You might find this tool to be a useful companion to C64 assembly tools we’ve featured previously, as well. If you’re pulling off your own retro development hacks, be sure to notify the tipsline.

[Thanks to Stephen Waters for the tip!]

Commodore 64 Helps Revive The BBS Days

Before the modern Internet existed, there were still plenty of ways of connecting with other computer users “online”, although many of them might seem completely foreign to those of us in the modern era. One of those systems was the Bulletin Board System, or BBS, which would have been a single computer, often in someone’s home, connected to a single phone line. People accessing the BBS would log in if the line wasn’t busy, leave messages, and quickly log out since the system could only support one user at a time. While perhaps a rose-tinted view, this was a more wholesome and less angsty time than the modern algorithm-driven Internet, and it turns out these systems are making a bit of a comeback as a result.

The video by [The Retro Shack] sets up a lot of this history for context, then, towards the end, uses a modern FPGA-based recreation called the Commodore 64 Ultimate to access a BBS called The Old Net, a modern recreation of what these 80s-era BBS systems were like. This involves using a modern networking card that allows the C64 to connect to Wi-Fi access points to get online instead of an old phone modem, and then using a terminal program called CCGMS to connect to the BBS itself. Once there, users can access mail, share files, and even play a few games.

While the video is a very basic illustration of how these BBS systems worked and how to access one, it is notable in that it’s part of a trend of rejecting more modern technology and systems in favor of older ones, where the users had more control. A retro machine like a C64 or Atari is not required either; modern operating systems can access these with the right terminal program, too. A more in-depth guide to the BBS can be found here for those looking to explore, and we’ve also seen other modern BBS systems recently.

Thanks to [Charlie] for the tip!

Continue reading “Commodore 64 Helps Revive The BBS Days”

Building A Commodore 64 Laptop

What might a laptop version of the Commodore 64 have looked like if one had been released by the late 1980s? This is the question that [Kevin Noki] tried to recently answer with a custom C64 laptop build.

While technically you could argue that Commodore’s SX-64 could be construed as a ‘portable’ system, its bulky format ensured that it was only portable in the sense that a 1980s CRT-based oscilloscope is also portable. Sadly, this turned out to be the last real attempt by Commodore to make a portable non-PC compatible system, with the ill-fated Commodore LCD project never making it out of development. We can, however, glean from this some design hints of what Commodore’s designers had in mind.

Interestingly, [Kevin] decided to instead use the Macintosh Portable as inspiration, with adaptations to make it look more like a breadbin C64. One could have argued that the C64C’s design would have worked better. Regardless, an enclosure was 3D printed, with parts glued together and metal dowels added for support.

For the guts, a custom keyboard with a new PCB and FDM printed keycaps was used, with a Raspberry Pi Pico as keyboard controller. We would here cue the jokes about how the keyboard controller is more powerful than a C64, but the real brains of this laptop come in the form of a Raspberry Pi 5 SBC for running the Vice C64 emulator, which blows a C64 even further out of the water.

This choice also means there’s no direct compatibility with genuine C64 peripherals, but a workaround involving many adaptors and more MCUs was implemented. Sadly, cartridge compatibility was sacrificed due to these complications. The resulting innards can be glimpsed in the above screenshot to give some idea of what the end result looks like.

Of course, this isn’t the first time a Commodore 64 laptop has been created; [Ben Heck] used a C64C mainboard and an original keyboard back in 2009. This meant direct compatibility with all peripherals, including cartridges. Hopefully, now that Commodore as a company has been revived, it will pick up on ideas like these, as an FPGA-based C64 or C128 laptop would be pretty rad.

Thanks to [fluffy] for the tip.

Continue reading “Building A Commodore 64 Laptop”