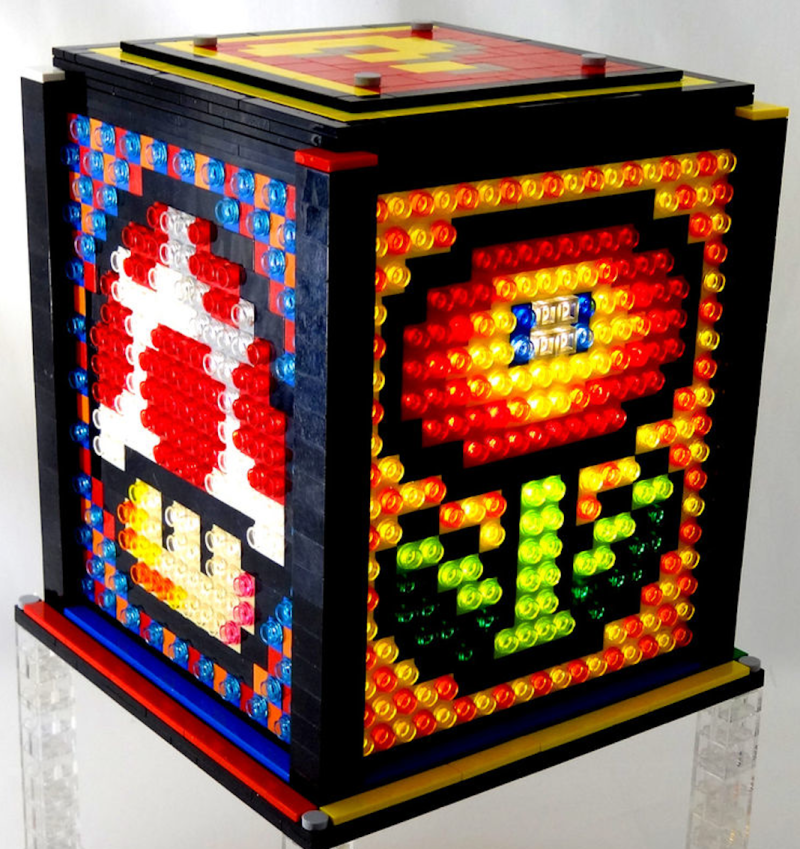
Looking for a throw back to your childhood, or maybe you just appreciate things that light up and look amazing? Well, [Baron] has a really impressive project for you. Not only does it look stunning and incorporate all of the things we love, it’s actually a pretty novel design. These lamps are built completely out of LEGO Technic pieces, the brand of LEGO that have holes drilled through them so you can build more advanced creations.
[Baron] used these parts with the drilled holes to create a dot matrix in which he placed colored transparent LEGO dots in the holes. The method of creating patterns is very similar to the way it’s done on the “Lite-Brite”. We especially love the theme of these lamps and they would match well with your LEGO mystery box. What’s really great about this tutorial is that it lays down the foundation for LEGO-built lamps that could be more interactive, involve more control (like RGB LEDs), or even introduce some LEGO mechanics!


> completely out of LEGO Technic pieces
Nope.
Oooh! Pretty! That’s really lovely.
Technically Technic pieces do not have holes _drilled_ through them; the holes are molded in.
@Kevin, guess you don’t know your LEGO, none of the pieces he uses are Technic, although by looking at his design he could definitely drop his block count by doing so,
False. The dot matrix grid is comprised of 1×2 and 1×1 LEGO Technic bricks. When Kevin says “are completely built out of LEGO Technic pieces”, I believe he’s specifically referring to the grid itself, and in my tutorial I have an illustrated example of the base walls being made entirely of Technic bricks. Regardless, the colored dots definitely aren’t floating in mid air nor suspended by magic.
Alrighty Mr. LiteBrite, but why just use only 1×1 and 1×2 bricks when 1×4, 1×8 (and longer) Technic bricks would help drop the brick count, and strengthen the structure. Is it solely to have a background colour, other than black, behind each “pixel”? The number of plates comprising the base looks like it could be optimized as well.
1×1 and 1×2 bricks were chosen for greater detail for the design in its “lights off” mode, for this particular sprite pattern I chose (which required several different colors) for an 18×18 square. Presumably, yes, longer Technic bricks can be used, if the person building one doesn’t mind the walls having solid backgrounds. The structure otherwise holds up rather sturdy with its base, columns, and lid, and the basic square design is done deliberately to convey the idea that it’s a Super Mario Bros. ? Block. The shape can technically be of any design with any sort of unique structure; this basic block design serves as a general reference point, and in my tutorial I urge builders to improve on the design and make their own versions based on my simple cube model. The plates for the base are intentionally stacked in that fashion to provide support. I’ve made two other lamps in this same fashion, one of which was made a year and a half ago: there’s never been any issues with it collapsing or the structure bowing.
The 1×1 and 1×2 pieces here have 1 hole per stud, the longer pieces (and even some 1×2 ones) have the holes in between studs, resulting in one less hole that number of studs, this would means there would be a ‘dead pixel’ anywhere one pieces meets another horizontally. You would have to have pieces that have enough holes to span the entire image, which I think would limit you to about 15 across (based on what I can find on bricklink)
Thanks Baron! and great job with this by the way!
Great work and great educational approach to robotics