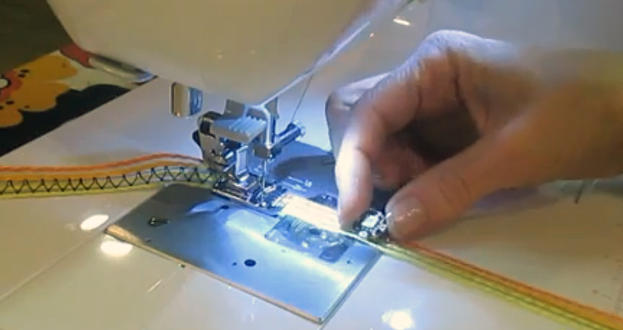
[Cynthia] has shared a great video of machine sewing parallel lines of conductive thread onto ribbon using a cording foot which usually comes standard with most machines. This technique could be particularly useful when using addressable LEDs like a NeoPixel to get the ground, data, and positive lined up fairly accurately. Sewing the conductive thread onto ribbon also makes it a hell of a lot easier to attach to many garments or textiles, and also makes it easier to replace or reuse.
The method is pretty easy, essentially using the grooves in the cording foot to guide the conductive treads and ensuring even spacing. Two of the lines are sewn down approximately 3 mm apart using a zigzag stitch. The third line is sewn separately making sure the stitching doesn’t break the first two lines. In the video, a striped ribbon is used which has slight troughs that additionally helps the threads stay in place and the sewer to stay on target.
[Cynthia] of Cynthia Designs Studio has been experimenting with embedding electronics in textiles and has quite a few great videos that you can check out on the Cynthia Designs Studio YouTube channel.
We have seen a machine embroidered LED matrix and a hand sewn LED quilt here on Hackaday, but those who have tried know that conductive thread can be very tricky to work with and keep conductivity. Do you have any tips or tricks for hand or machine sewing conductive thread? If so, please share in the comments below.


Here’s a challenge, get an old PC and sew up a working 8 bit ISA bus extender for something like a serial port card.
Oh, so the conductive thread is just being held in place by the regular thread, it’s not what the sewing machine is using.
Yes, the conductive thread is not going through the machine, so there is a lot less chance of it being damaged or snagging. You are basically cording it onto the base layer.
FYI: a term I heard used on a youtube video, it’s “power thread injection” not sewing. 8 )
Ha! that is funny. It’s just an embellishment technique.