There are sure a lot of varieties of Arduinos out there but there may even be more of a variety when it comes to Arduino Cases. Let’s take the most popular Arduino form factor, the Uno. Below are a handful of unique cases for the Uno-sized boards.
by [Megaduty], Arduino Protection Box 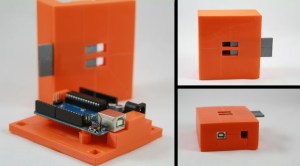
We’ll call this one robust. Although it is 3D printed, its intent is to be extremely protective of the inhabitant. Some extra thought went into this case, no tools are needed! After the Arduino snaps into place, so does the cover. There is an access door to get the input/output wires to the free world. [Megaduty] suggests that this contains $0.10 of plastic. Not a bad deal.
by [Jason], Lexan Beauty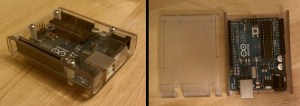
By looking at these photos you may think you’d need a laser cutter to make this stylish case. Not so! [Jason] sketched out the design on lexan, cut it out with a jig saw and then heated the material to bend it around a wooden form. It’s worth noting that the top of this case has openings so that a shield can fit onto the Arduino while it is still in the case.
by [Gurt], Bezel for LCD Screen Shield 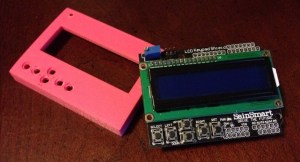
If your Arduino project is using a SainSmart LCD keypad shield for the user interface then this case will surely put a smile on your face. The holes line up with the buttons on the SainSmart shield. In addition to the case, the buttons are also available for download and printing. Screw holes are provided to allow secure attachment between the shield and case. All you need is a 3D printer to get going with this project. It comes in any color as long as it’s pink!
by [jwags55], LCD Electrical Box Topper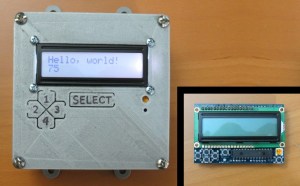
This one is similar to above, it is 3D printed and designed for an LCD/Button Shield, but this time for another shield configuration. As you can see it has integrated flexible tabs that allow access to the shield buttons. What you can’t see from this photo is that it is mounted to a standard 4×4″ electrical box available from any hardware store. A standard electrical box is deep enough for the shield and an Arduino. Extra-deep boxes are available in case you need more room.
by [Daniel], CNC Routed Wood 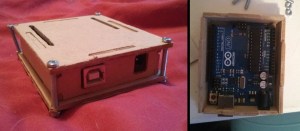
What came first, the Arduino Case or the CNC Router? A pretty cool DIY CNC Router was responsible for making this case. An Arduino running GRBL controls the CNC Machine, which moves a spindle that, in turn, cuts pieces out of wood, and those pieces of wood are assembled to form a case that holds the Arduino that runs GRBL…… your mind was just blown.
by [Jason], Folding Arduino Lab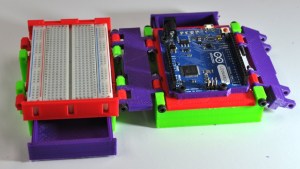
Are the above cases not good enough for ya? Maybe they don’t have enough features, or are only good for finished projects. If you are interested in taking your perpetual Arduino project on the road then pay attention. This case not only holds an Arduino and breadboard, it has two drawers for your components. If the breadboard and one of the drawers are removed, the closed case will even fit an installed shield. Download the STL files here.
by [ninjaprawn], Lego Case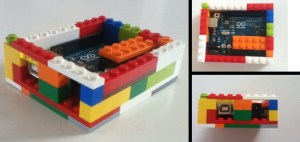
This list wouldn’t be complete without at least one (or two) extremely inexpensive case options. Here we have a Lego-based enclosure. What it lacks in style is made up by its zero-cost and minimal effort required. It does what it was made to do.
by [Allan], Cardboard Insulator 
I’m not sure we can call this a ‘case’ per se, it’s just a piece of cardboard tied on to an Arduino through the mount holes. [Allan] had to do this to prevent the contacts on the underside of the board from shorting by way of typical workbench clutter.
If there’s a sweet case out there that we’ve missed, let the other readers know in the comments. Or, maybe you’ve made your own specialized case, document it somewhere on the ‘web and let us know.



Usually I just put a drop of hot glue on all four corners and glue a flash card to the back then trim it with scissors. If I need to remove the hot glue, put of drop of rubbing alcohol on it and the glue falls off.
Thank you, great idea.
No need for rubbing alcohol, all you need to do is wish really hard that the glue would stay on and it just falls off within minutes :P
I use 2-56 bolts nut and 1 inch standoffs with plywood. the bolt,nuts, and standoffs are all nylon.
Plexiglass and standoffs here.
A hard-drive shock-protection bag with cut-outs works for me, it’s crap but is duct tape-able to anything :D
Usually I’ll tear off one short side of an altoids tin and mount with double-faced tape. It’s not actually a particularly good mount (particularly in variations where something then needs to be mounted on the top of the box — like, for instance, basically any circuitry), but it’s cheap.
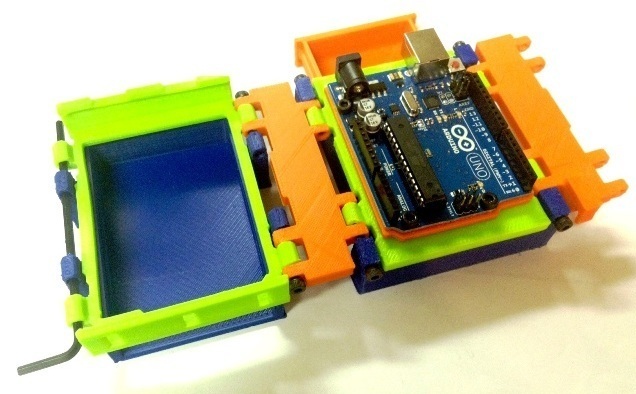
Needed a stackable solution so I made some modular parts on Shapeways:
http://bit.ly/1mKmoHr
http://bit.ly/1sv8koT
http://bit.ly/1l8NoRi
Nice design, are the 3d files available?
You are linking to the spanish instructables site for the first link, FYI
I use PVC fence posts from Home Depot to make custom project enclosures. Here’s an admittedly crappy video on how I do it-
http://vimeo.com/85505715
That is beautiful!
that is awesome. ty chuck
Excellent! I love it and I have some of that material already. Thanks for sharing!
I have mine screwed to a plank of plywood that has a bit of finish on it
Dollarama in Canada sells 2part soap bar travellers, two units for $1!
Comes in Black and even Arduino Turquoise, amazing.
Also fits a raspberry pi..
old ipod as case, standoffs are a little bit large, otherwise it would fit perfectly after cutting out the jacks.
http://abload.de/img/ipod_2014y3jrm.jpg
+10 bonus points if you get the display and wheel working with the dev board.
LEGO, neither cheap nor free, unless someone else bought it and you nicked a few pieces…
Here is my own contribution to the Arduino world box :
http://www.thingiverse.com/thing:31924
the 3D files can be downloaded on the thingiverse site or on https://www.tinkercad.com/dashboard/?page=0
Here is a way to make almost anything a holding box for Arduino :-)
http://blog.digilentinc.com/index.php/zuno-clip-for-chipkit/
If you want simple to 3D print, customisable box check out http://catchit.pl/blog/modular-3d-printed-case-diy-project/
There is a thingiverse link at the end of the post.