Well, this is timely. We saw a lot of things at Midwest RepRap Festival this year on both the printer and the material fronts. We told you about the delicious offerings made possible through remote extruder setups, strong and heavy filaments infused with copper and other metals, and a printer built out of K’NEX. No one was printing with canned cheese, though, and maybe for good reason.
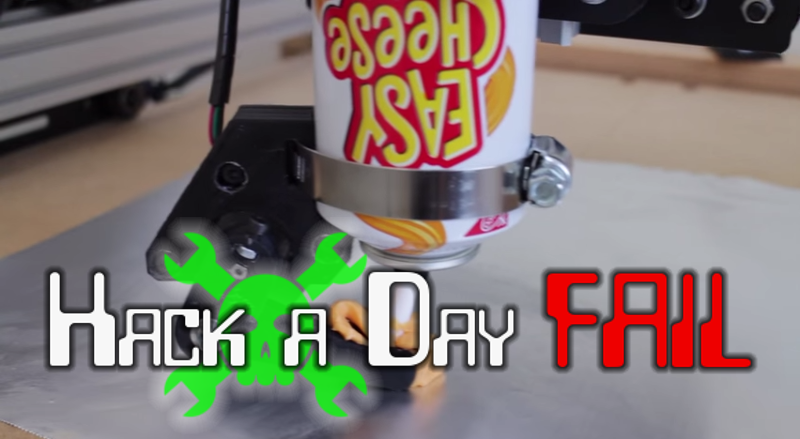
[Andrew] here has created a 3D-printed arm that holds a can of aerosol cheese-like substance in place. A motor causes the holder to move the spout to the side, dispensing the goo. At first he squirts it in a coiled pile on to a cracker. That goes pretty well until it’s time to move away from the cracker. [Andrew]’s later attempt to build up four cheesy walls had us cheering. You can see what we mean after the break.
There are a couple of issues at play. Sometimes the add-on just plain falls off the end of the spout. Other times, air in the can interrupts the flow, just as it does during manual operation. And every once in a while, it just seems that the spout was too close to the substrate.
What do you think about the viability of cheese printing? Would it work better if the extrusion took place remotely, and the cheese was pushed through a thinner tip? Would a cooled print bed help? Let us know.
http://www.youtube.com/watch?v=uCy0NEbJf4s
[Thanks for the tip, Tapio]
Editor’s Note: If you want to see the series continue on a weekly basis we need help finding more documented fails! Please look back through your projects and document the ones that didn’t go quite right. We also encourage you to send in links to other fails you’ve found. Just drop the links in our tips line. Thanks!
 Fail of the Week is a Hackaday column which runs every so often. Help keep the fun rolling by writing about your past failures and sending us a link to the story — or sending in links to fail write ups you find in your Internet travels.


This has to be developed further. I see great possibilities for printing cheese.. It’s cheese for F(#*&$#K sake! It does not get better than that..
Not being a chauvinistic dutch cheese-head, but perhaps a cheese with the room temperature consistency of Gouda would make structures more stable. You’d need to build a new extruder type for that, but I think you’d need that anyway because :
This nozzle is to thick and crude. It adds simplicity due to it not needing a heating element, but the angle and activation method make for inconsistent flow. A thinner nozzle with cheese that needs to be a bit warm to be extruded will give more consistent thicknesses.
But cheese printing must be…
This is a great place to use a CNCheese router!
That joke was too cheesy to be funny
I just cheesed.
I expect it would soon start to spoil after being through a heater, so I don’t see much use in putting effort in designing a cheese printer really. The only use would be for restaurants for direct serving, but surely a human chef can already do the handiwork.
I’ve seen a map of Wisconsin printed in processed cheese, so it’s entirely possible. I blame the inaccurate “extrusion head” he’s using. Try a wide-bore syringe with a low-power heating coil around the barrel and a stepper driving the plunger instead — it’s the standard type of setup for paste extrusion.
If the canned cheese wiz is defective, He may need to use a secondary extruder stage.
The idea of cheese in a can is already a fail to me.
Exactly
“dairy product” not cheese
As Dave Barry would say, it is “cheeez”, a petroleum by-product approved for use on humans.
I, for one, will never eat anything deliberately misspelled, or having more vowels than absolutely needed.
How can you profane this lovely substance?? Read the ingredients – it’s made with all the parts of real cheese, just mixed in different proportions to give the heavenly goo its remarkable consistency and flavor
Which parts?
If it makes any difference, reef fish absolutely love the stuff – ask any diver.
Reef fish only love it because it tastes better than algae.
It’s an abomination…
Just looking at it, makes me sick, even I like my national dish: Fondue, melted cheese pot
Short story, “Marklord Pete”. Author Wil McCarthy. Jim Baen’s Universe Feb. 2007.
Relevance? In this story Pete owns and operates the “Cheese Information Center”. Anything and everything you want to know about cheese, for a price.
It looks like the activation linkage could do with some refinement.
Perhaps a 2nd passive pivot point on the servo and an additional link to turn it into a 4 bar linkage?
The bottom link which would attach to the nozzle would still transition down as it rotates but in a much more repeatable way.
Im not convinced you can improve on this. (even if it worked)
It looks like the reason the activation linkage slips off the nozzle is that it has too much tangential force.
A 4 bar linkage would keep the activator bar from slipping as much. An improved nozzle would also help and allow vertical activation instead of this current diagonal activation method.
I cried so hard watching that. OMG. its fantastic. Fail so hard you can feel the despair and hopelessness coming from the machine.
“Easy cheese” – I think not…
Expected it to start flashing on the screen “Also works as a cheese spreader!” towards the end
I think someone needs do this right and pay fromage to this guy.
such a cheesy comment…
You gouda be kidding me!
The best part was when the gas bubble bleu out.
I wonder if vibrating the can would help keep it from pushing just air. Maybe get an old muffin fan, break off the blades on one side and attach that to it.
I built a machine just like this for Maker Faire Detroit in 2011. The best post I can find for it is from EMSL https://www.flickr.com/photos/lenore-m/6004275169/ (I should have documented better). It still lives in my basement but needs some repairs. The key that he missed is that you need to secure the nozzle and then move the can. That way you can keep your nozzle aligned with the base to keep your extrusion straight. I kind of figured out can angle to flow rate at room temperature. Mine became really reliable until it just got too hot at the event and the consistency of the cheese changed and then we ran into lots of problems as this video will show https://www.youtube.com/watch?v=xaNV-cJJUu4.
Less funny, but more successful:
https://www.youtube.com/watch?v=l2uyWS8A8ng
Totally agree that the cheese in the can is already a fail.
I particularly like the farting noise the can makes on that last print stroke. Very apropos.
In addition to a gadget to keep the nozzle attached to the activation arm, it also needs something to pinch off the flow, i.e. a device to cut the cheese, so to speak.
Lock the tip in place, tilt the can
I like the way you think.
It’s only a matter of time until someone ties an incontinent dog to one of these machines.
++?????++ Out of Cheese Error. Redo From Start.
+++Whoops! Here comes the cheese! +++
+10K for the Discworld reference
I saw two clear issues with the nozzle pushrod mechanism:
1) It was possible for the pushrod to fall off the nozzle, and collide with workpiece.
2) The nozzle pushrod extended below the nozzle, which allowed it to obstruct the cheese flow.
Suggestions:
A) Rotate the stepper/servo 90 degrees, so that its axis is vertical, and stiffen the mechanism to reduce the vertical flex/motion of the pushrod.
B) Make the end of the pushrod into a ring that normally rides at least 3/8 of an inch above the nozzle opening.
C) Displace the nozzle less, and slow the movement rate.
Why are comments/votes enabled on the video. I would upvote this like five times.