Fail Of The Week: The Deadliest Multimeter

Need a good multimeter? The Fluke 17B is an excellent basic meter that will last your entire career. It’s also $100 USD. Need something cheaper? Allow me to introduce the AIMOmeter MS8217. On the outside, it’s a direct copy of the Fluke 17b, right down to the screen printing but understandably lacking the yellow enclosure. $30 USD will get you an exact copy of a Fluke 17B, it would seem. Right? Not a chance. [electronupdate] did a teardown of the AIMOmeter, and while this meter looks like a Fluke on the outside, it’s probably going to kill somebody.

The teardown begins with a look at the ratings on the back of this off-brand meter. It does have two fuses, but the engraving on the back strangely claims ‘Wrrebt insurance limit’. If anyone has any idea what a ‘wrrebt’ is, please leave a note in the comments. The only references to this word in Google are mis-OCRed blackletter type in a book from the early 1800s.

Opening up the meter reveals – surprisingly – two real fuses in the meter. There were no markings on the bigger fuse, which could be a problem for verifying if the fuse is of the proper value. That’s not really a problem, though: the fuse isn’t even between ground and the amp probe socket. Yes, this fuse is completely useless, and testing the resistance with the fuse out of the circuit confirms this.

After putting the meter back together, [electron] tests the accuracy of the meter. With a 1 mA current source, the mA setting seems to work, but when testing the larger Amp range of this meter, the results display in milliVolts. Don’t worry, there’s an easy fix for that: just press the dial down just right and the correct setting will be displayed. Wow.

You get what you pay for, and if you only ever use an AIMOmeter for measuring Arduinos and batteries, you might – might – be alright. This is not the kind of meter you want to measure line voltage, motors, or anything else with, though.

Hackaday Fail: A $3000 Prototype That Doesn’t Work

[Dan Royer] is hard at work building his own personal robot army. Robots mean motors, and motors mean gearboxes. In [Dan]’s case, gearboxes mean $3000 wasted on a prototype that doesn’t work. Why doesn’t it work? He doesn’t know, and we don’t either.

[Dan] would like to use small but fast DC motors for his robots coupled to a gearbox to step down the speed and increase the torque. The most common way of doing this is with a planetary gear set, but there’s a problem with the design of planetary gears – there is inherent backlash and play between the gears. This makes programming challenging, and the robot imprecise.

A much better way to gear down a small DC motor is a hypocycloid gear. If you’ve ever seen the inside of a Wankel engine, this sort of gearing will look very familiar: a single gear is placed slightly off-axis inside a ring gear. On paper, it works. In reality, not so much.

[Dan] spent $3000 on a prototype hypocycloid gearbox that doesn’t turn without binding or jamming. The gear was made with incredible tolerances and top quality machining, but [Dan] has a very expensive paper weight sitting on his desk right now.

If anyone out there has ever designed or machined a hypocycloid gearbox that works, your input is needed. The brightest minds [Dan] met at the Bring A Hack event at Maker Faire last weekend could only come up with. ‘add more lasers’, but we know there’s a genius machinist out there that knows exactly how to make this work.


2013-09-05-Hackaday-Fail-tips-tileHackaday Fail is a column which runs every now and again. Help keep the fun rolling by writing about your past failures and sending us a link to the story — or sending in links to fail write ups you find in your Internet travels.

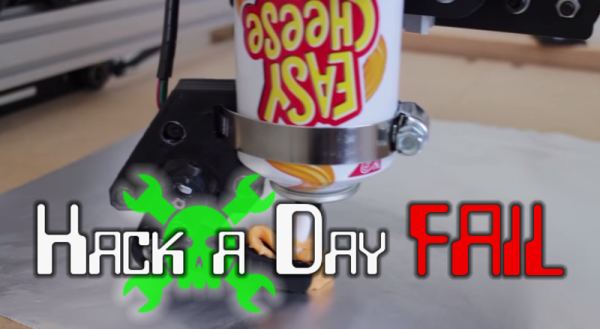
Fail Of The Week: Easy Cheese? Printer Says No

Well, this is timely. We saw a lot of things at Midwest RepRap Festival this year on both the printer and the material fronts. We told you about the delicious offerings made possible through remote extruder setups, strong and heavy filaments infused with copper and other metals, and a printer built out of K’NEX. No one was printing with canned cheese, though, and maybe for good reason.

[Andrew] here has created a 3D-printed arm that holds a can of aerosol cheese-like substance in place. A motor causes the holder to move the spout to the side, dispensing the goo. At first he squirts it in a coiled pile on to a cracker. That goes pretty well until it’s time to move away from the cracker. [Andrew]’s later attempt to build up four cheesy walls had us cheering. You can see what we mean after the break.

There are a couple of issues at play. Sometimes the add-on just plain falls off the end of the spout. Other times, air in the can interrupts the flow, just as it does during manual operation. And every once in a while, it just seems that the spout was too close to the substrate.

What do you think about the viability of cheese printing? Would it work better if the extrusion took place remotely, and the cheese was pushed through a thinner tip? Would a cooled print bed help? Let us know.

Continue reading “Fail Of The Week: Easy Cheese? Printer Says No”

Fail Of The Week: Teddy Top And Fourteen Fails

Last summer, [Quinn] made the trip out to KansasFest, the annual Apple II convention in Kansas City, MO. There, she picked up the most modern Apple II system that wasn’t an architecturally weird IIGS: she lugged home an Apple IIc+, a weird little machine that looks like an old-school laptop without a screen.

Not content with letting an old computer just sit on a shelf looking pretty, [Quinn] is working on a project called the Teddy Top. ‘Teddy’ was one of the code names for the Apple IIc, and although add-ons to turn this book-sized computer into something like a laptop existed in the 80s, these solutions have not withstood the test of time. [Quinn] is building her own clamshell addition to her IIc+, and somehow failing at something she’s done hundreds of times before.

While the IIc+ has an NTSC composite output, the super-special video add-ons for the IIc+ used a DB15 expansion connector. Here, any add-on could access video sync signals, the a sound signal from the audio circuit, and even a +12V line that could drive loads up to 300 mA. It just so happened the display [Quinn] is using for this project runs at 12V, 200 mA. Everything was great, but as a worthy trustee of this computer’s Earthly existence, [Quinn] thought a bit of current limiting should be included in her addon. She designed a circuit around an NPN power transistor, that would allow the display to draw power until the load was around 250mA. After that, the transistor would start dumping excess power as heat. Yes, a fuse would be better. [Quinn] calls this Fail #1. There are thirteen more to go.

Continue reading “Fail Of The Week: Teddy Top And Fourteen Fails”

Sparkfun Ships 2000 MicroViews Without Bootloaders

microview-fail

Everyone has a bad day right? Monday was a particularly bad day for the folks at Sparkfun. Customer support tickets started piling up, leading to the discovery that they had shipped out as many as 1,934 MicroViews without bootloaders.

MicroView is the tiny OLED enabled, Arduino based, microcontroller system which had a wildly successful Kickstarter campaign earlier this year. [Marcus Schappi], the project creator, partnered up with SparkFun to get the MicroViews manufactured and shipped out to backers. This wasn’t a decision made on a whim, Sparkfun had proven themselves by fulfilling over 11,000 Makey Makey boards to backers of that campaign.

Rather than downplay the issue, Sparkfun CEO [Nathan Seidle] has taken to the company blog to explain what happened, how it happened, and what they’re going to do to make it right for their customers. This positions them as the subject of our Fail of the Week column where we commiserate instead of criticize.

First things first, anyone who receives an affected MicroView is getting a second working unit shipped out by the beginning of November. Furthermore, the bootloaderless units can be brought to life relatively easily. [Nate] provided a hex file with the correct bootloader. Anyone with an Atmel AVR In-System Programming (ISP) programmer and a steady hand can bring their MicroView to life. Several users have already done just that. The bootloader only has to be flashed via ISP once. After that, the MicroView will communicate via USB to a host PC. Sparkfun will publish a full tutorial in a few weeks.

Click past the break to read the rest of the story.

Continue reading “Sparkfun Ships 2000 MicroViews Without Bootloaders”